> ## Documentation Index
> Fetch the complete documentation index at: https://docs.prophecy.ai/llms.txt
> Use this file to discover all available pages before exploring further.
# Informatica migration overview
> A tutorial on using Informatica Transpiler
Transpiler in Prophecy allows large enterprises to easily upgrade their data integration stack from Informatica to modern cloud solutions that can run on data platforms like Databricks. Transpiler converts your existing workflows into low-code visuals and highly optimized open-source Spark code with an accuracy close to **80%**. This automation significantly reduces manual effort and costs associated with the migration process for large enterprises.
We'll show you step-by-step how to use Transpiler for converting a simple workflow that was designed in Informatica. By the end of this training, you'll have a basic understanding of Transpiler and its capabilities. Let's dig in!
## Prerequisites
To complete this training, you will need:
* Informatica workflows
* A [Databricks Fabric (Prophecy Managed)](/data-engineering/fabrics/spark-provider/prophecy-managed)
* A GitHub Account
## 1. Export Informatica Files
To use Transpiler for migrating a workflow from Informatica, first you will need to have a pre-existing workflow created in Informatica. Then you will have to export this workflow from Informatica. After exporting, look for the below-mentioned files, as Transpiler will use them:
* \*\* XML files \*\* : XML files contain information about the workflow like components used in the workflow and connection between them. It also holds any parameters, macros, or other metadata associated with the workflow. Example:
 As you have access to all the Informatica files now, let's try to use the same in Transpiler.
## 2. Import Bundle
To import a bundle into the Transpiler:
1. Open the Transpiler interface from the left sidebar of Prophecy.
2. Click **Import Bundle** to import a new bundle.
### 2.1 Select Source Type
As you have access to all the Informatica files now, let's try to use the same in Transpiler.
## 2. Import Bundle
To import a bundle into the Transpiler:
1. Open the Transpiler interface from the left sidebar of Prophecy.
2. Click **Import Bundle** to import a new bundle.
### 2.1 Select Source Type
 Source Type refers to the Legacy ETL product from which we want to import the files into Prophecy. As you are using Informatica, select the same and click on the Next button.
### 2.2 Enter Bundle Details
Bundle in Transpiler is like a project where all the details like Informatica files, pipelines etc. will be stored for future reference. Creating a bundle is pretty straightforward. First, give a (1) name to your bundle. Select the (2) language in which you want the Transpiler to generate the open-source code for you. Then, select the (3) team to whom you want to have access to the bundle. More teams can be added later. Choose the (4) project where the Prophecy workflow will be uploaded and (5) Git branch where all the open-source code will be stored. Finally, you have to select the (6) Fabric where the workflow will run. We will be selecting Databricks fabric for now.
### 2.3 Upload Artifacts
Source Type refers to the Legacy ETL product from which we want to import the files into Prophecy. As you are using Informatica, select the same and click on the Next button.
### 2.2 Enter Bundle Details
Bundle in Transpiler is like a project where all the details like Informatica files, pipelines etc. will be stored for future reference. Creating a bundle is pretty straightforward. First, give a (1) name to your bundle. Select the (2) language in which you want the Transpiler to generate the open-source code for you. Then, select the (3) team to whom you want to have access to the bundle. More teams can be added later. Choose the (4) project where the Prophecy workflow will be uploaded and (5) Git branch where all the open-source code will be stored. Finally, you have to select the (6) Fabric where the workflow will run. We will be selecting Databricks fabric for now.
### 2.3 Upload Artifacts
 Upload the Informatica files that you want to transpile and click on the Next button.
 Now, you have to hover and add the (1) xml file that you want to transpile. The Informatica workflow will be converted to a [pipeline](/data-engineering/development/pipelines/pipelines) in Prophecy.
 Provide a (1) readable name to the pipeline.
## 3. Validate and Transpile
Provide a (1) readable name to the pipeline.
## 3. Validate and Transpile
 It is always advisable to (1) validate the uploaded files before running transpilation so that you know beforehand if any important files are missing. For higher Transpiler coverage, please make sure to upload the correct xml files before starting the transpilation process.
 Please feel free to ignore the warning message during validation if you are sure that all the Informatica files for the workflow have been properly uploaded. Close the validation summary dialog and click on the Transpile button after you are sure from your side.
 Here, you can track the progress of the transpilation process. The total time taken to transpile depends on the complexity of the workflow that you have uploaded. If the workflow is simple, transpilation will take a few seconds but complex workflows can take several minutes. After the transpilation is complete, click on the Import button.
 The purpose of the above screen is to help you resolve conflicts if any components already exist in the project. Deselect the entities that are not required. As you are using a new project, click on the Import button and import the bundle.
## 4. Bundle Overview
The purpose of the above screen is to help you resolve conflicts if any components already exist in the project. Deselect the entities that are not required. As you are using a new project, click on the Import button and import the bundle.
## 4. Bundle Overview
 After the bundle is imported, you will be redirected to the overview section. Here, you will see the overall summary of the transpilation process. (1) shows the pipelines that were created in Prophecy. (2) shows the pipeline components - the individual transformation steps that we call "Components" - with a status column. In case the Transpiler was not able to read any Informatica component, the same would be displayed here with Failed status. (3) shows the overall transpiler coverage %.
 Now click on the (1) icon to check the pipeline that has been transpiled by the Transpiler. Based on historical results, Prophecy Transpiler can convert the Informatica workflows correctly up to **80%**.
 With the magic of Transpiler, the Informatica workflow has been converted into a simple visual workflow - a Pipeline. All Informatica components and functions will be mapped to equivalent Prophecy entities.
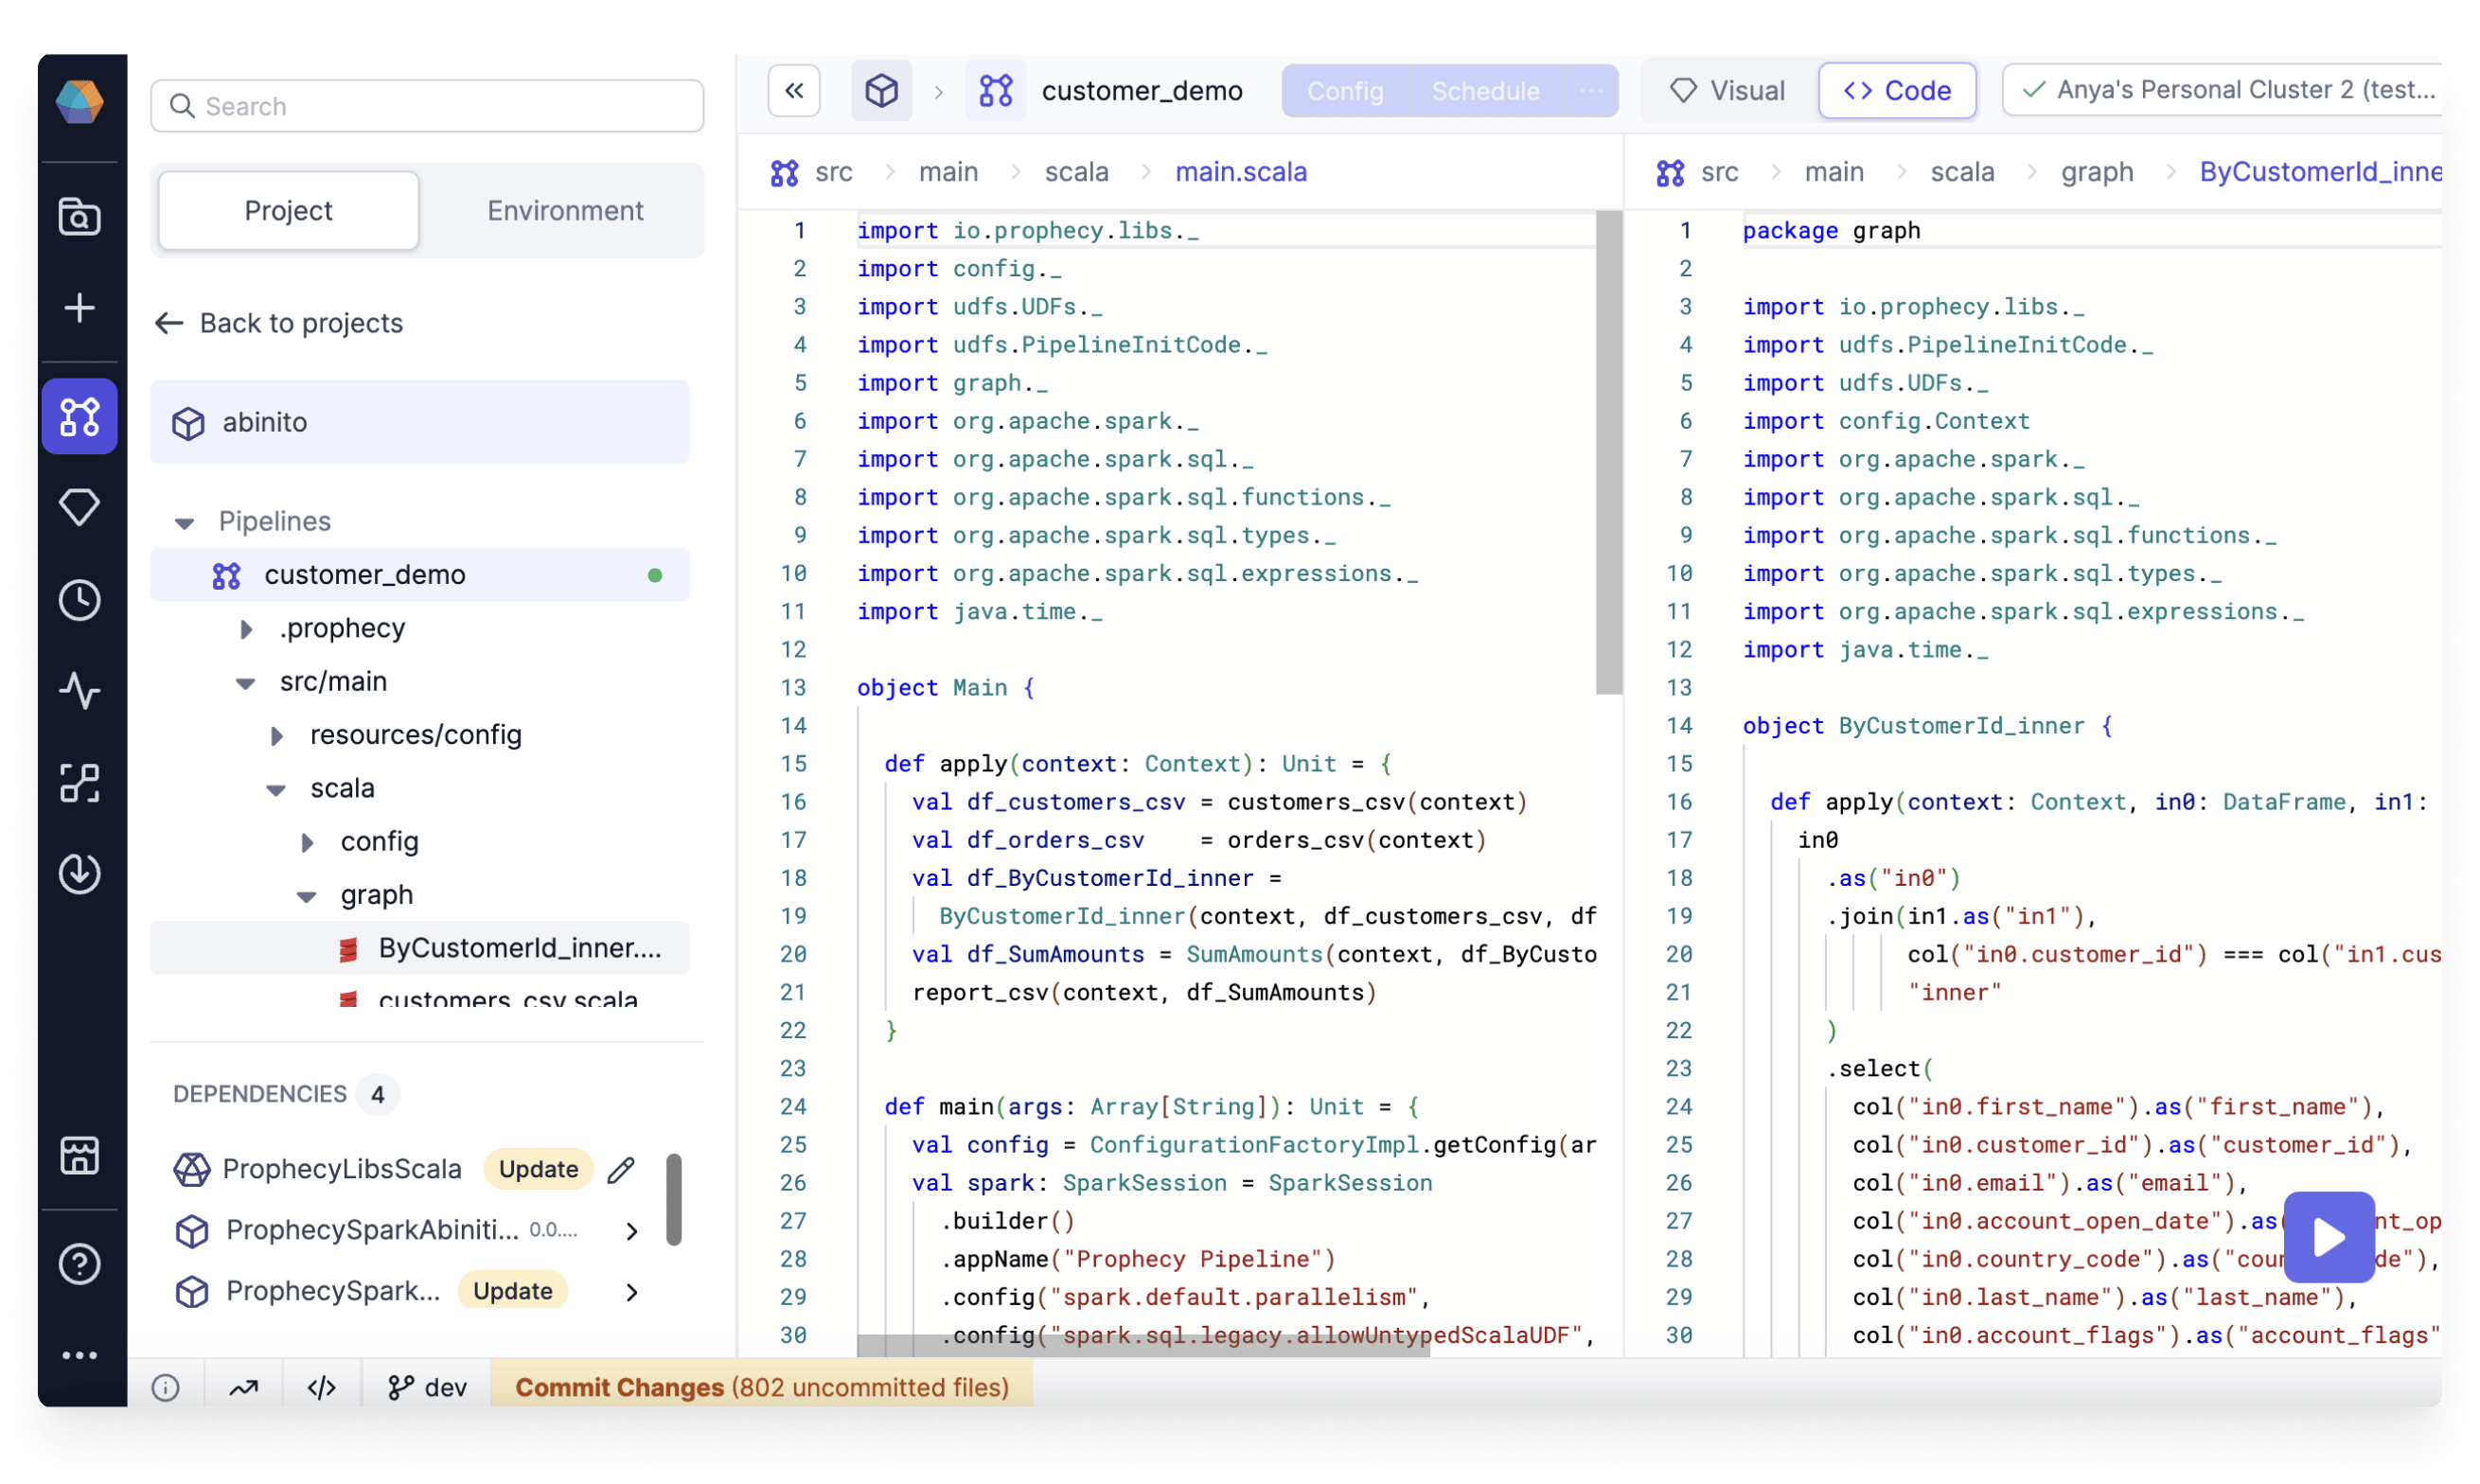 Prophecy has also generated optimal high-performance open source Spark code for you.
## 5. Run Pipeline
Prophecy has also generated optimal high-performance open source Spark code for you.
## 5. Run Pipeline
 To run the pipeline, let's first connect to a (1) fabric where the pipeline will be executed using the open-source Spark code.
After the fabric is connected, let's change the file path of all the data components as Prophecy modernizes your legacy solutions to cloud alternatives. For this example, I will be reading files from Databricks, but you can connect any source of your choice.
To run the pipeline, let's first connect to a (1) fabric where the pipeline will be executed using the open-source Spark code.
After the fabric is connected, let's change the file path of all the data components as Prophecy modernizes your legacy solutions to cloud alternatives. For this example, I will be reading files from Databricks, but you can connect any source of your choice.
 1. Click on the source component.
2. Choose the file type from where you will read the data. This example reads from a CSV file stored in Databricks.
3. Provide the file location that points to the correct file in Databricks.
4. Click **Properties → Infer Schema** and verify whether the schema of the data is correct.
5. Click on the **Preview → Load** to preview the data that is being read by the component. This helps you to crosscheck whether you are referring to the correct data table or not.
6. If everything looks good, then go ahead and click on the Save button.
Similarly, repeat the above steps for changing the file paths for all the source and target components in your pipeline.
A **Target** in Prophecy represents the data being written to a target storage location.
1. Click on the source component.
2. Choose the file type from where you will read the data. This example reads from a CSV file stored in Databricks.
3. Provide the file location that points to the correct file in Databricks.
4. Click **Properties → Infer Schema** and verify whether the schema of the data is correct.
5. Click on the **Preview → Load** to preview the data that is being read by the component. This helps you to crosscheck whether you are referring to the correct data table or not.
6. If everything looks good, then go ahead and click on the Save button.
Similarly, repeat the above steps for changing the file paths for all the source and target components in your pipeline.
A **Target** in Prophecy represents the data being written to a target storage location.
 Now run the pipeline by clicking on the **Run** button.
 After the pipeline runs successfully, you will be able to see the data at each stage by clicking the **interim** icon.
## What's next?
Great work! 🎉
You've successfully migrated your first legacy workflow to the cloud using Prophecy Transpiler in a few minutes without any manual help. Take a moment to appreciate your accomplishment 🥳.
To continue learning and expanding your skills with Prophecy, explore other tutorials within our documentation, or apply your newfound knowledge to address real-world business challenges!
After the pipeline runs successfully, you will be able to see the data at each stage by clicking the **interim** icon.
## What's next?
Great work! 🎉
You've successfully migrated your first legacy workflow to the cloud using Prophecy Transpiler in a few minutes without any manual help. Take a moment to appreciate your accomplishment 🥳.
To continue learning and expanding your skills with Prophecy, explore other tutorials within our documentation, or apply your newfound knowledge to address real-world business challenges!