

Categories
You can select gems from the following categories. Each category opens a dropdown menu when you click it.Bookmark favorite gems
You can bookmark frequently used gems so they’re easiliy available from the gem drawer. To bookmark a gem, click the star icon next to the gem in the category’s dropdown menu. Starred gems appear in the Favorites section of the toolbar, where they’re displayed as icon-only shortcuts. From Favorites, you can:- Click a gem to add it directly to the canvas.
- Drag a gem onto the canvas.
- Click the star again to remove it from your favorites.
Interactive gem examples
To test a gem hands-on, you can try the interactive example of the gem. If you search for a gem in the project sidebar, you can open the associated example and run the preconfigured pipeline!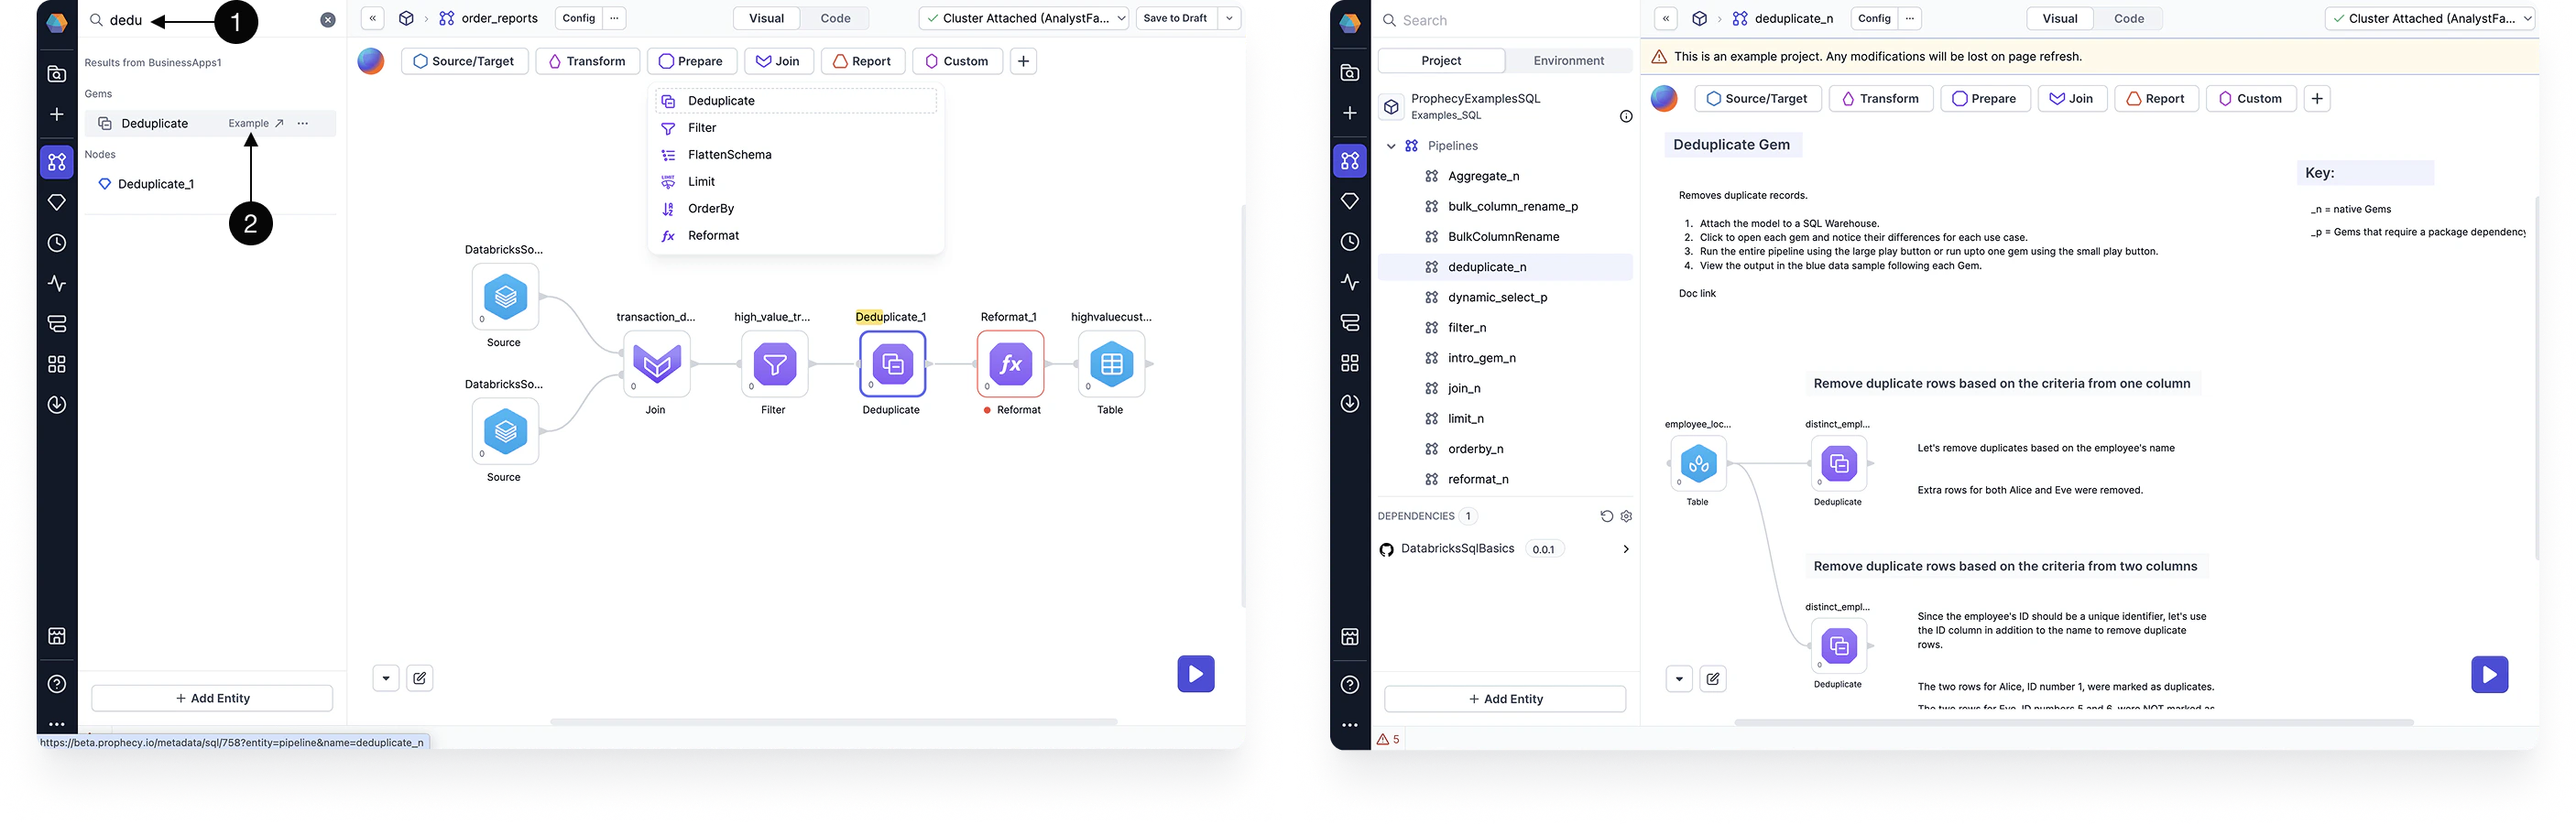
Expressions
Many gems include expression components where you can implement custom or complex logic. You can either build expressions visually, or use SQL syntax to write expression in code. Prophecy will automatically convert visual expressions to code expressions, and vice versa.The SQL dialect for expressions depends on the SQL warehouse connection of your fabric. Project
code must match the requirements of the execution environment. As a result, expressions can differ
slightly between projects that run on Databricks, Snowflake, or Google BigQuery.
Gem instance
When you click on a gem from the gem drawer, Prophecy adds the gem to your pipeline. The callouts in the image below correspond to the numbered UI elements described in the table.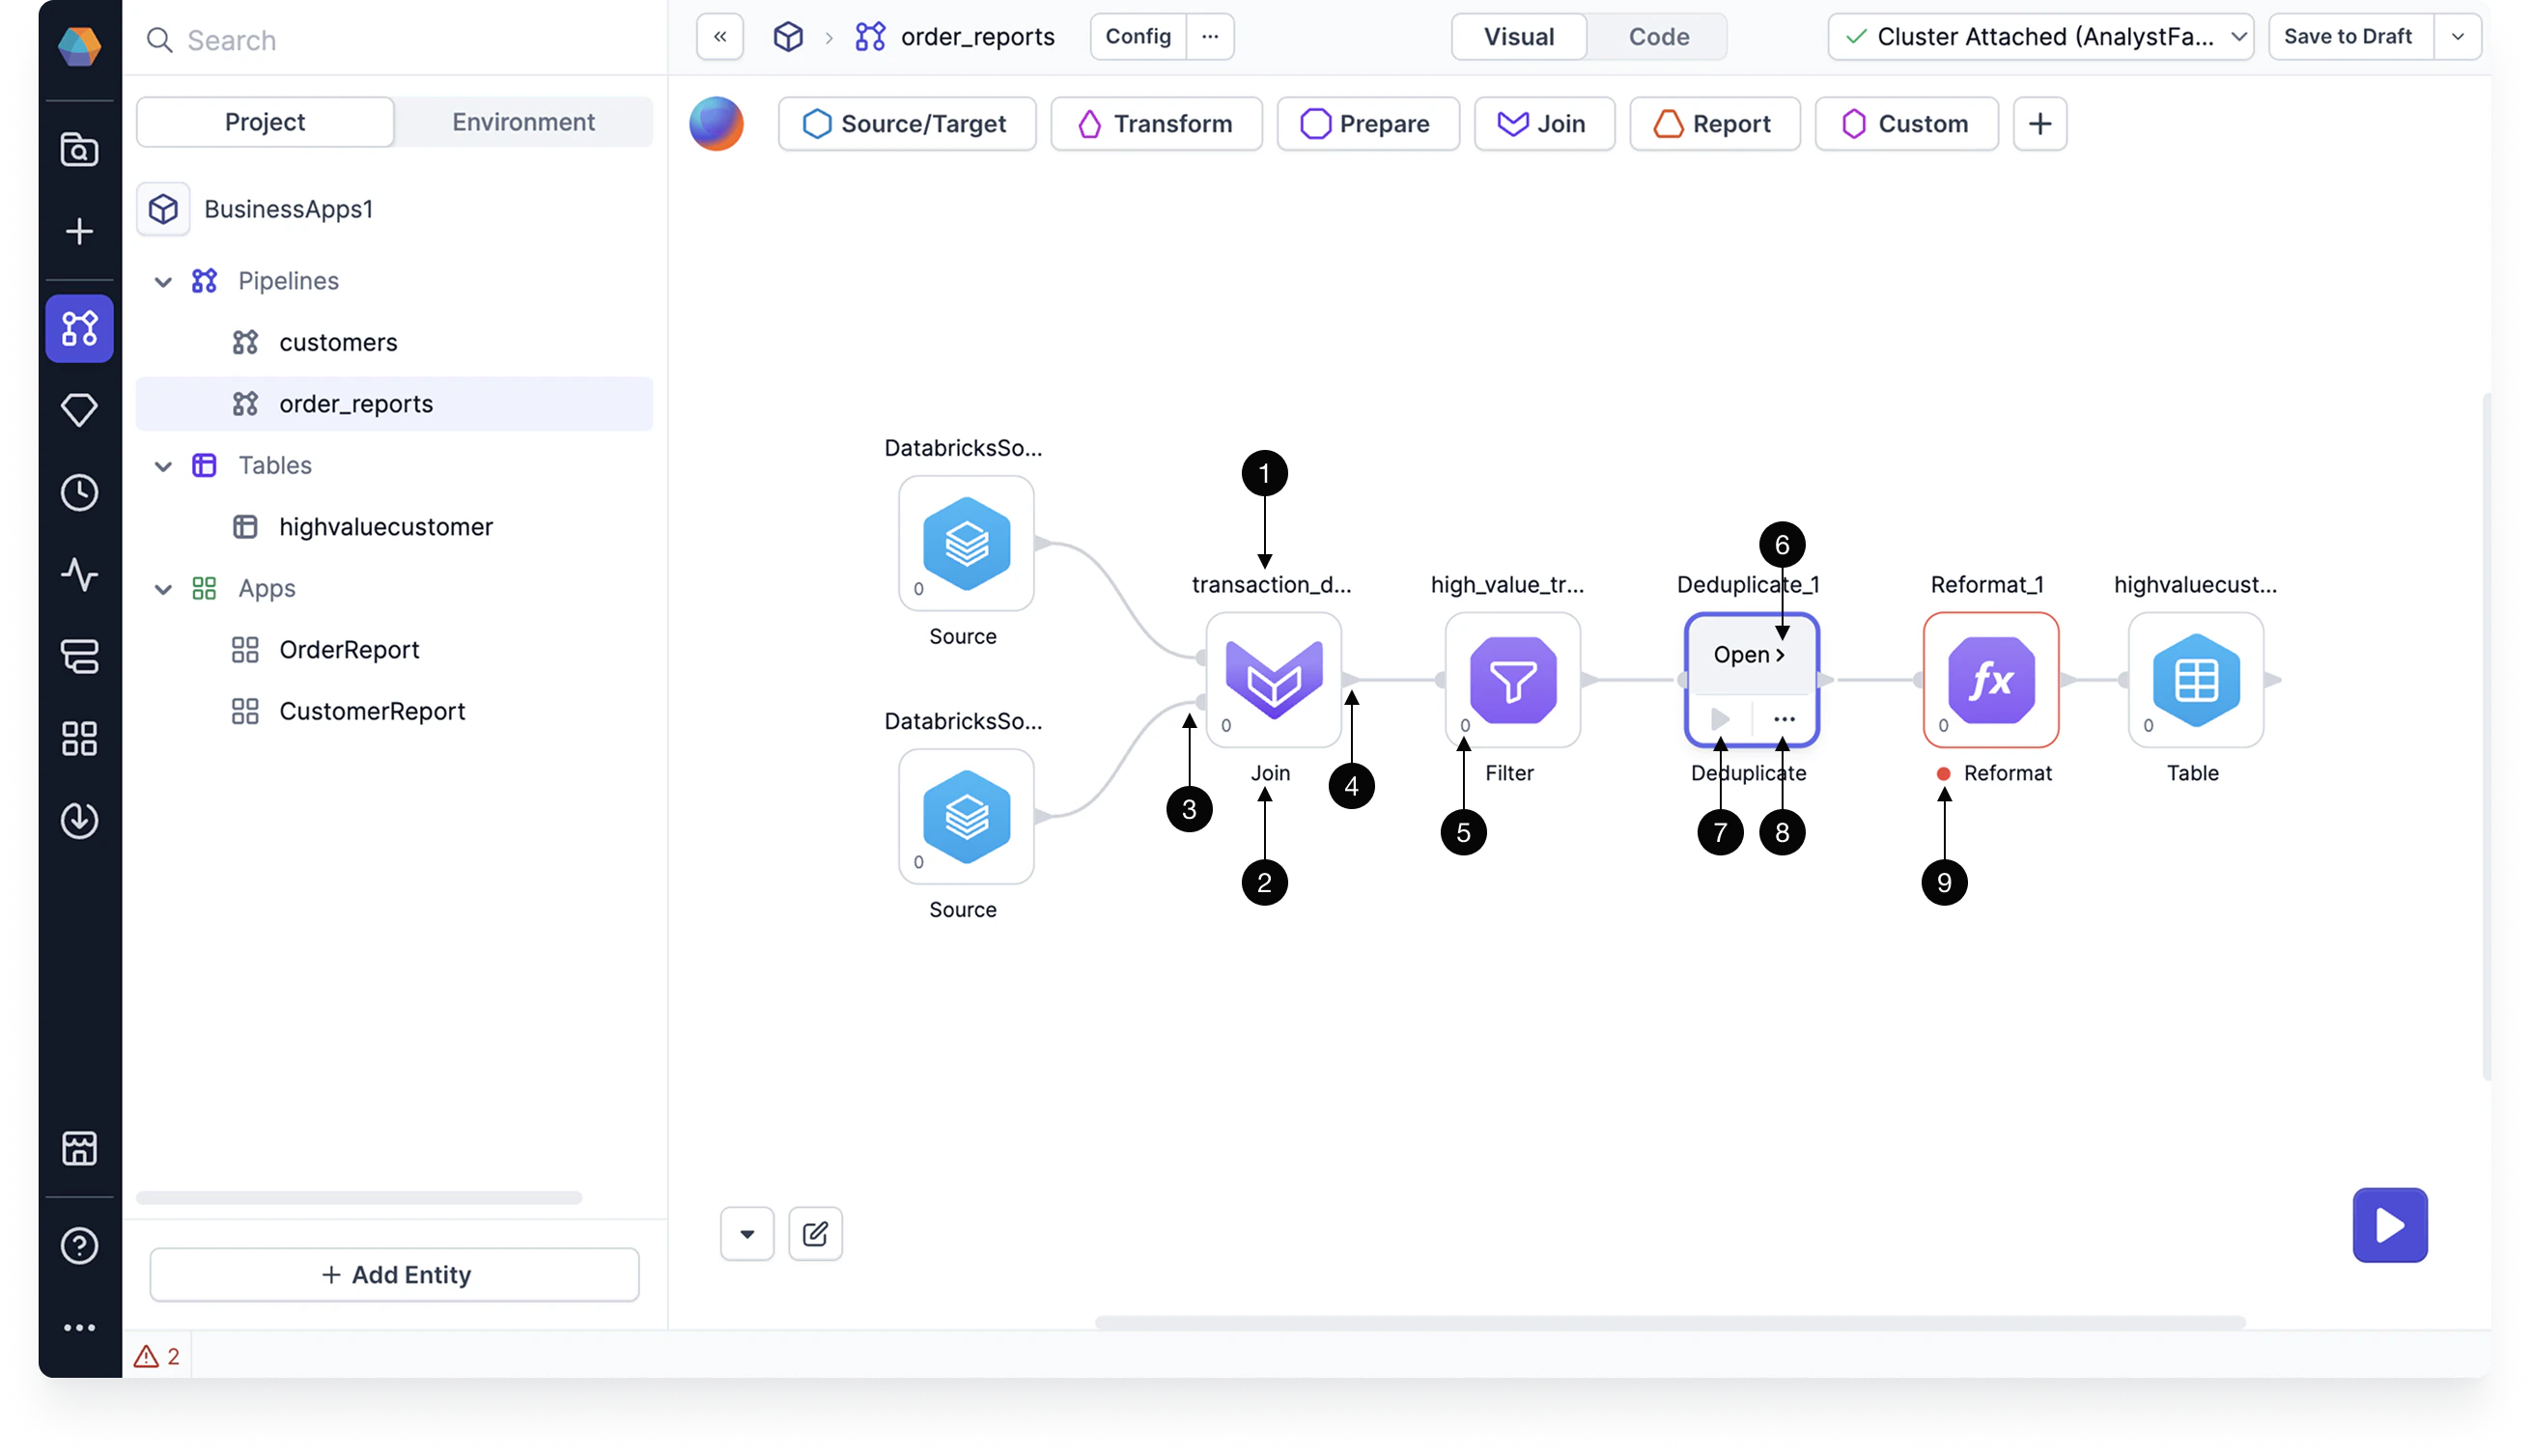
Gem configuration
Once a gem is on the canvas, you can configure its behavior. Available fields available depend on the gem type. See the documentation for each gem to learn about its specific parameters.Gem ports
Each gem handles ports differently. Some require specific input and output ports. Others allow only one port or none at all. Refer to the documentation for each gem to understand its port requirements. To add a port:- Open the gem to access its configuration.
- On the left, choose the Input or Output tab under Ports.
- Click the
+button next to Ports. If the+button doesn’t appear, the gem does not support adding more ports.
- Open the gem to access its configuration.
- On the left, choose the Input or Output tab under Ports.
- Click the pencil icon to enter Edit mode.
- Hover over the port you want to remove and click the trash icon.
- Click Done to save your changes and exit Edit mode.
Visual and code view
Most gems can be configured in the visual view or the code view. Use the visual expression builder to populate fields in the visual view. Prophecy will automatically convert visual expressions into SQL expressions. You can edit these SQL statements or write your own in the code view.Add a gem from a connection
You can quickly connect a new gem by hovering over the connector between two gems to reveal a+ button. Click it to open the gem palette and insert a new gem directly at that point in the flow.
- Hover over a gem’s input port to add a gem before it. If a connection already feeds that port, the new gem is spliced into it automatically
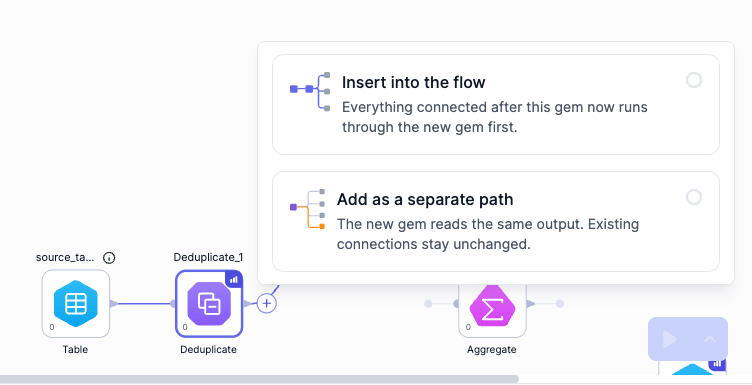
- Hover over a gem’s output port to add a gem after it. If the port has no downstream connections, the new gem attaches directly. If the port already feeds one or more gems, you choose how to insert it:
- Insert into the flow — the new gem is placed between the existing gems, so data now passes through it (A → New Gem → B).
- Add as a separate path — the new gem reads the same output as a new branch, and existing connections stay unchanged.
Action menu
Selecting one or more gems reveals a toolbar at the bottom of the canvas with the following buttons:
The Actions dropdown includes:
Applying actions to multiple gems
You can select multiple gems and apply Change Phase, Attach Annotation, Data Preview, Record Count, and Group to all of them at once from the Actions dropdown.Bulk Data Preview and Record Count toggles skip gems that don’t support them, such as canvas comments, target-process gems, and containers. If your selection has a mix of current values (for example, some selected gems have Data Preview on and others off), the checkbox shows an indeterminate state until you click it.
- Drag to select multiple gems on the canvas.
- Click Actions at the bottom of the canvas.
- Select desired action.
Gem phase
In a data pipeline, the phase of a gem determines the sequence in which it runs. Here’s how it works:- Gems are assigned a numerical phase (e.g.,
0,1,-1), where lower values run first. For example, a gem with phase0will execute before a gem with phase1. - When a gem runs, all its upstream gems must also run. This means that if a downstream gem has phase
0and an upstream gem has phase1, the upstream gem will be grouped into phase0to ensure proper execution. - Because of this dependency, the phase assigned to the last gem in a branch determines the phase of the entire branch. This means that when configuring gem phases, you only need to focus on the leaf nodes—the final gems in each branch of the pipeline.