

The recommended maximum file size is 100 MB.
Supported file formats
Supported file formats
You can upload the following file formats:
- CSV
- Excel (XLS, XLSX)
- JSON
- Parquet
- XML
File upload
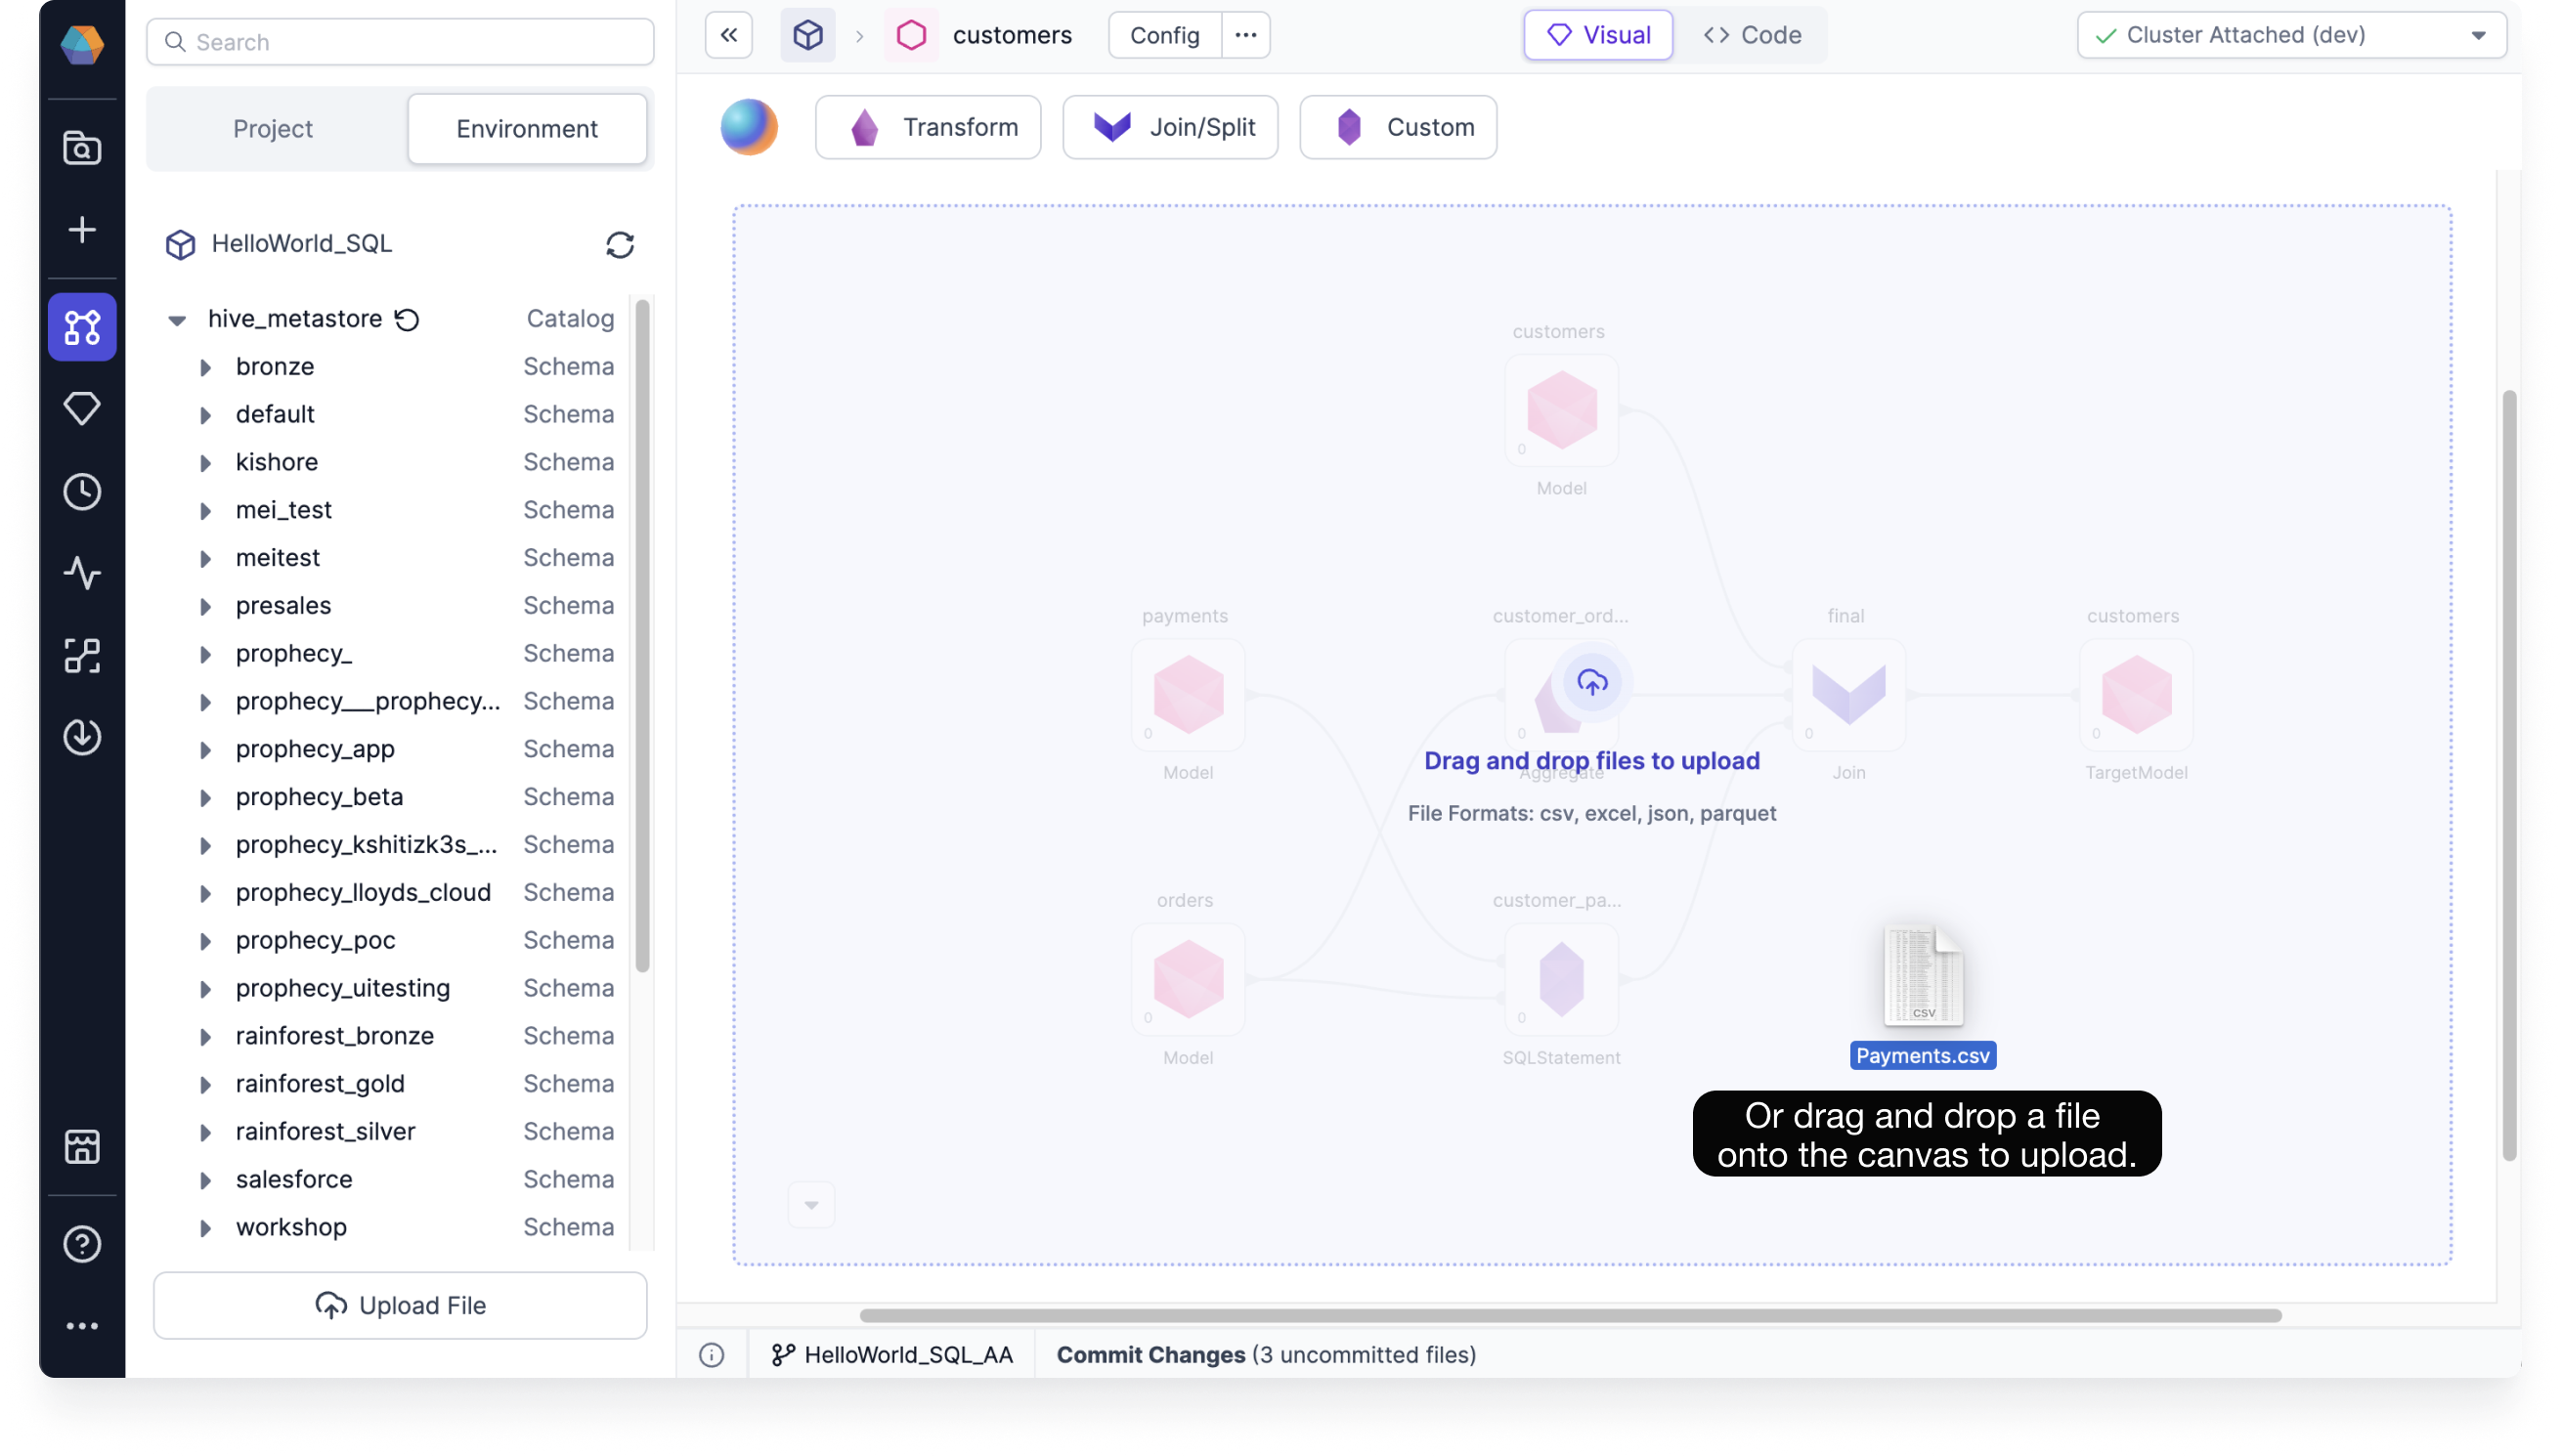
To upload your file:- Open a pipeline.
- Drag and drop your file onto the canvas. This opens a new Source gem.
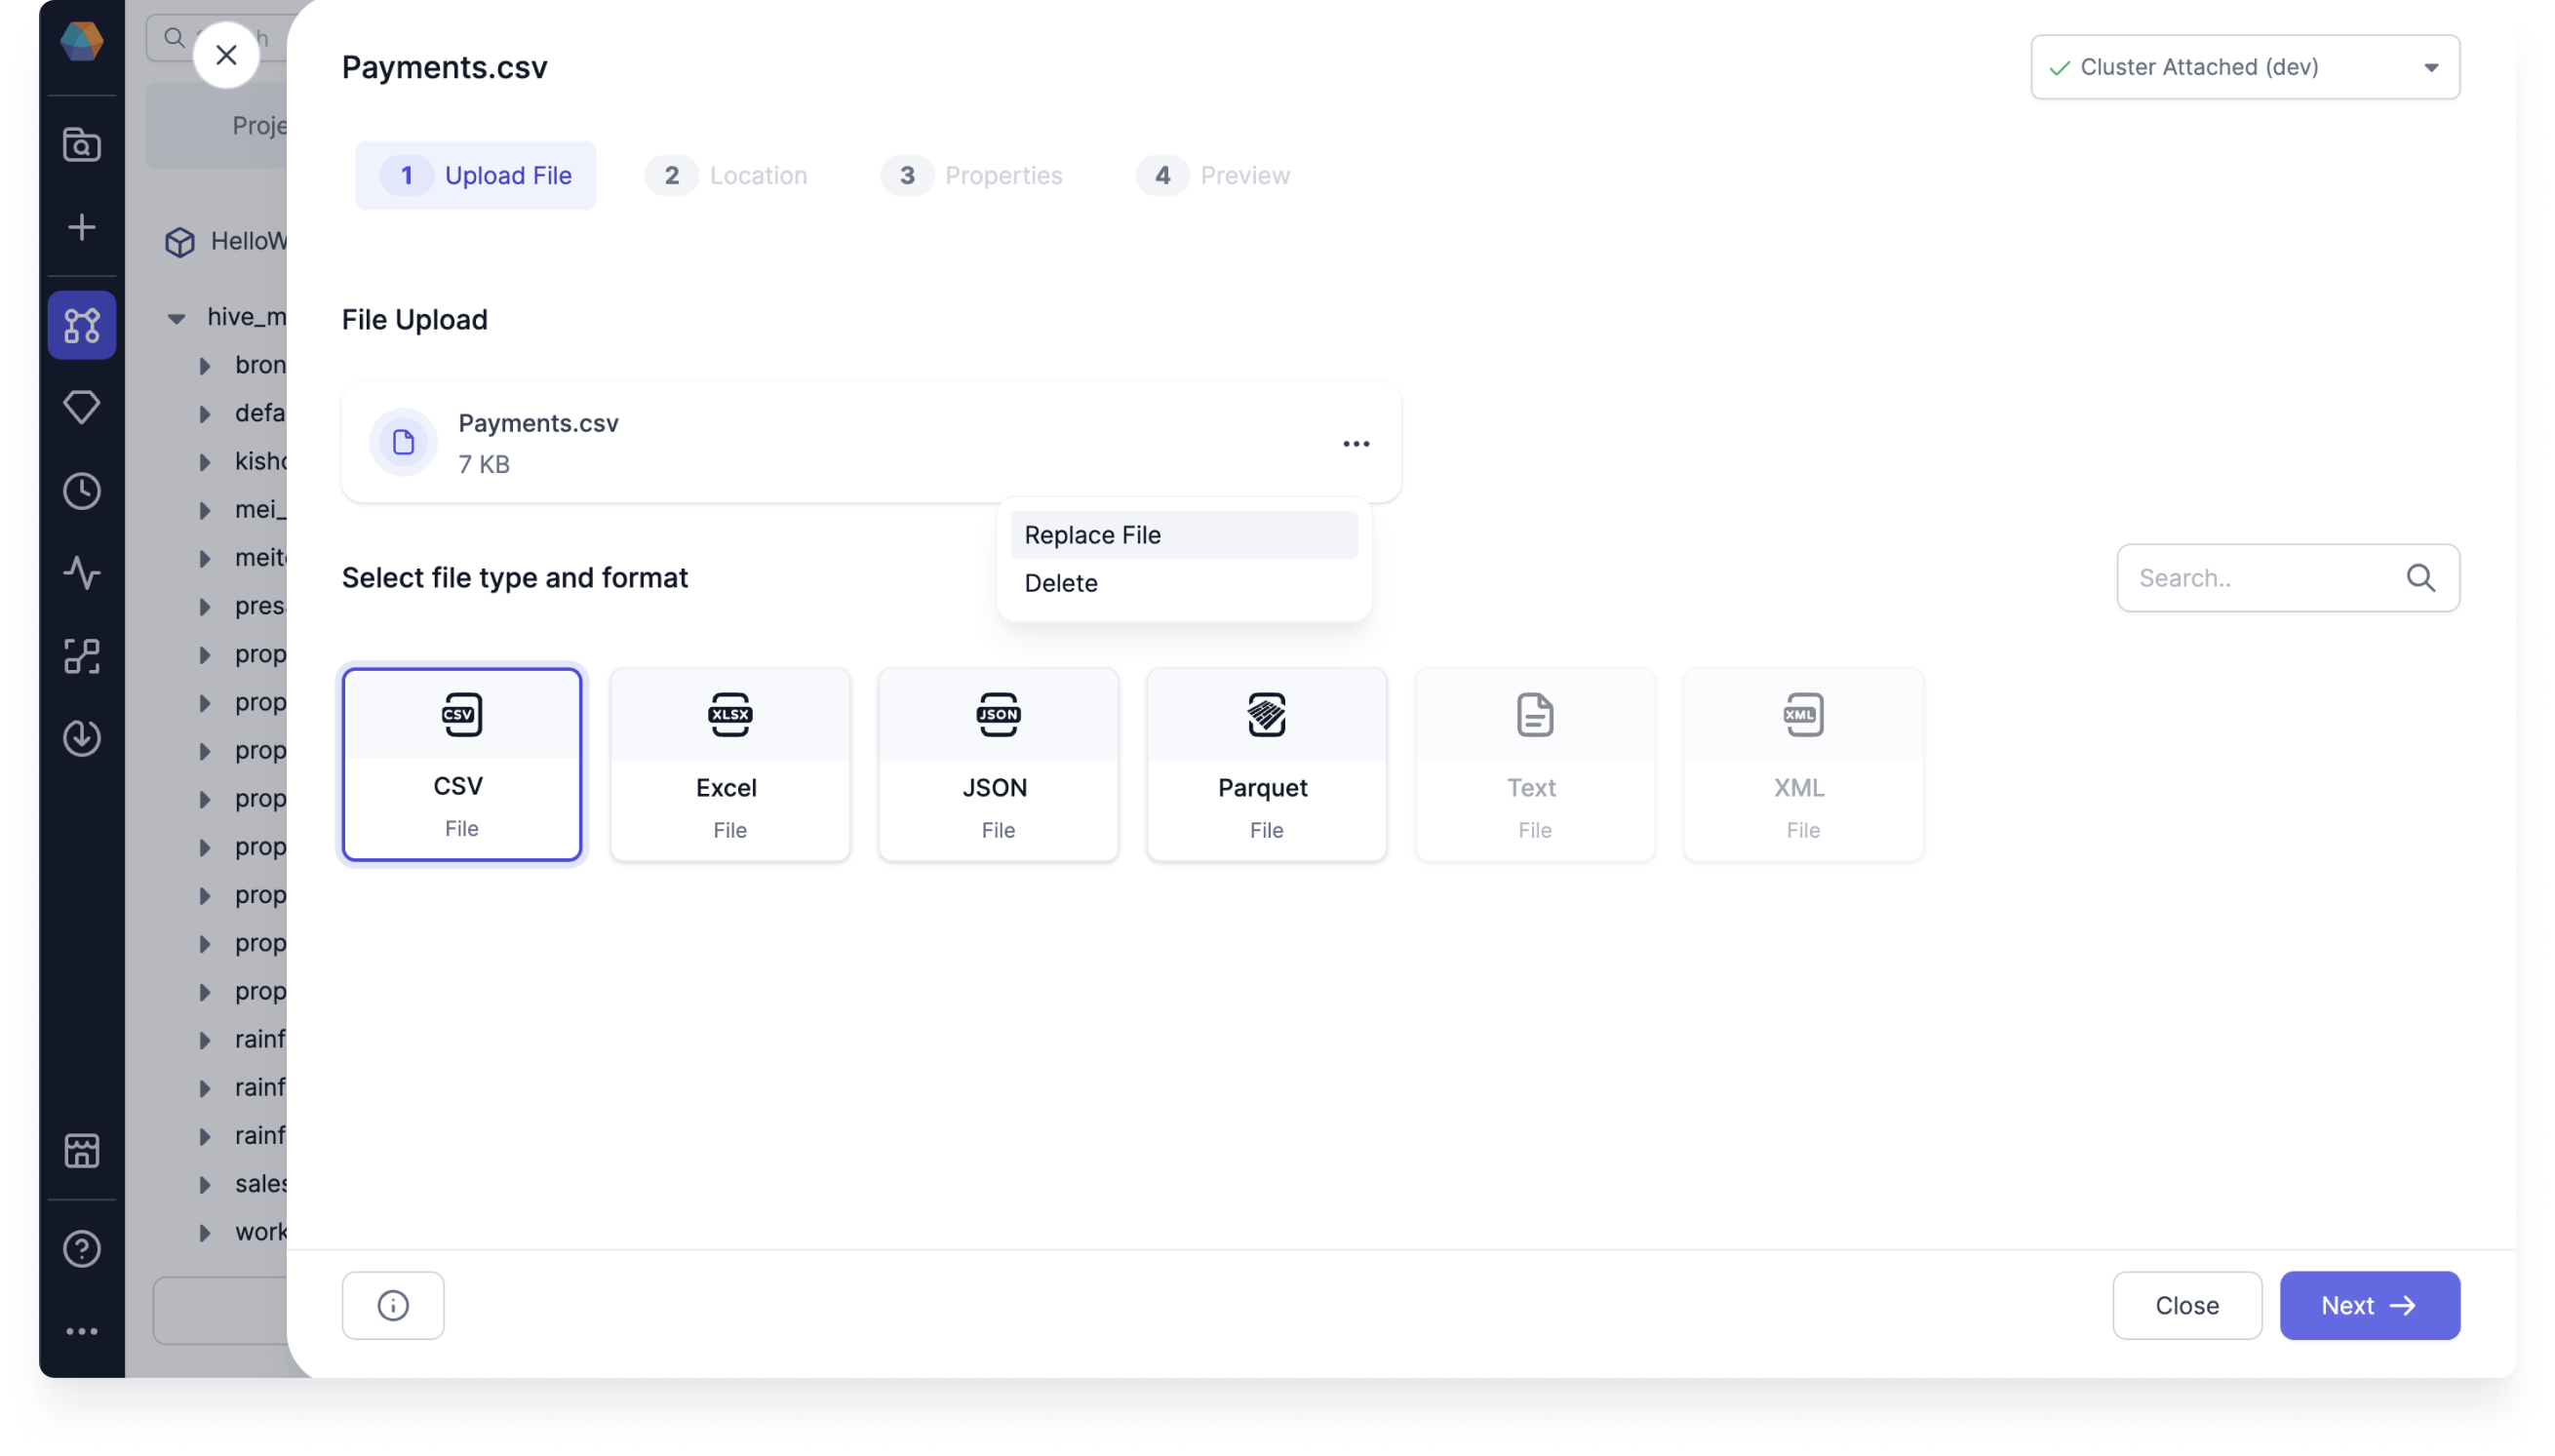
Type and format
Once the Source gem opens, you can review the type and format of the file.- Optional: Replace or delete your uploaded file.
- Optional: Change the type and format of the file.
- Click Next.
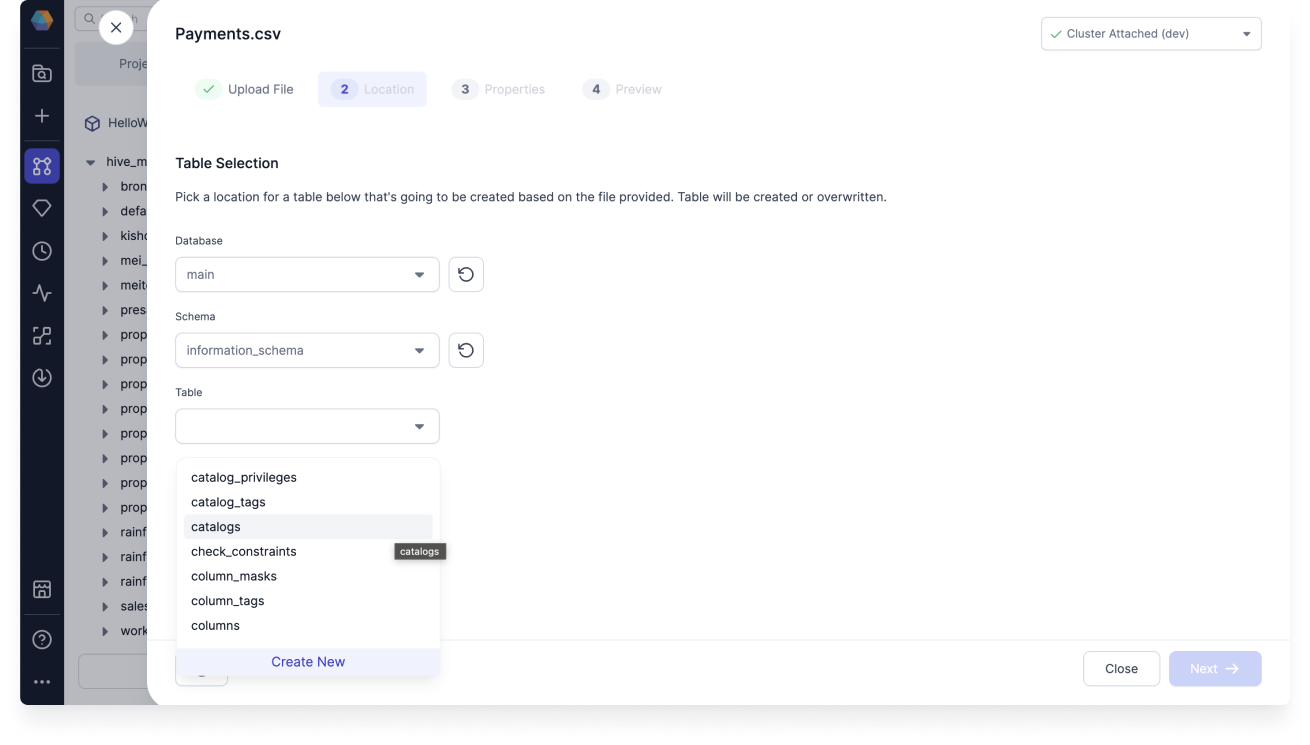
Location
Now, set the location where the table will be stored in the primary SQL warehouse configured in your fabric.- Choose the database.
- Choose the schema.
- Choose the table. You can either select an existing table or create a new one.
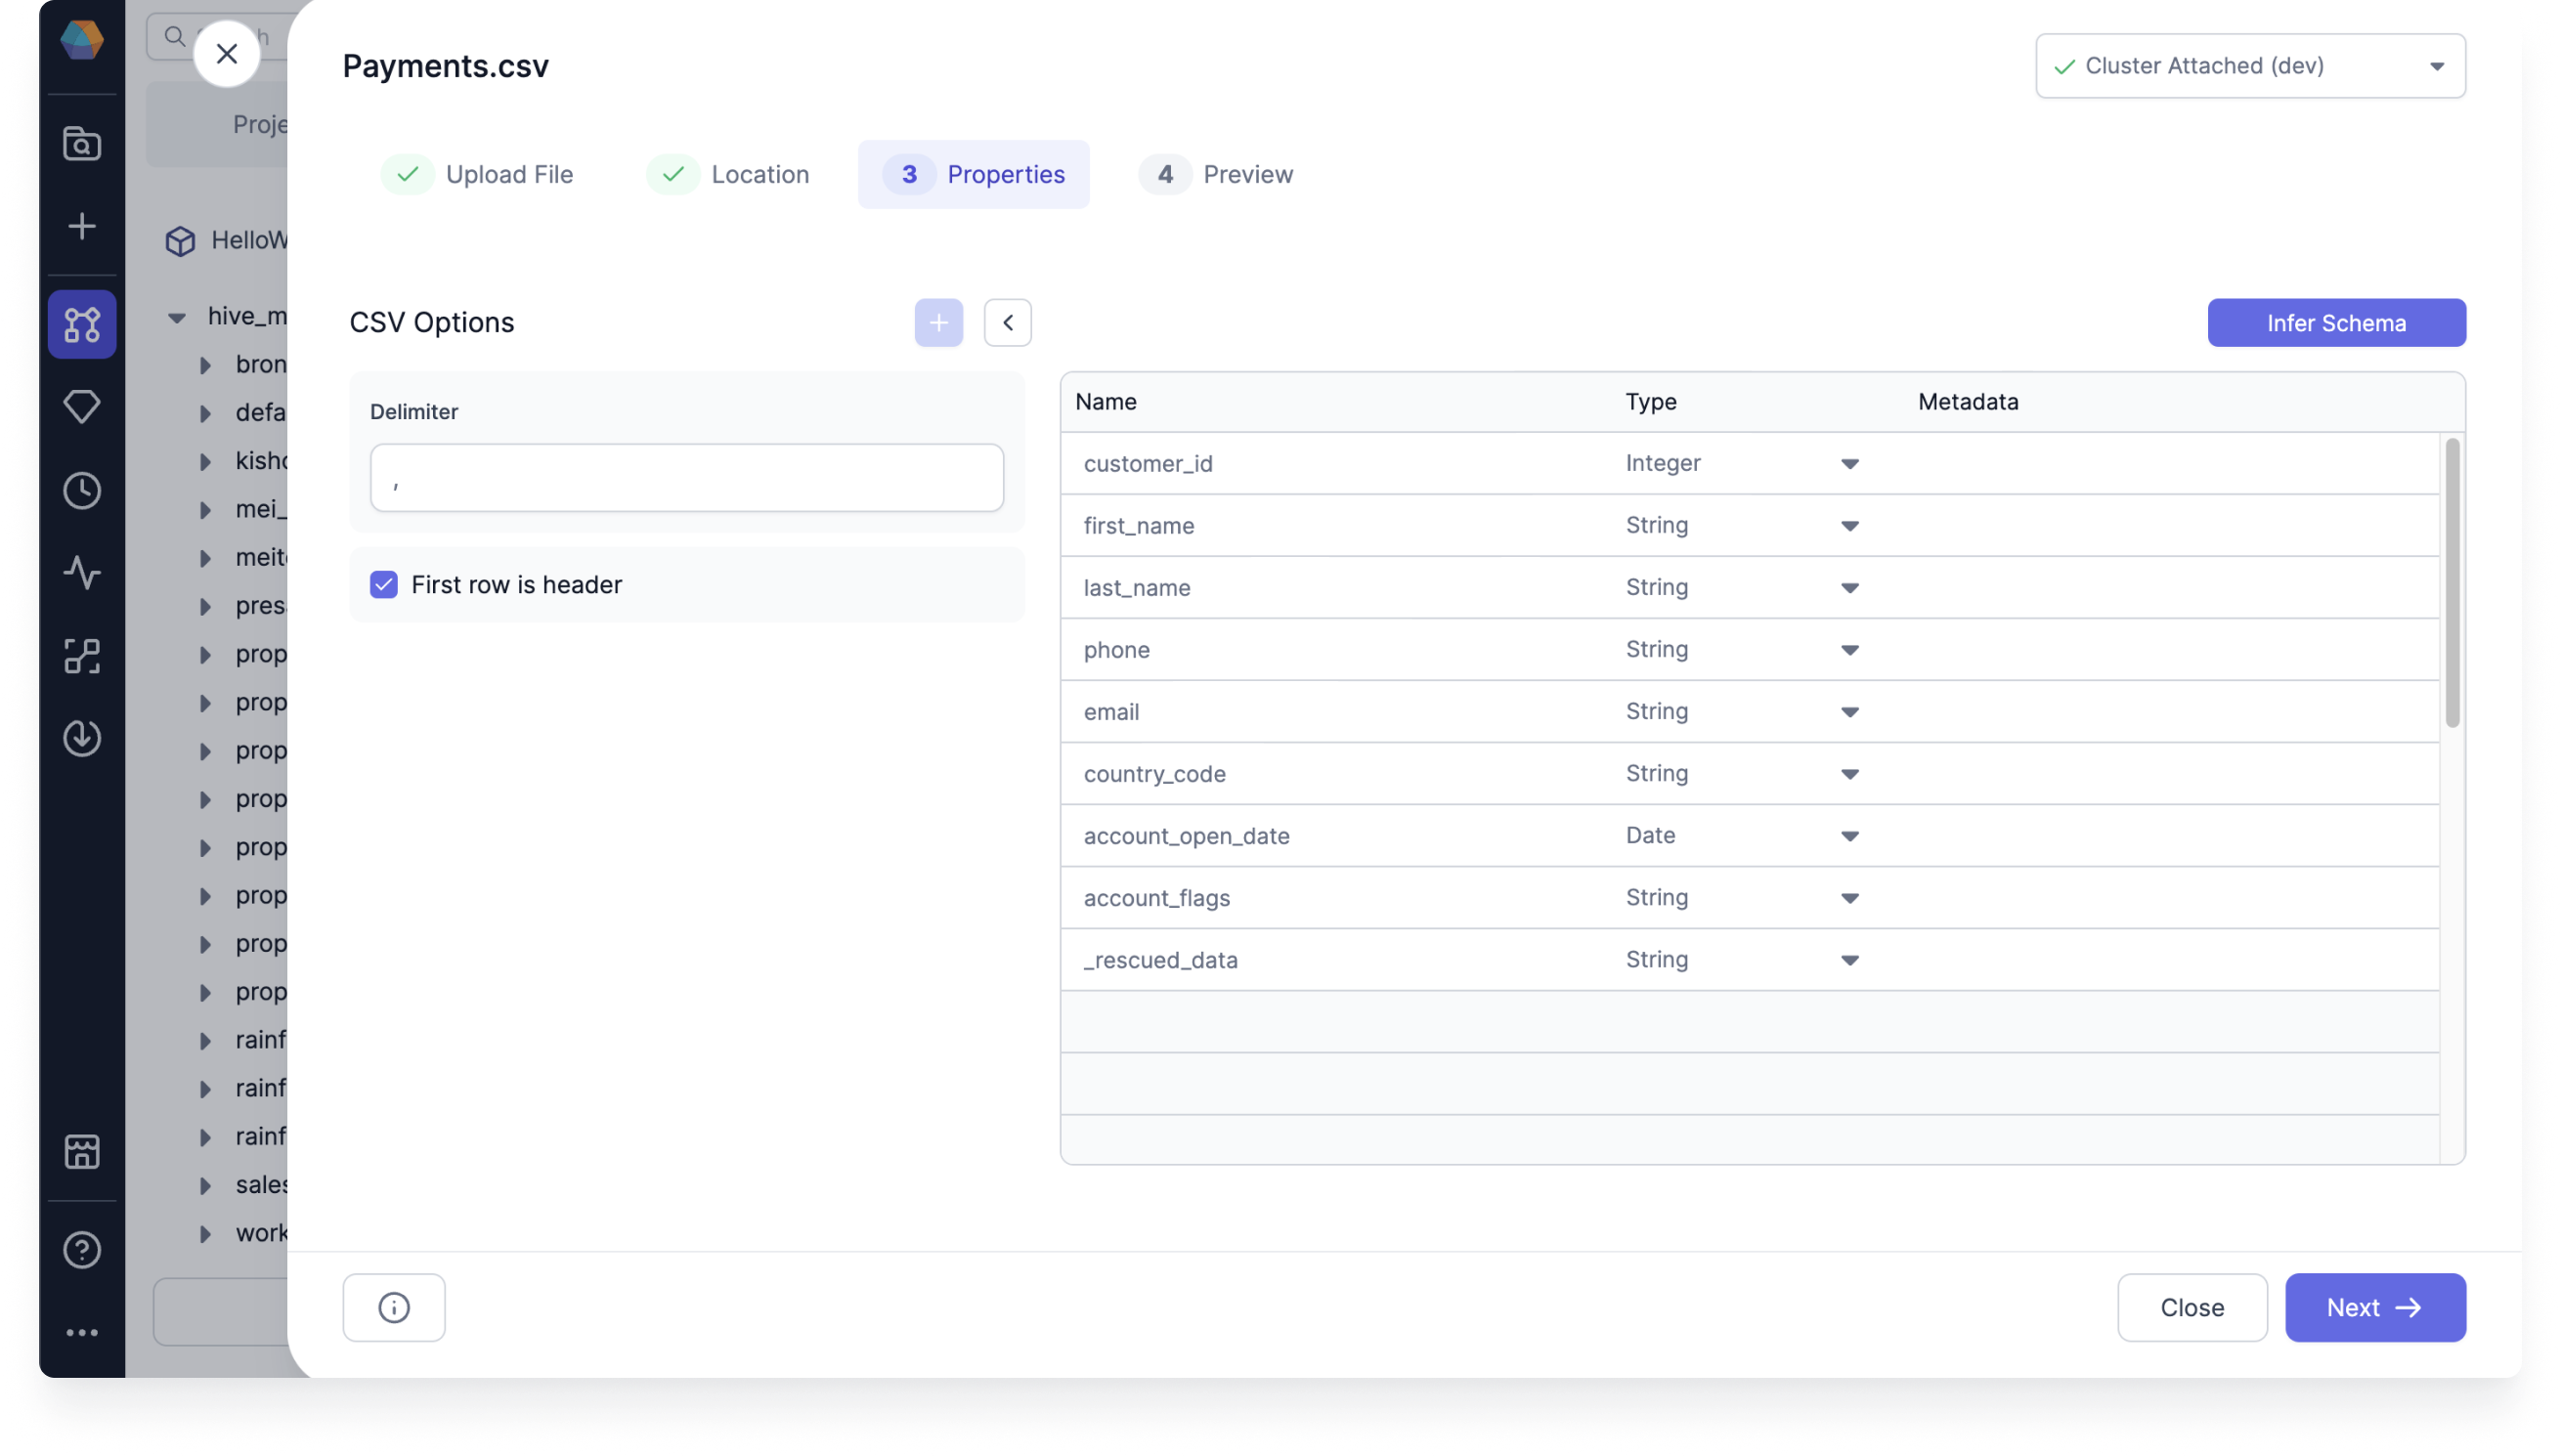
Properties
You can configure the table properties before completing the file upload.- Review the file’s options. Depending on the file type and format, common defaults are already chosen for you.
- Optional: Modify the options. For example, you can change the header row by selecting First row is header.
- Optional: If you made any changes to the options, click Infer Schema. This will update the schema according to the defined options.
Excel-specific properties
Excel-specific properties
Excel files (XLS, XLSX) expose additional options in the Properties panel:
After you configure these options, click Infer Schema to populate the column list. Column names, types (such as
String or Bigint), and other metadata are editable.Extract multiple tables from one workbook
You can mark multiple regions of an Excel workbook as separate tables. Each marked table becomes its own output port on the gem, and you can:- Edit the schema for each table independently.
- Set drift-handling behavior per table.
- Unmark or delete a table you no longer need.
Preview
The preview step shows your table data and gives you the option to download it.- To generate the preview, click Load. This loads the data.
- Check that your preview looks correct and click Done.
- If you selected a table to write your uploaded file to, you’ll need to confirm the upload in the pop-up window by clicking Proceed.
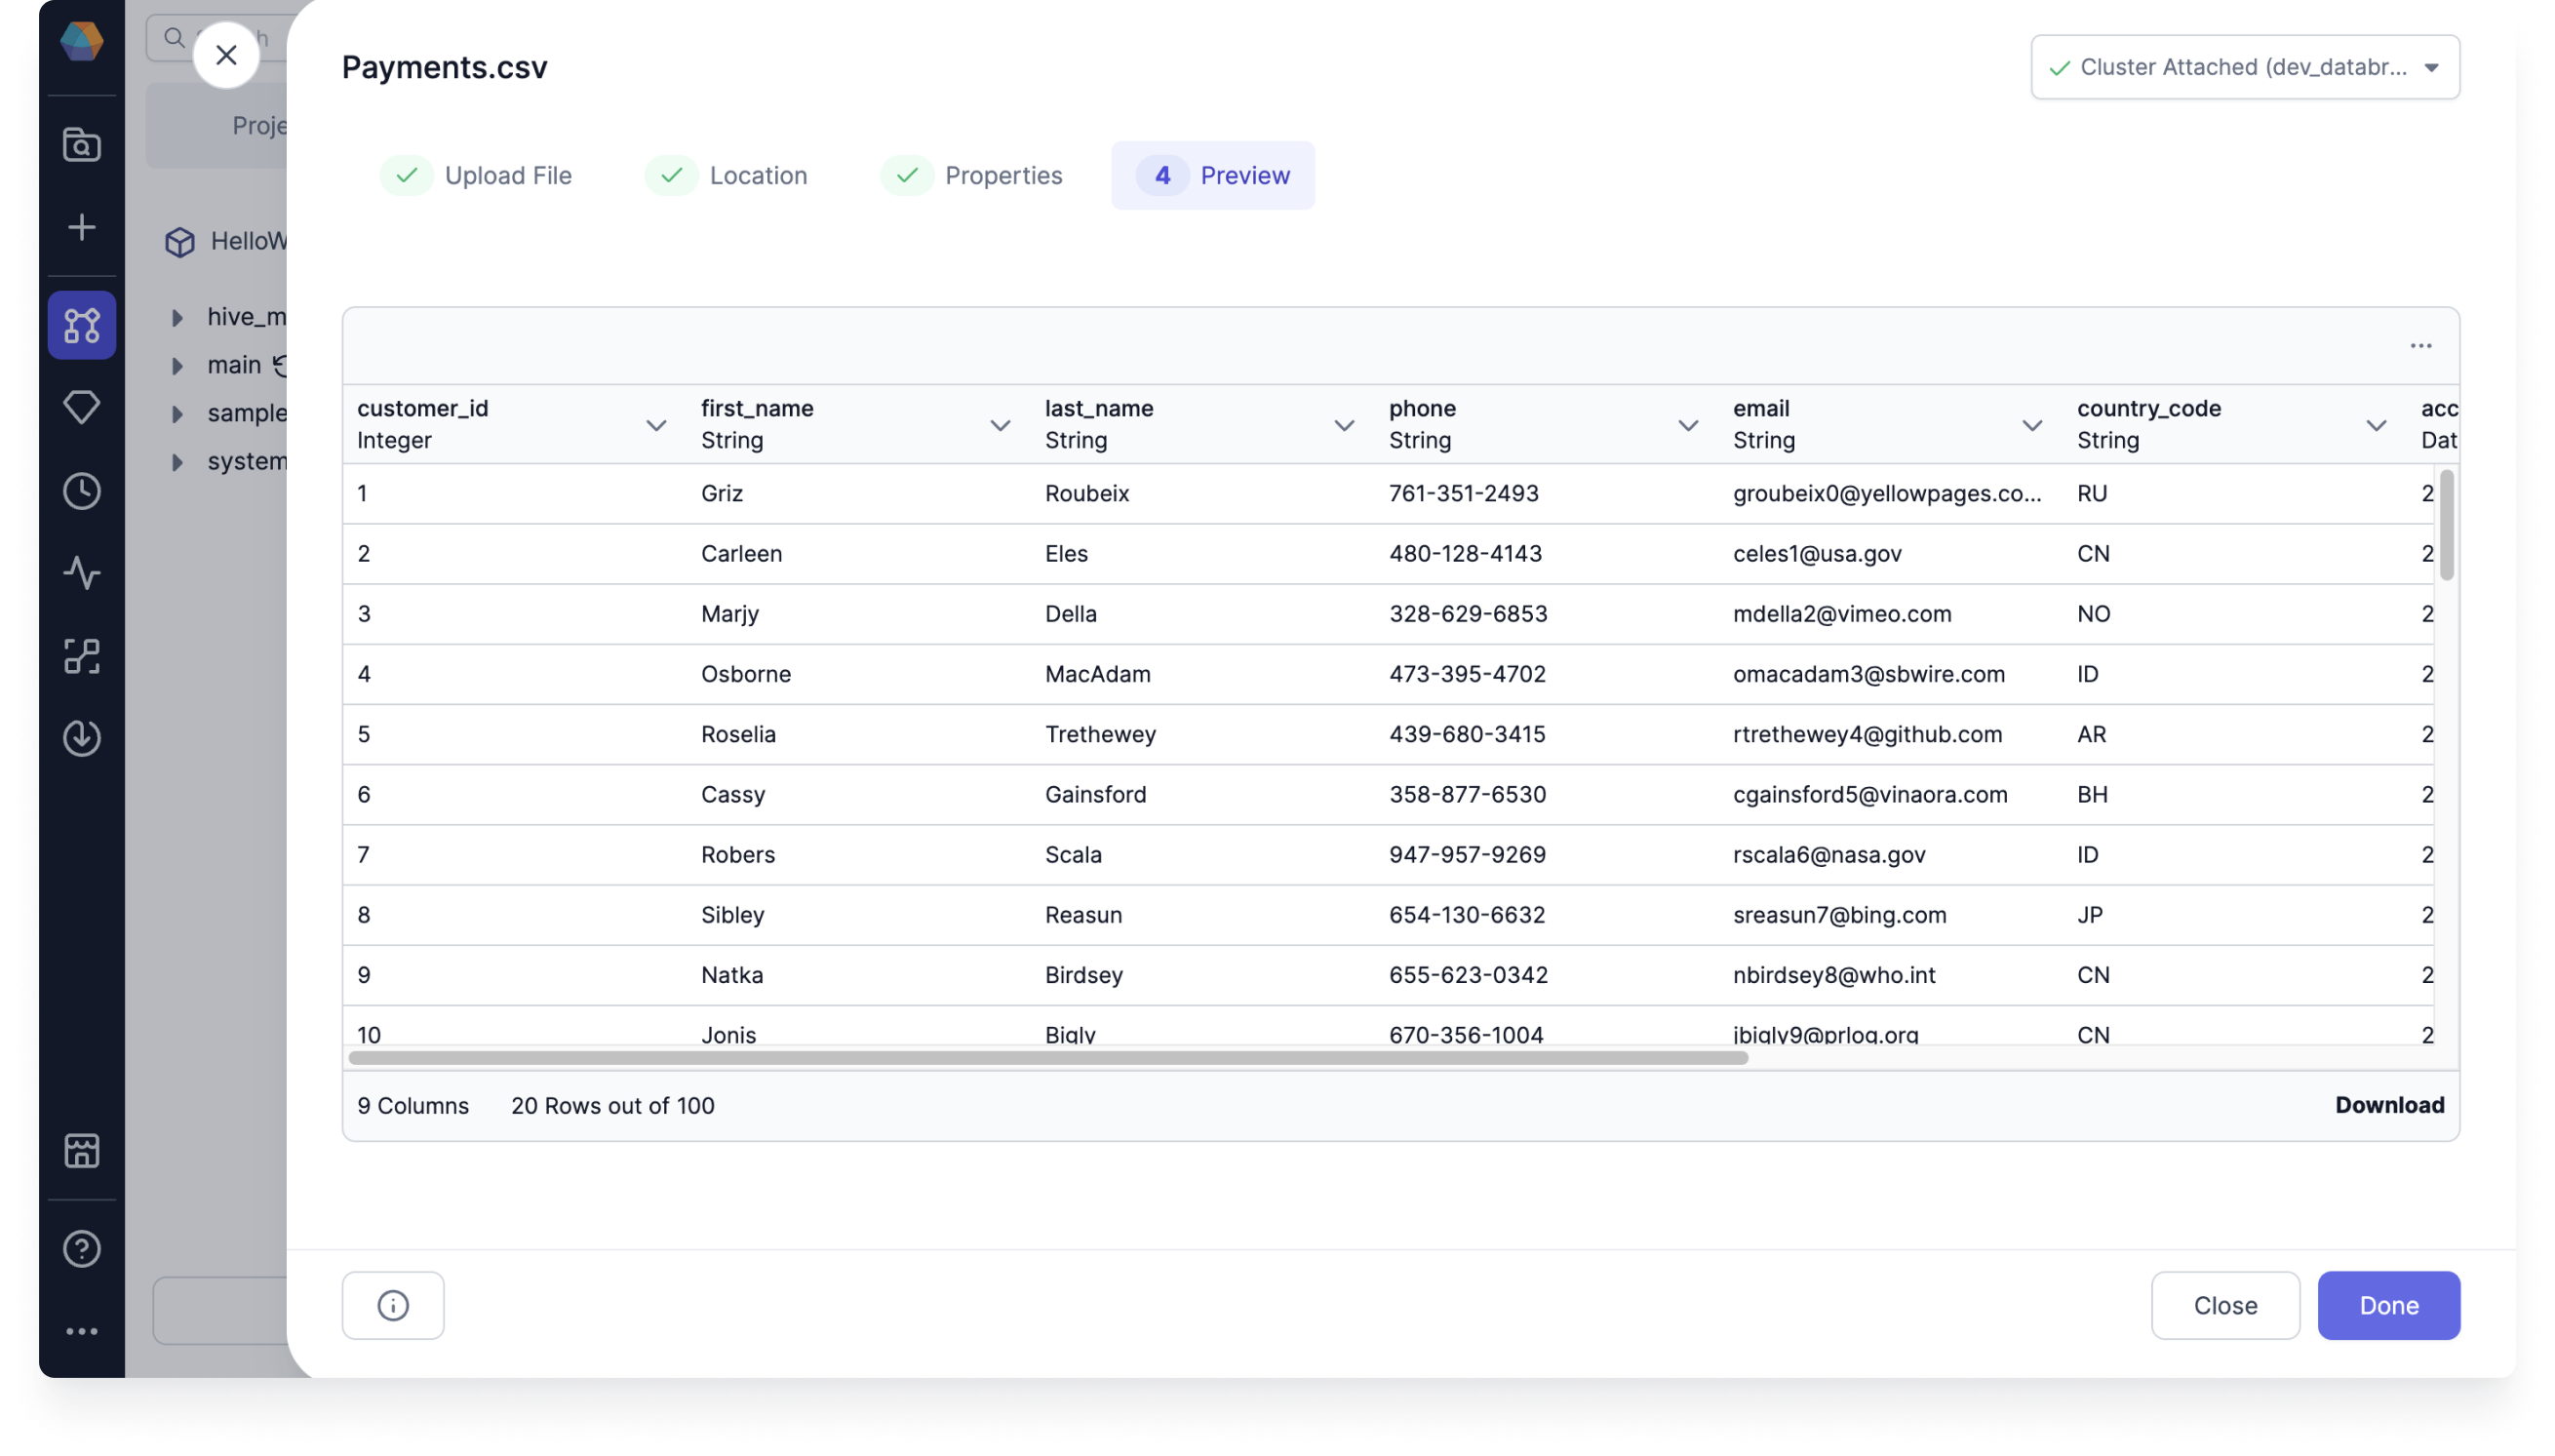
For Excel files, the preview grid loads additional rows and columns as you scroll, rather than fetching the entire sheet at once. Merged cells and blank rows in the source sheet are handled automatically.