Prerequisites
To complete this training, you will need:- An Ab Initio Plan
- A Databricks Fabric (Prophecy Managed)
- A Airflow Fabric (Prophecy Managed)
- A GitHub Account
1. Export Ab Initio Files
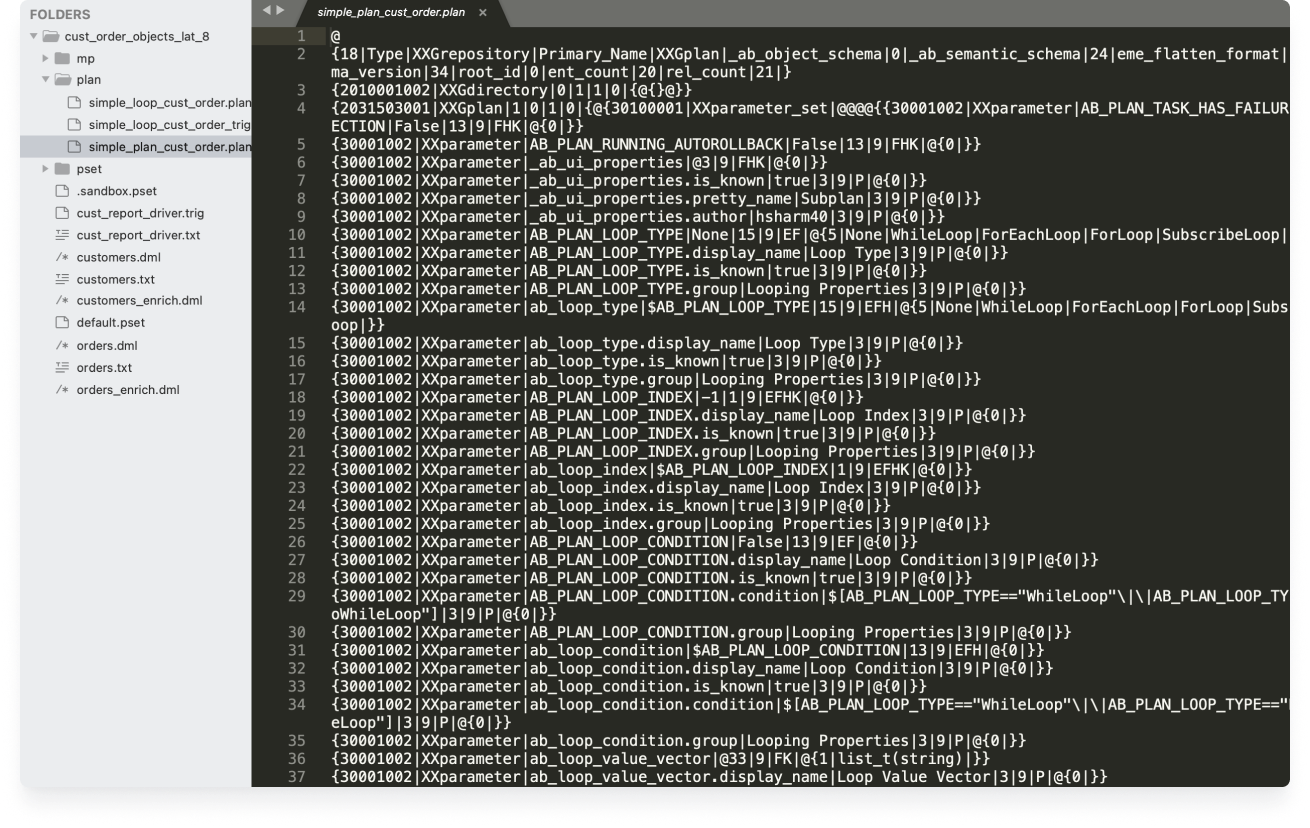
For transpiling an Ab Initio Plan, first you will need to have a pre-existing plan created in Ab Initio. Then you will have to export this plan from Ab Initio. After exporting, look for the below-mentioned files, as Transpiler will use them:- ** Plan files ** : Plan files contain the execution plan for a particular graph or set of graphs. The execution plan outlines the sequence of operations and dependencies required to execute the graph(s) successfully as shown below:
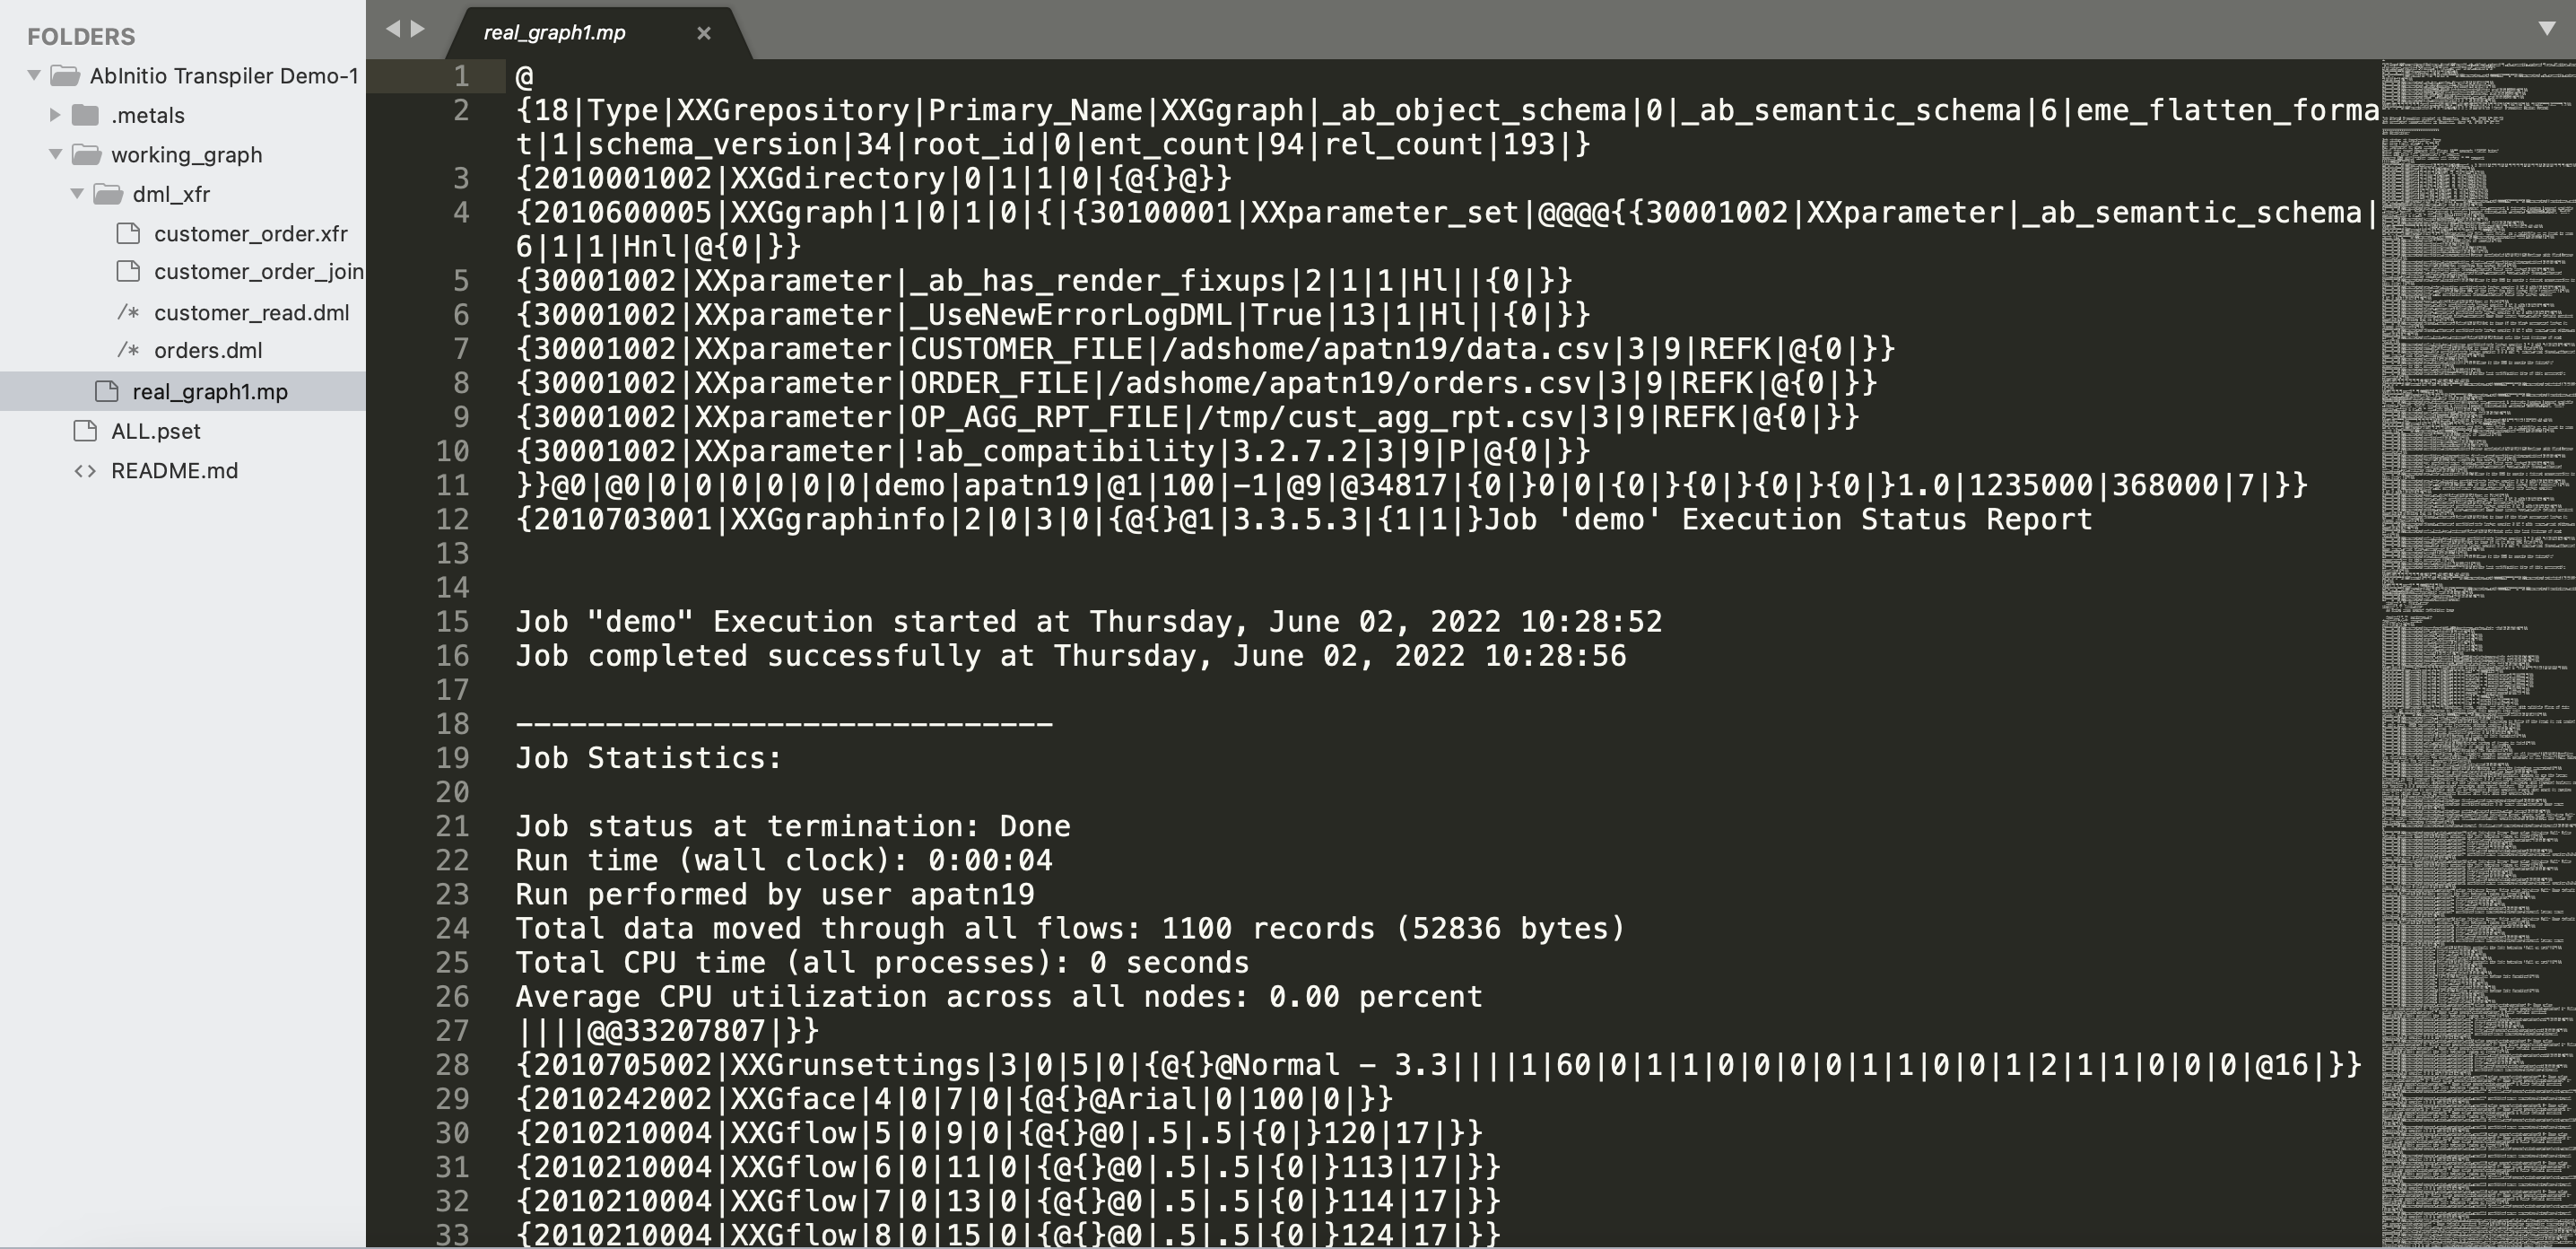
- ** Mp files ** : Mp (multi-processing) files contain information about the graph like components used in the graph, number of parallel instances and resource specifications for components in a graph as shown below:
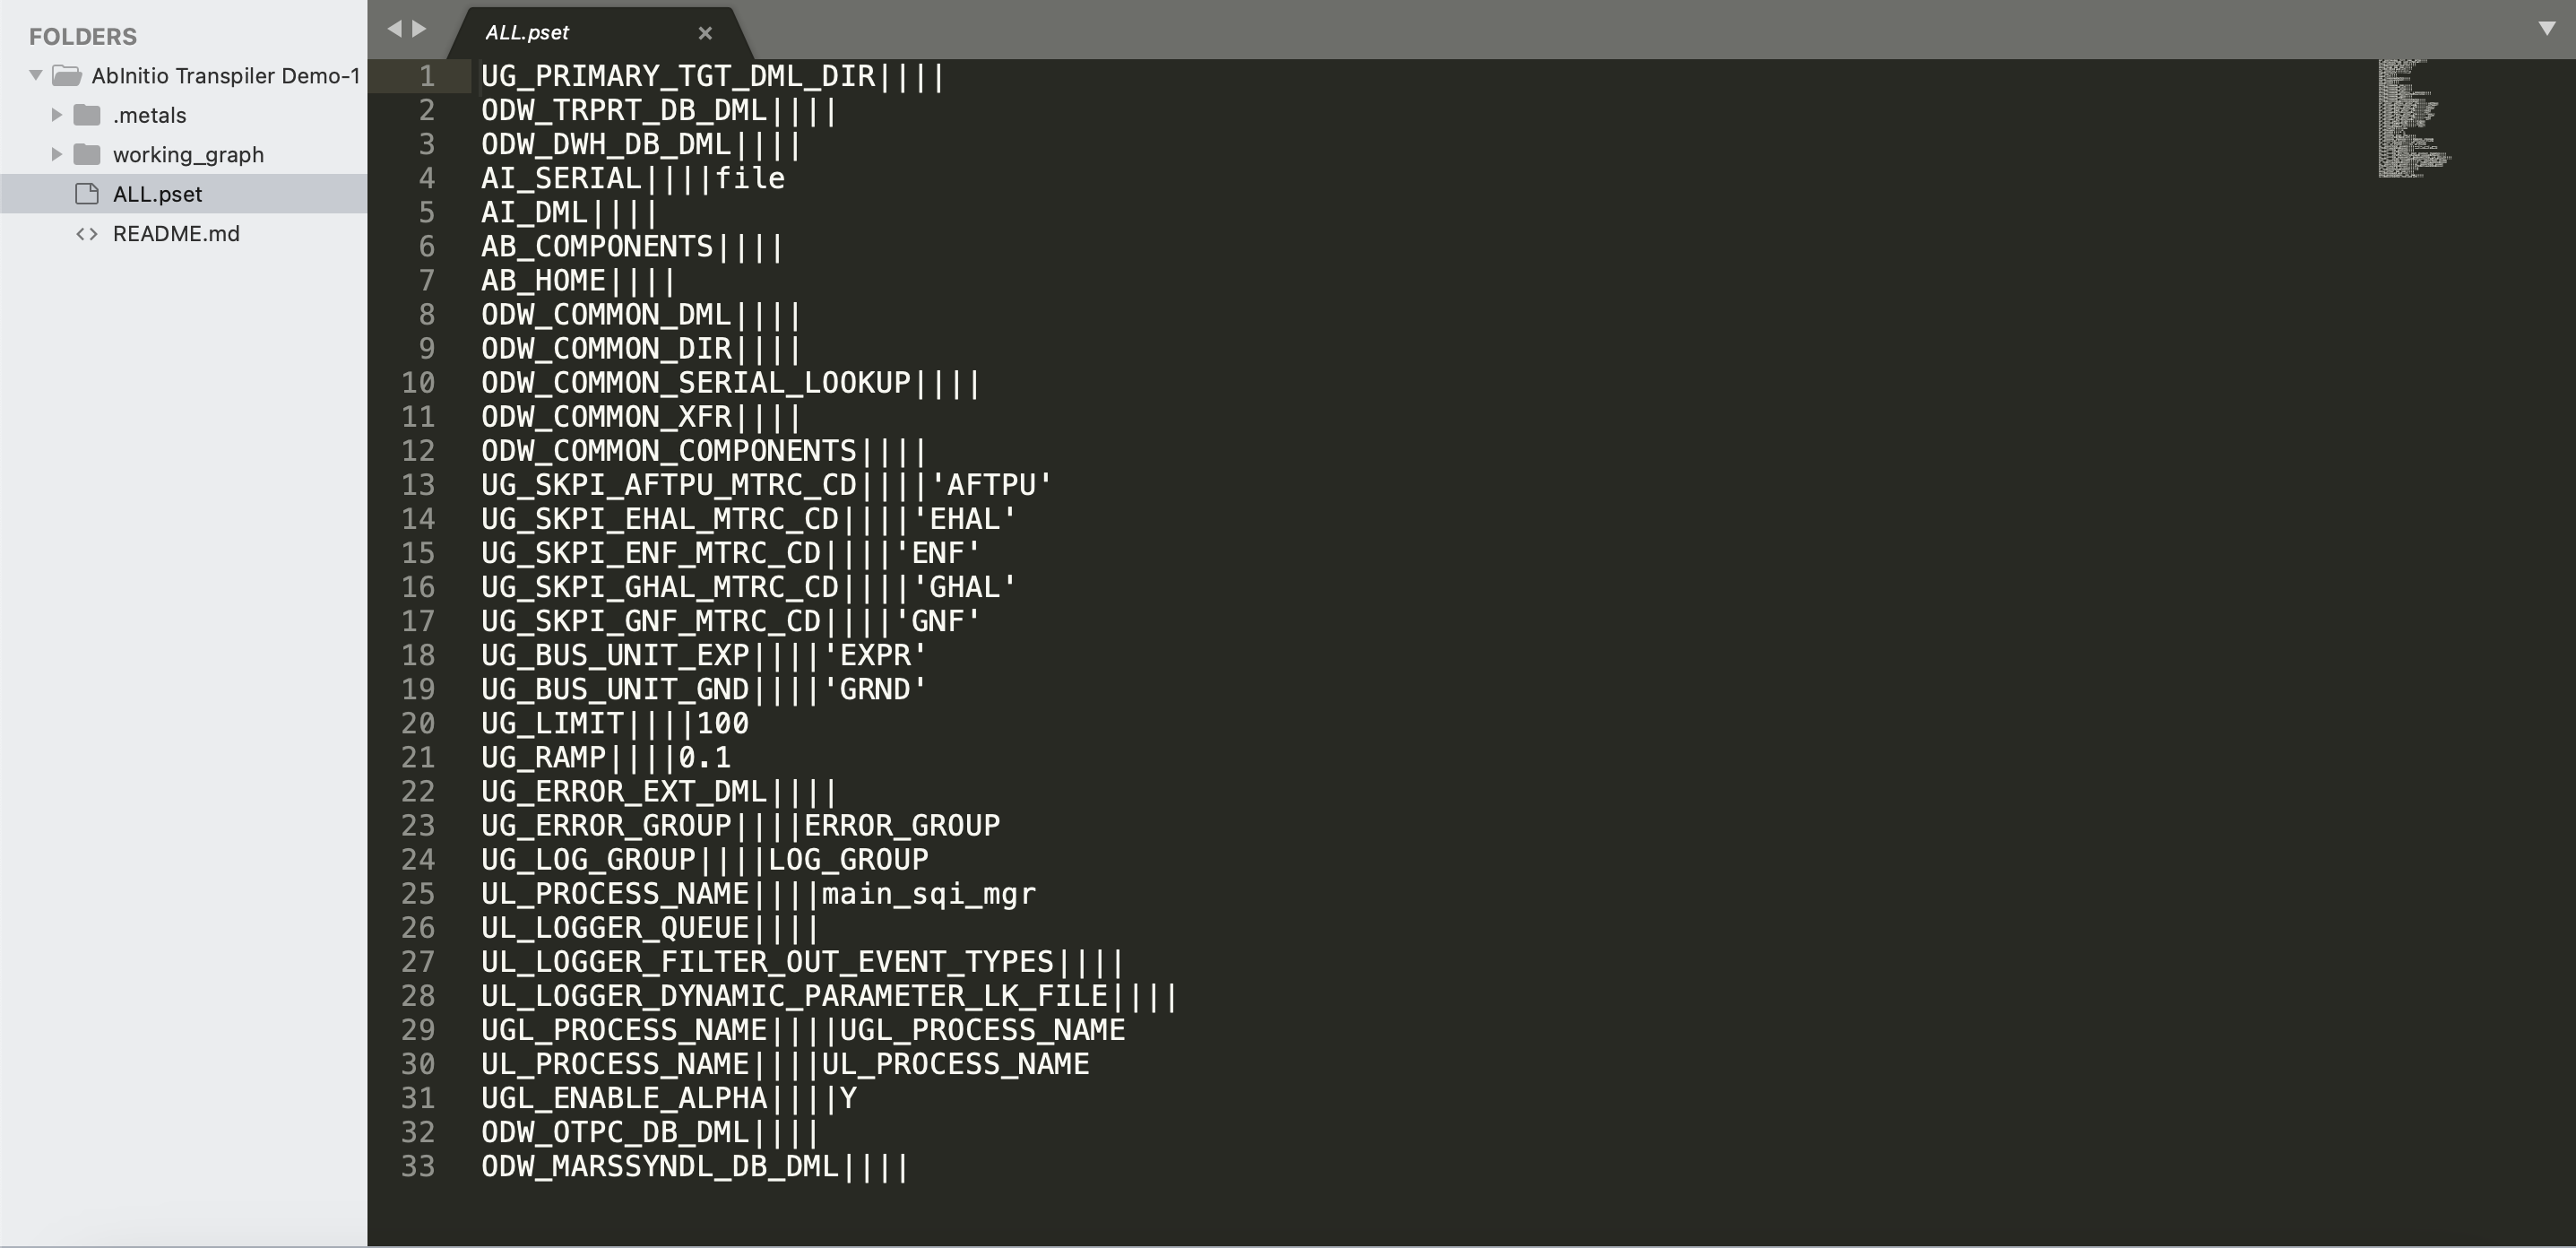
- ** Pset files ** : Pset (parameter set) files store and manage parameter values for the graph, thus allowing you to run the same graph differently by passing dynamic values at the run-time as shown below:
- ** Dml files **: Dml (data manipulation language) files are used to define the structure of the data records so that data is processed correctly inside the graph component. Example of a component is shown below that defines the schema of a table that will be read and processed.

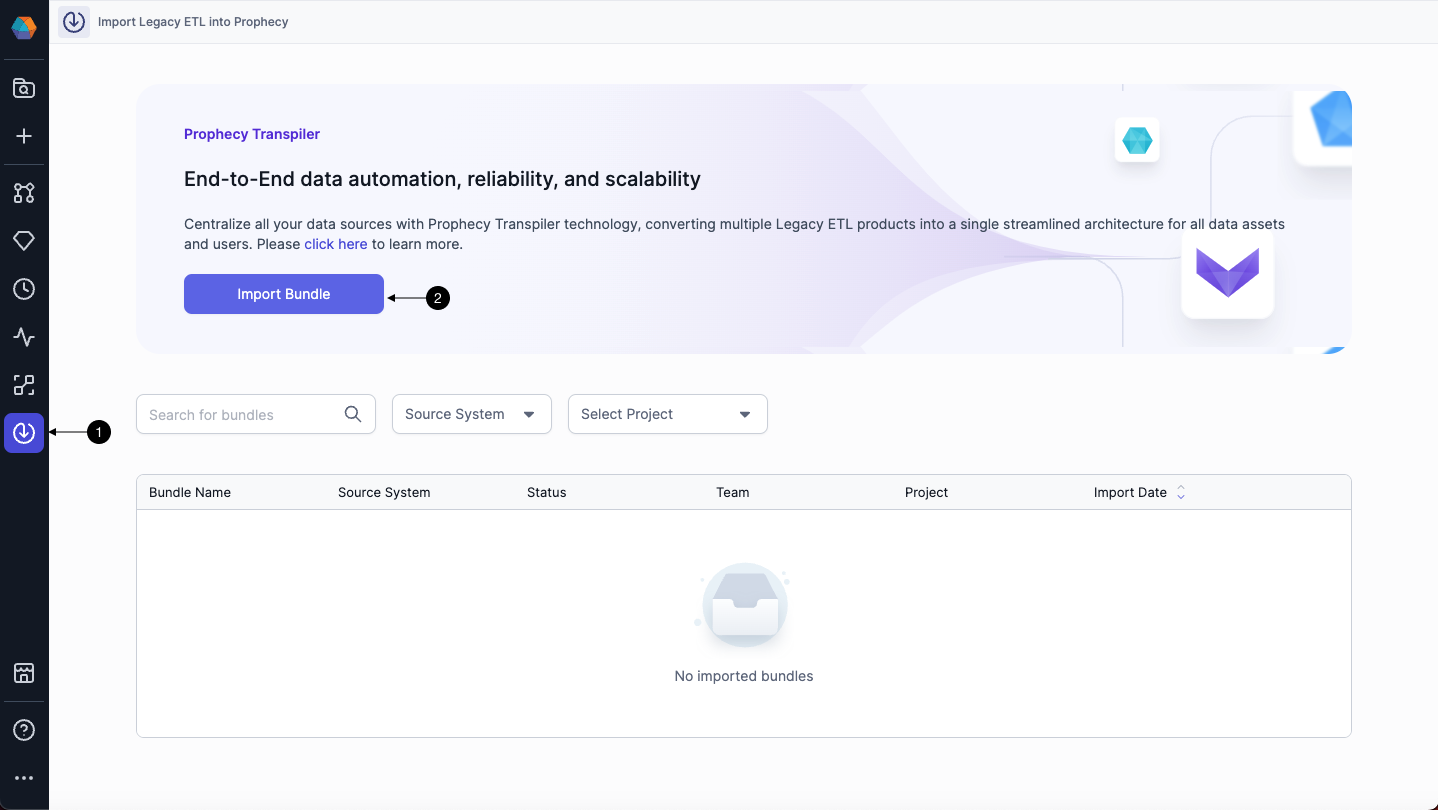
2. Import Bundle
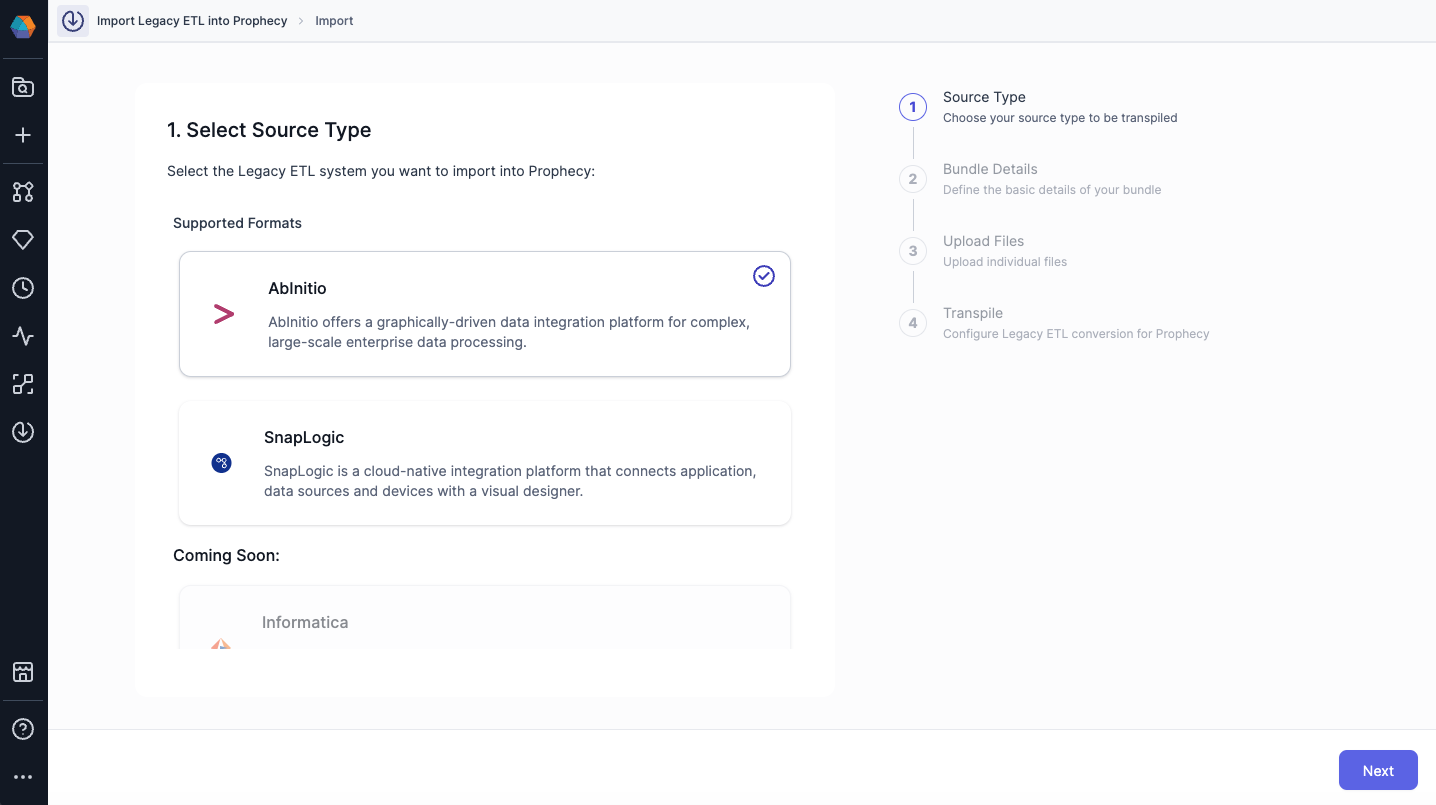
2.1 Select Source Type
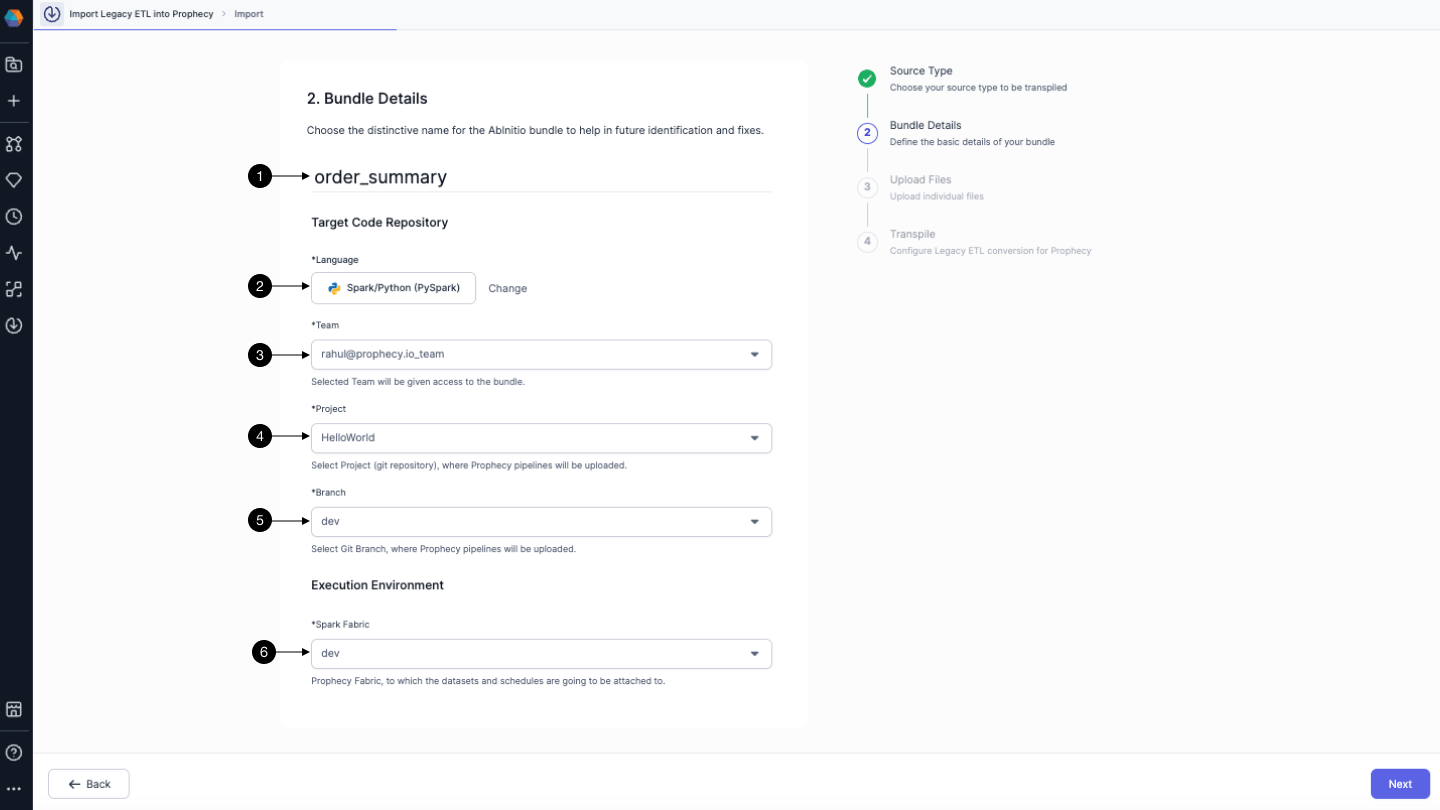
2.2 Enter Bundle Details
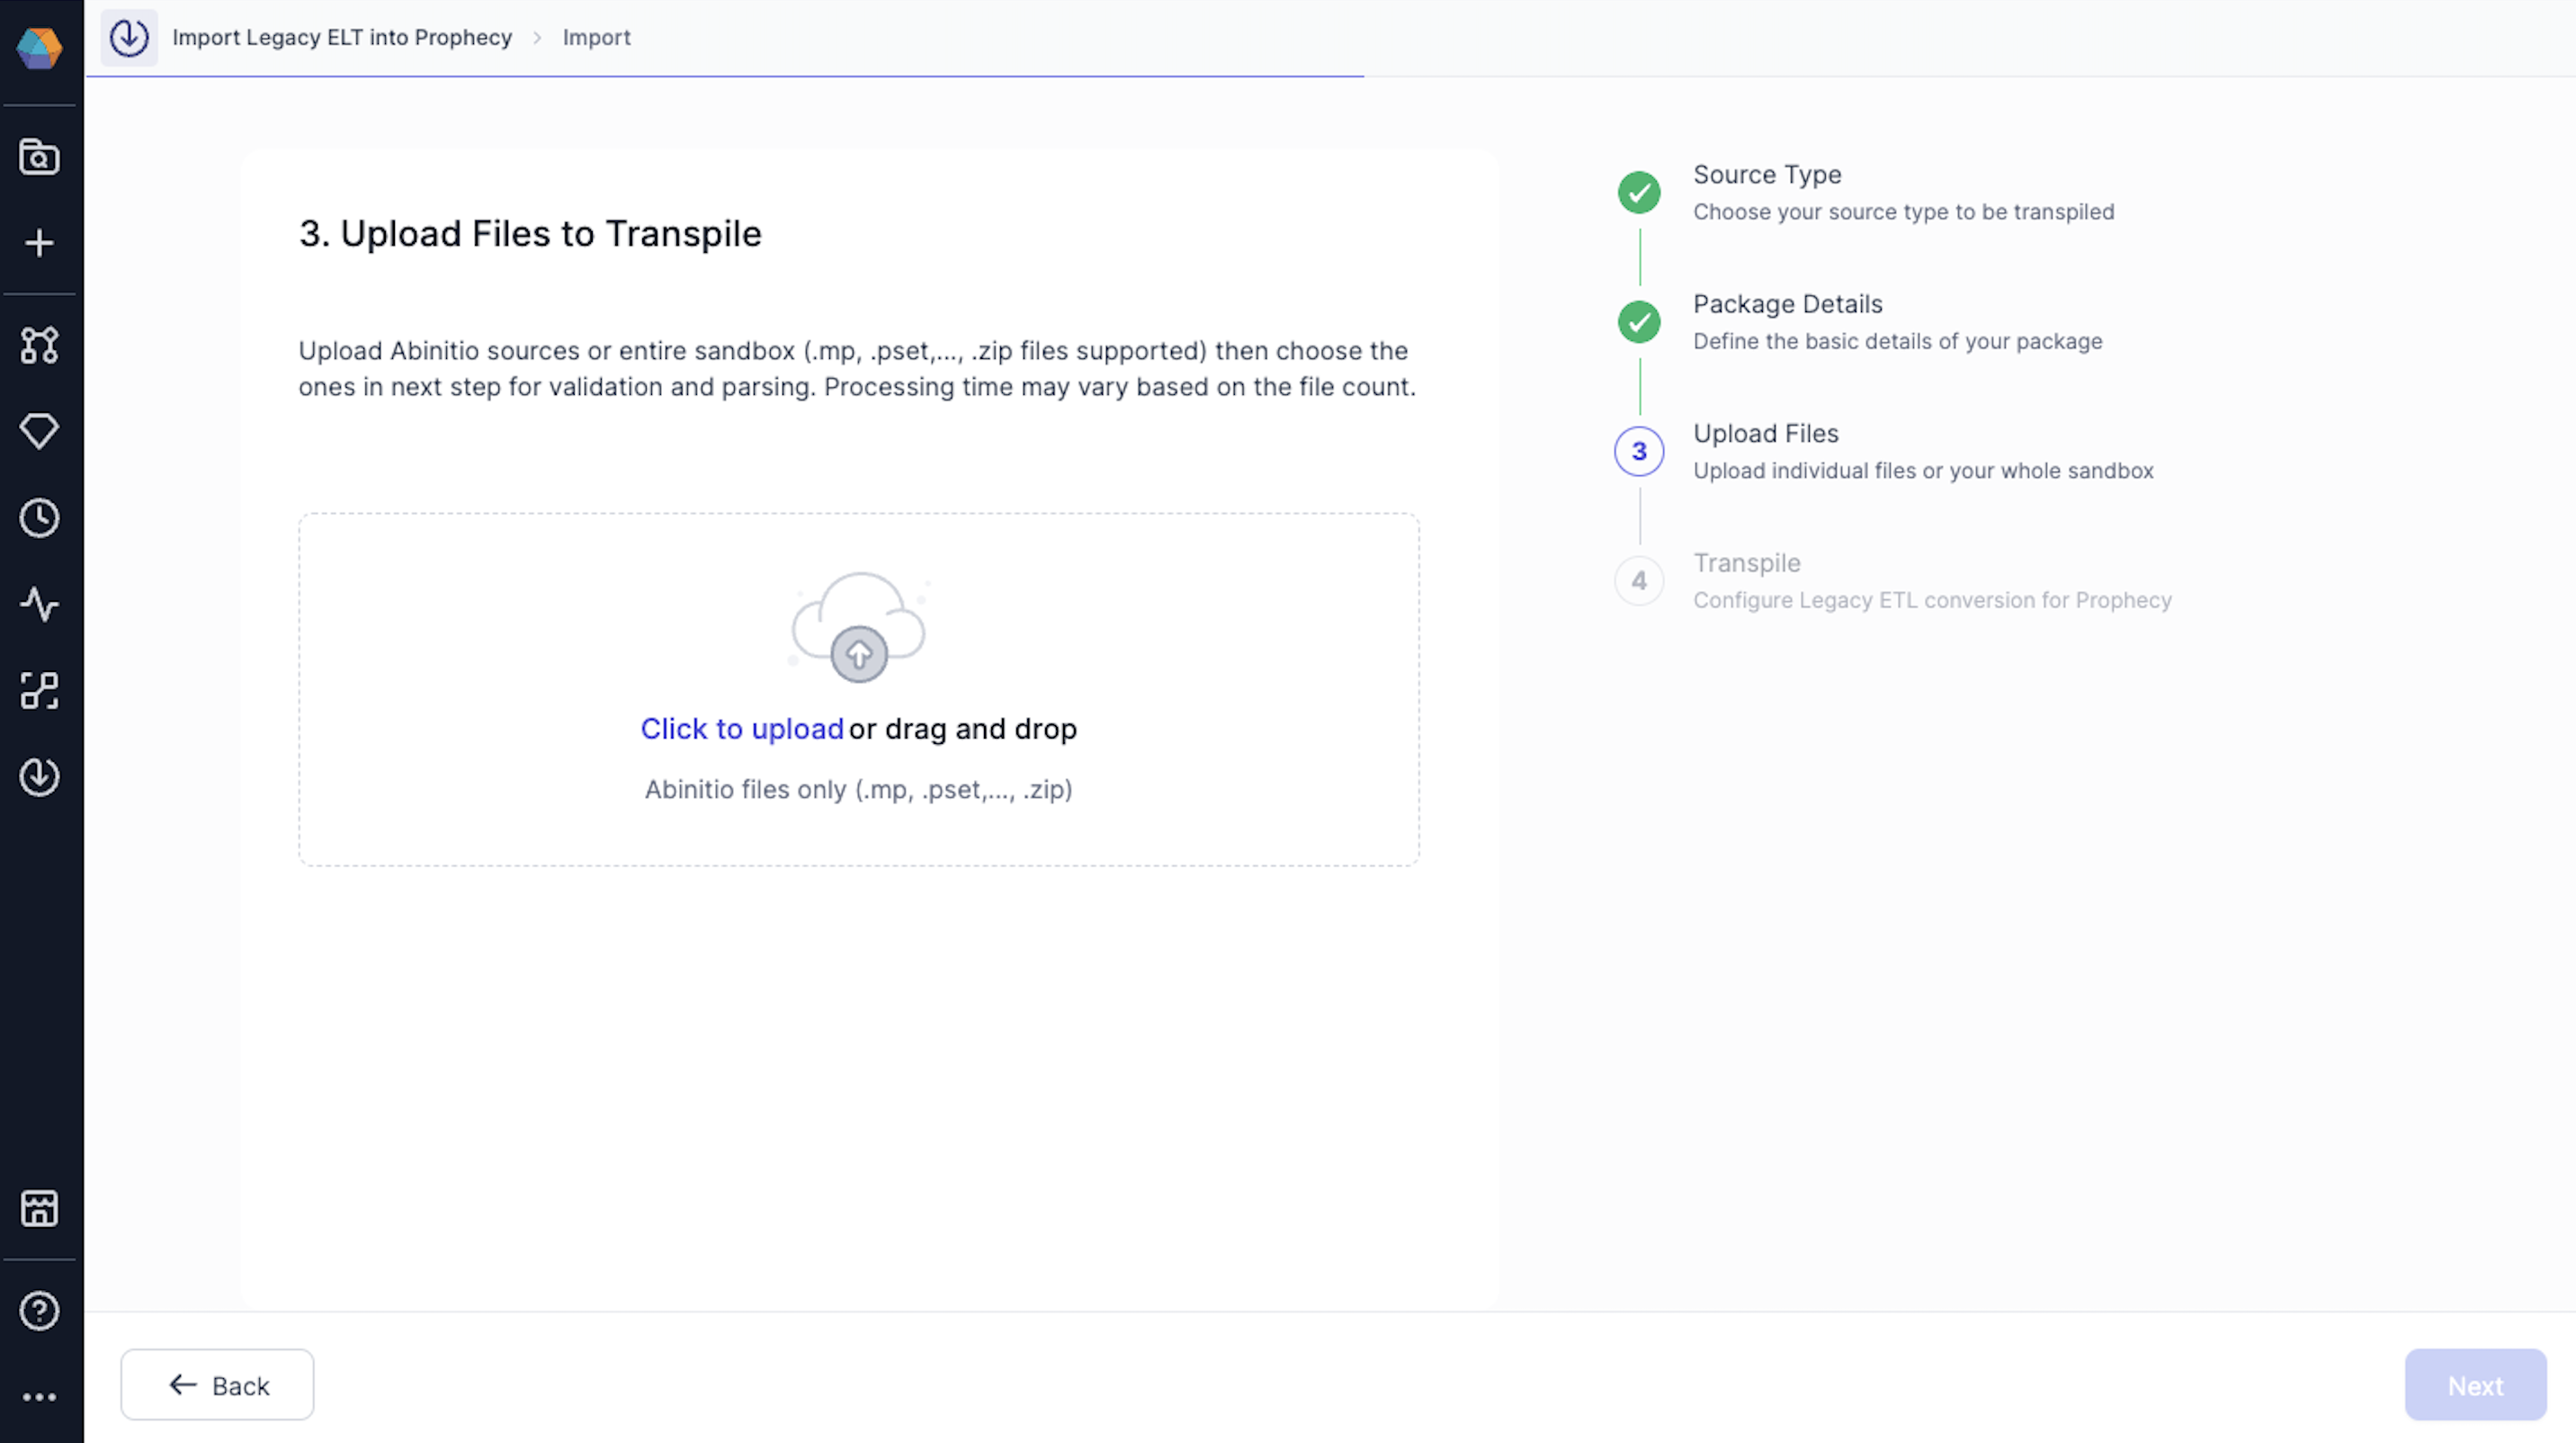
2.3 Upload Artifacts
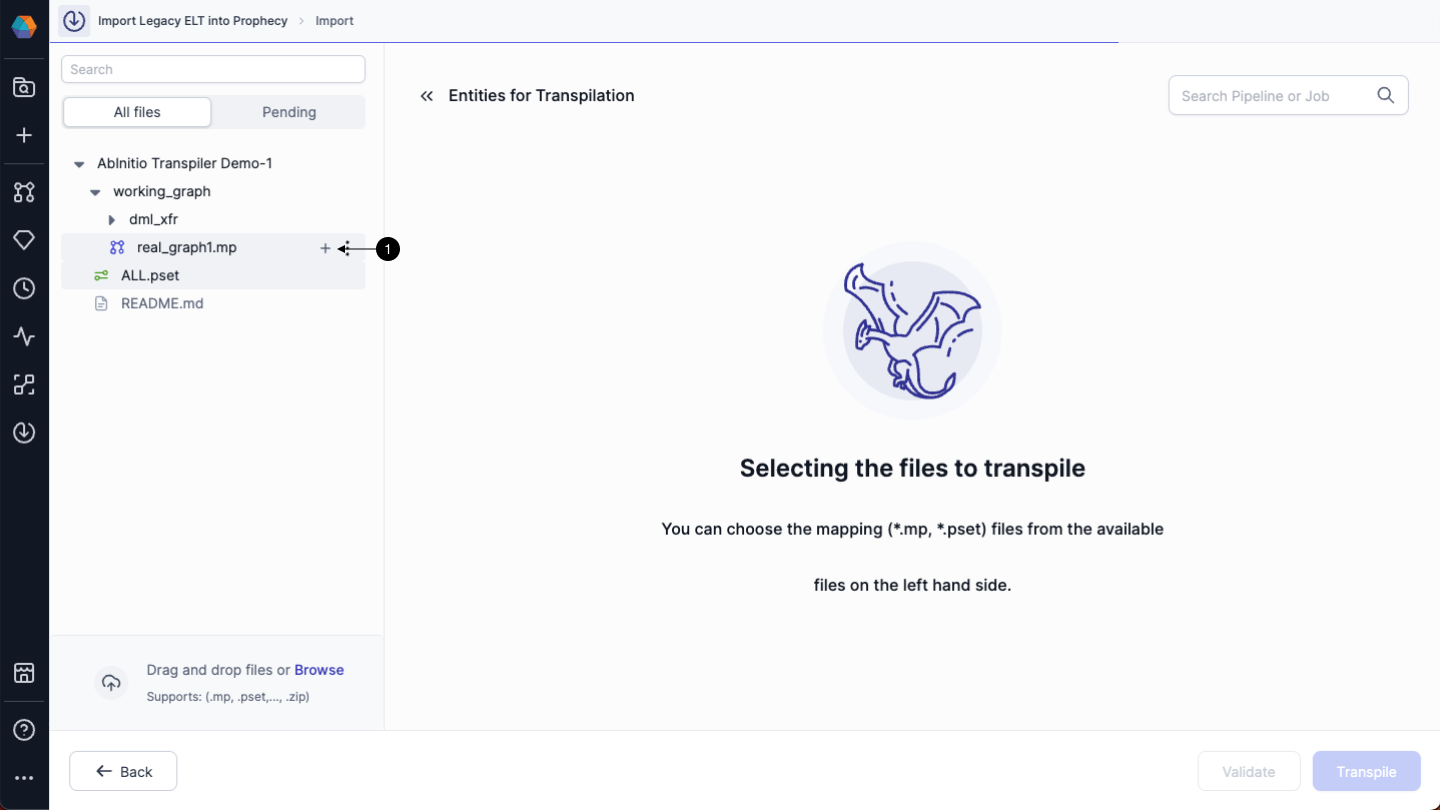
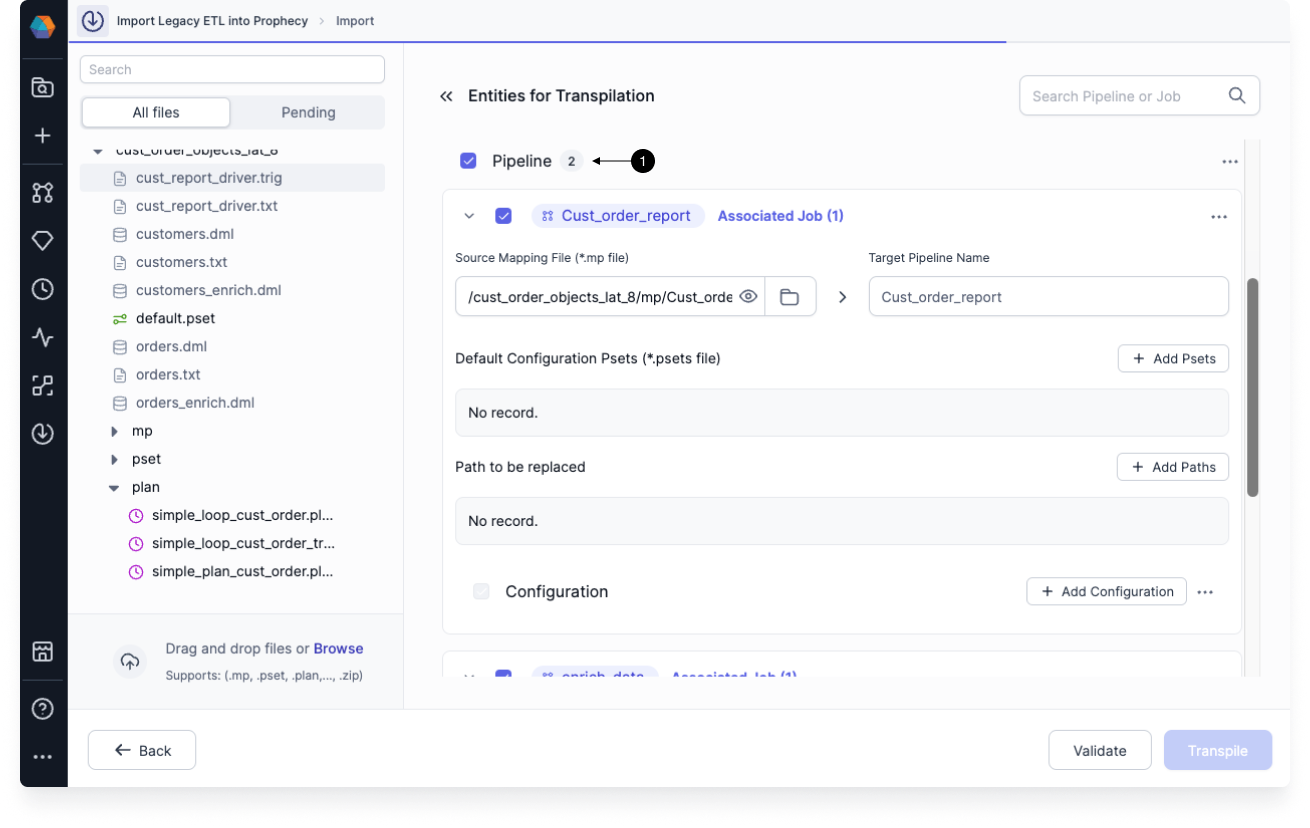
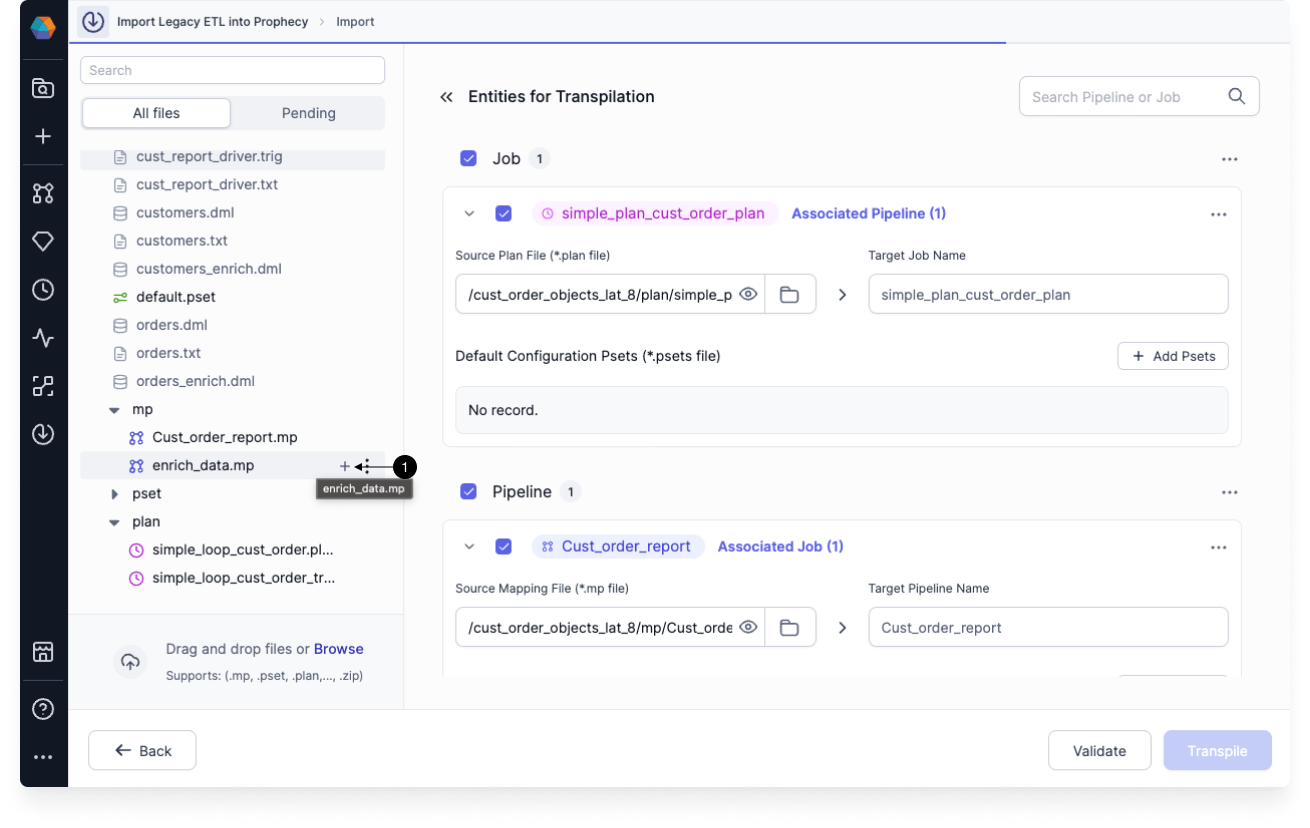
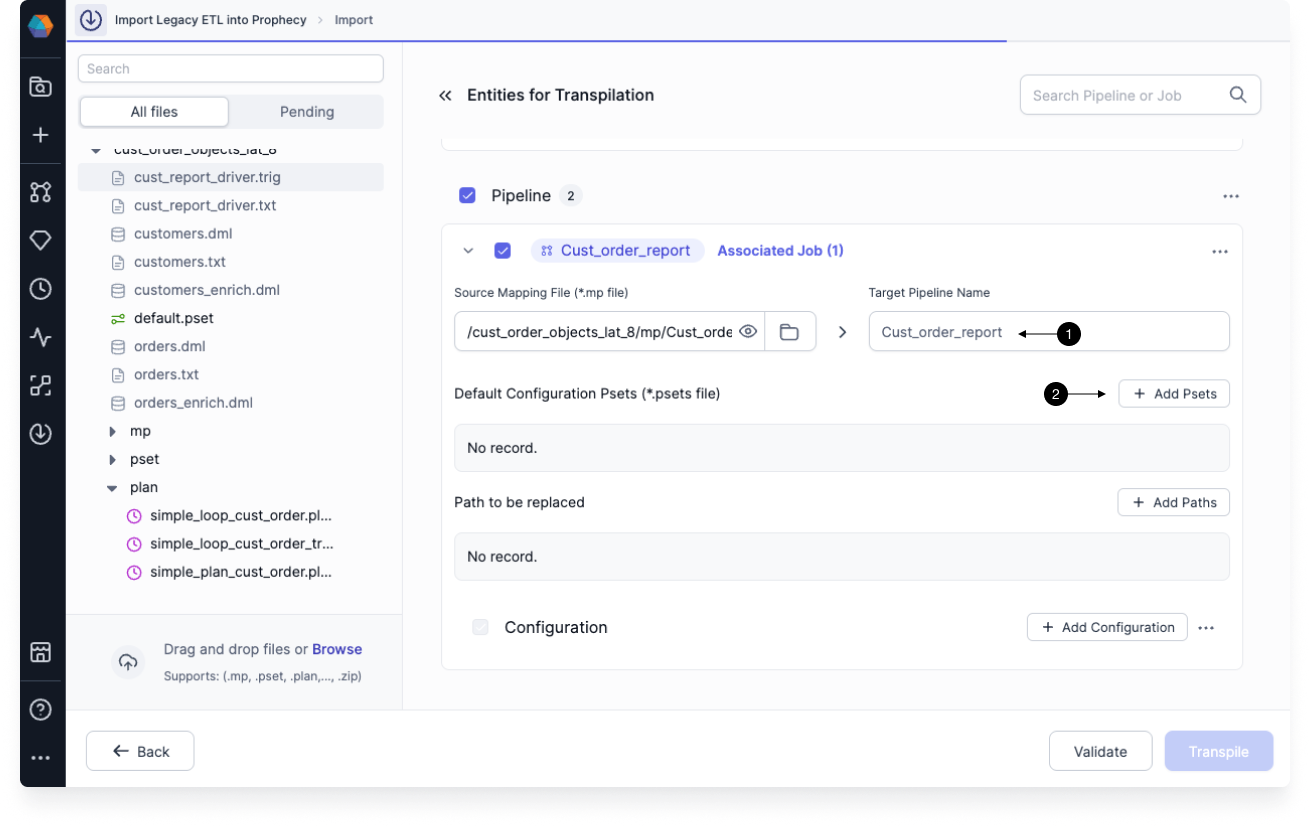
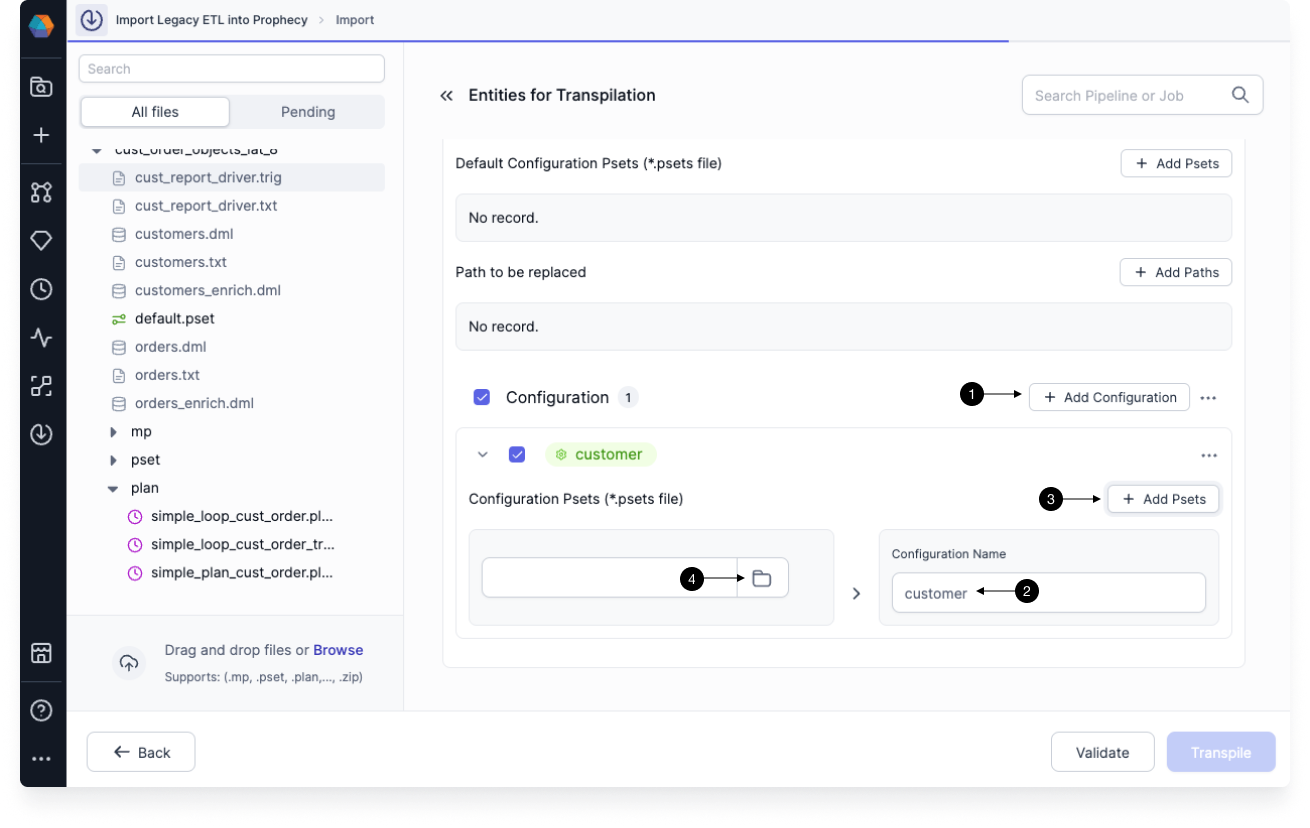
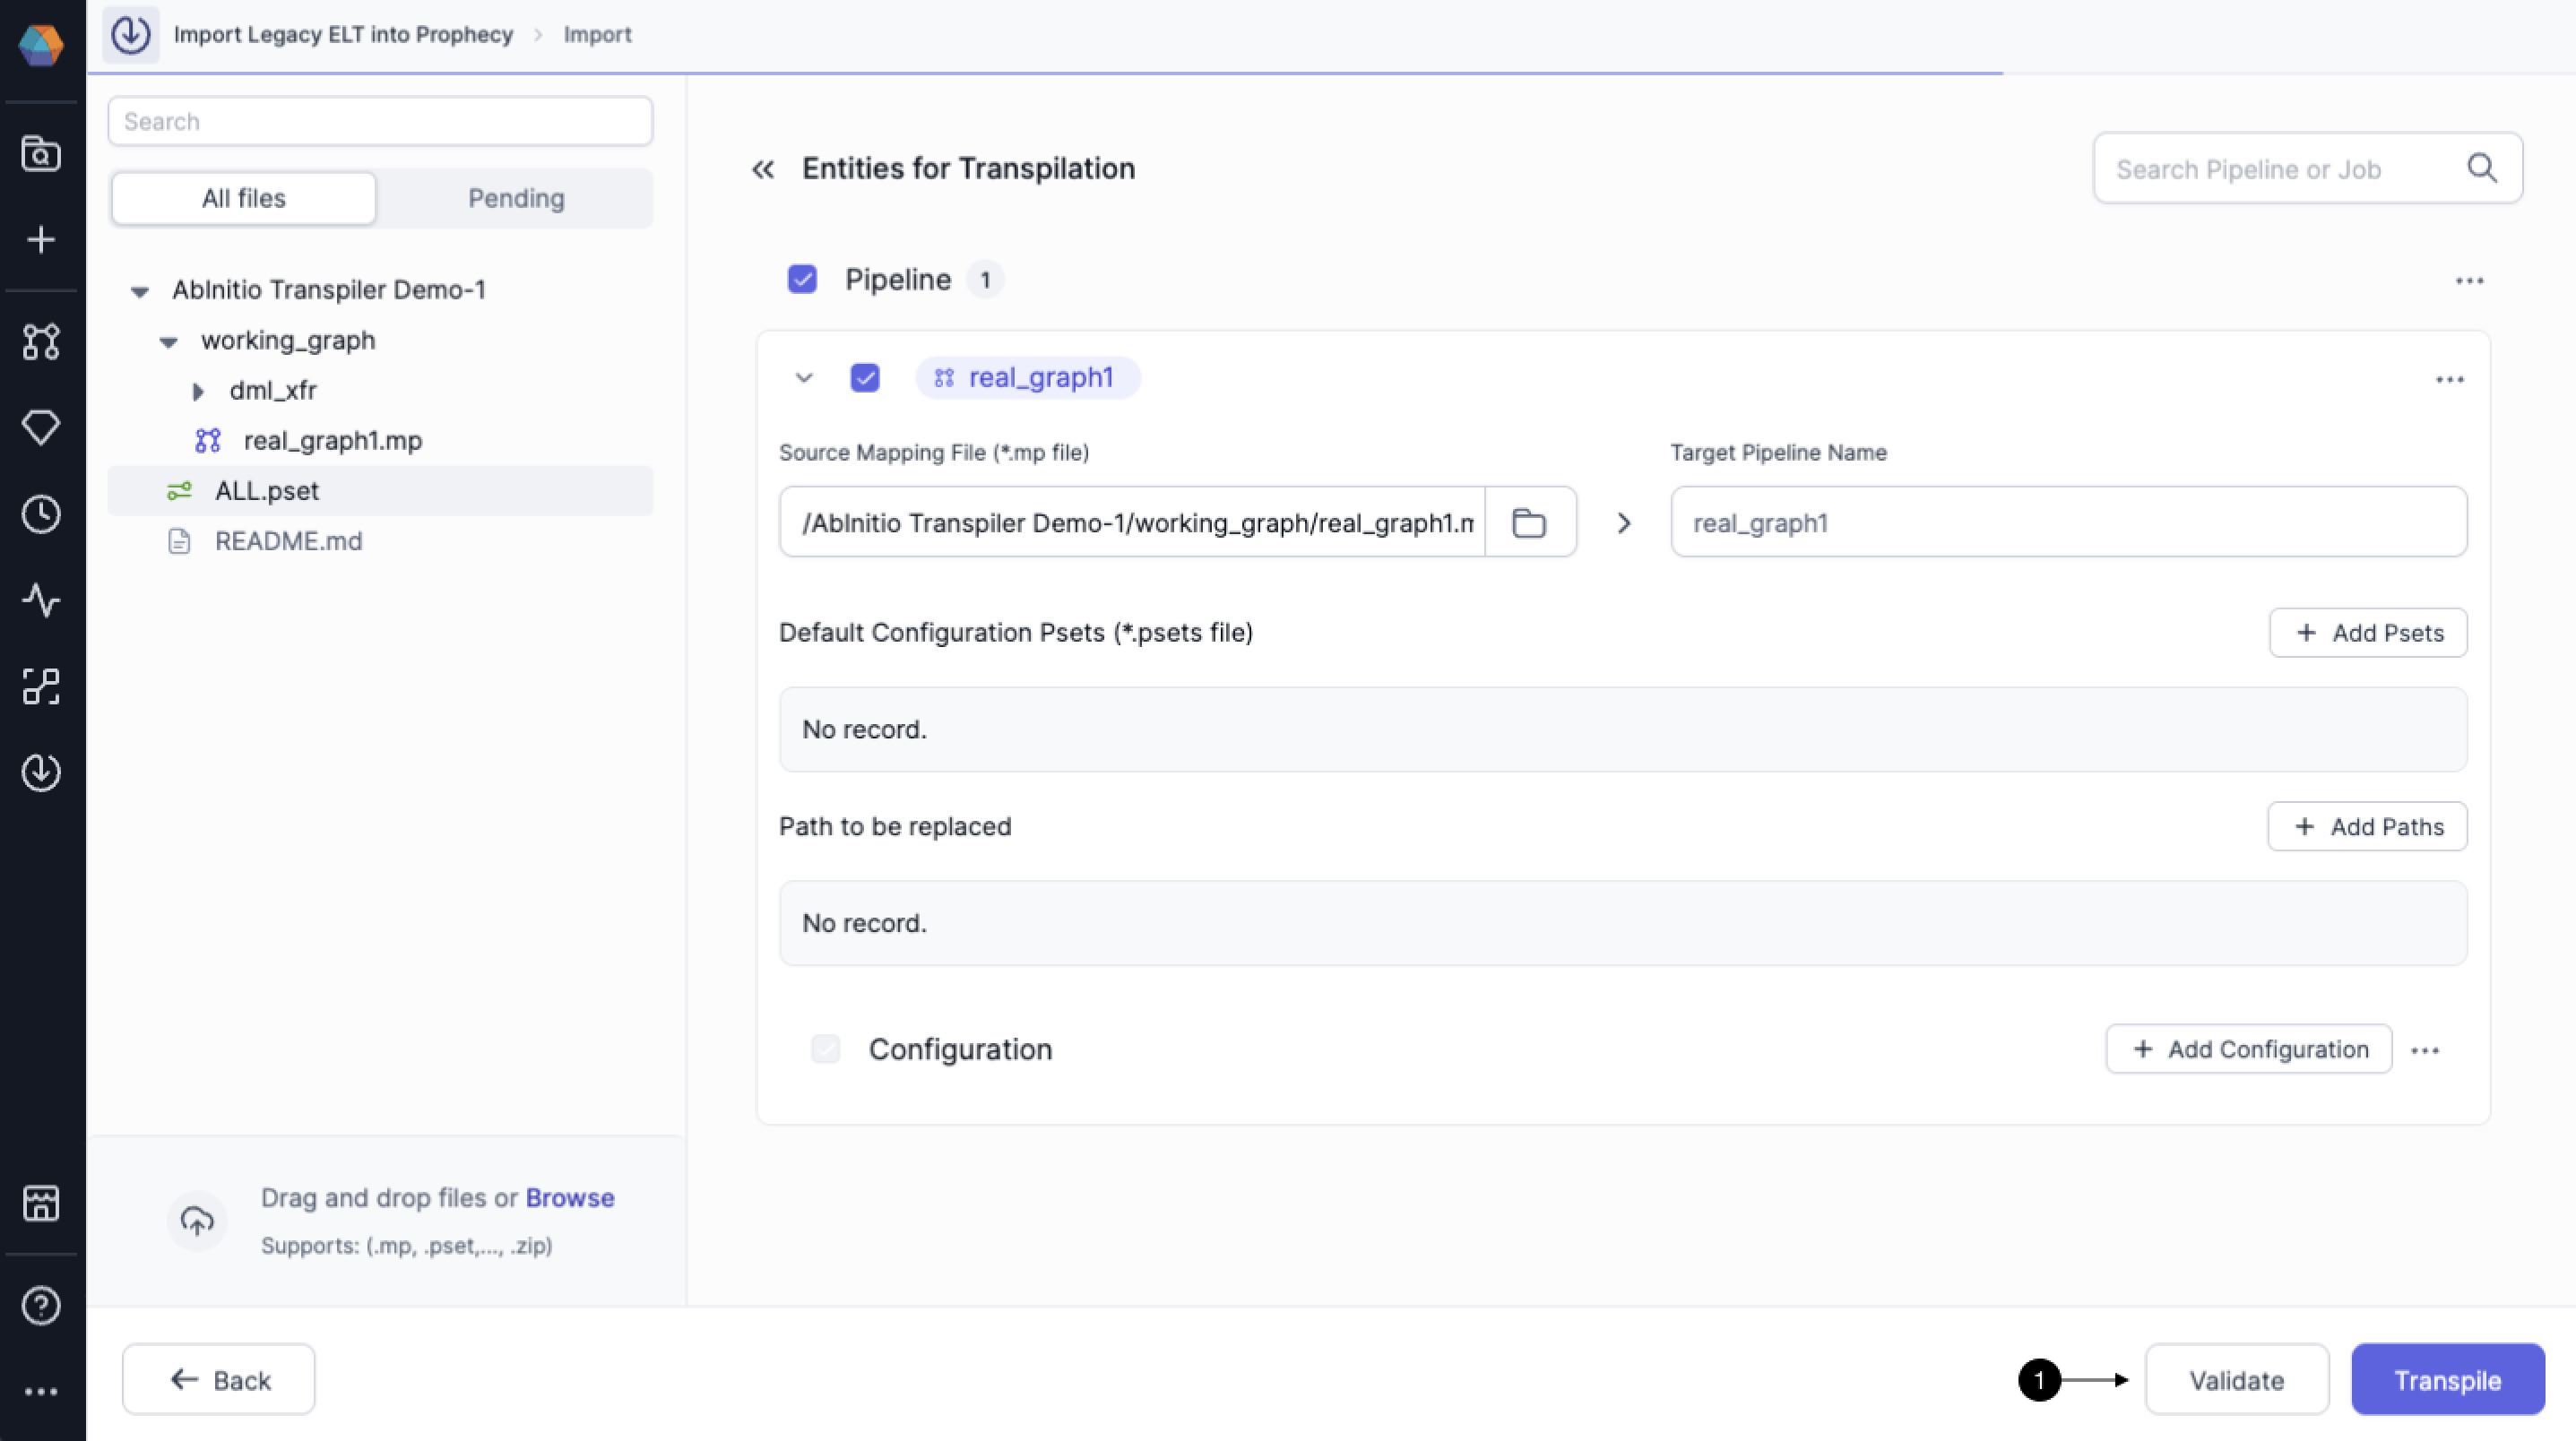
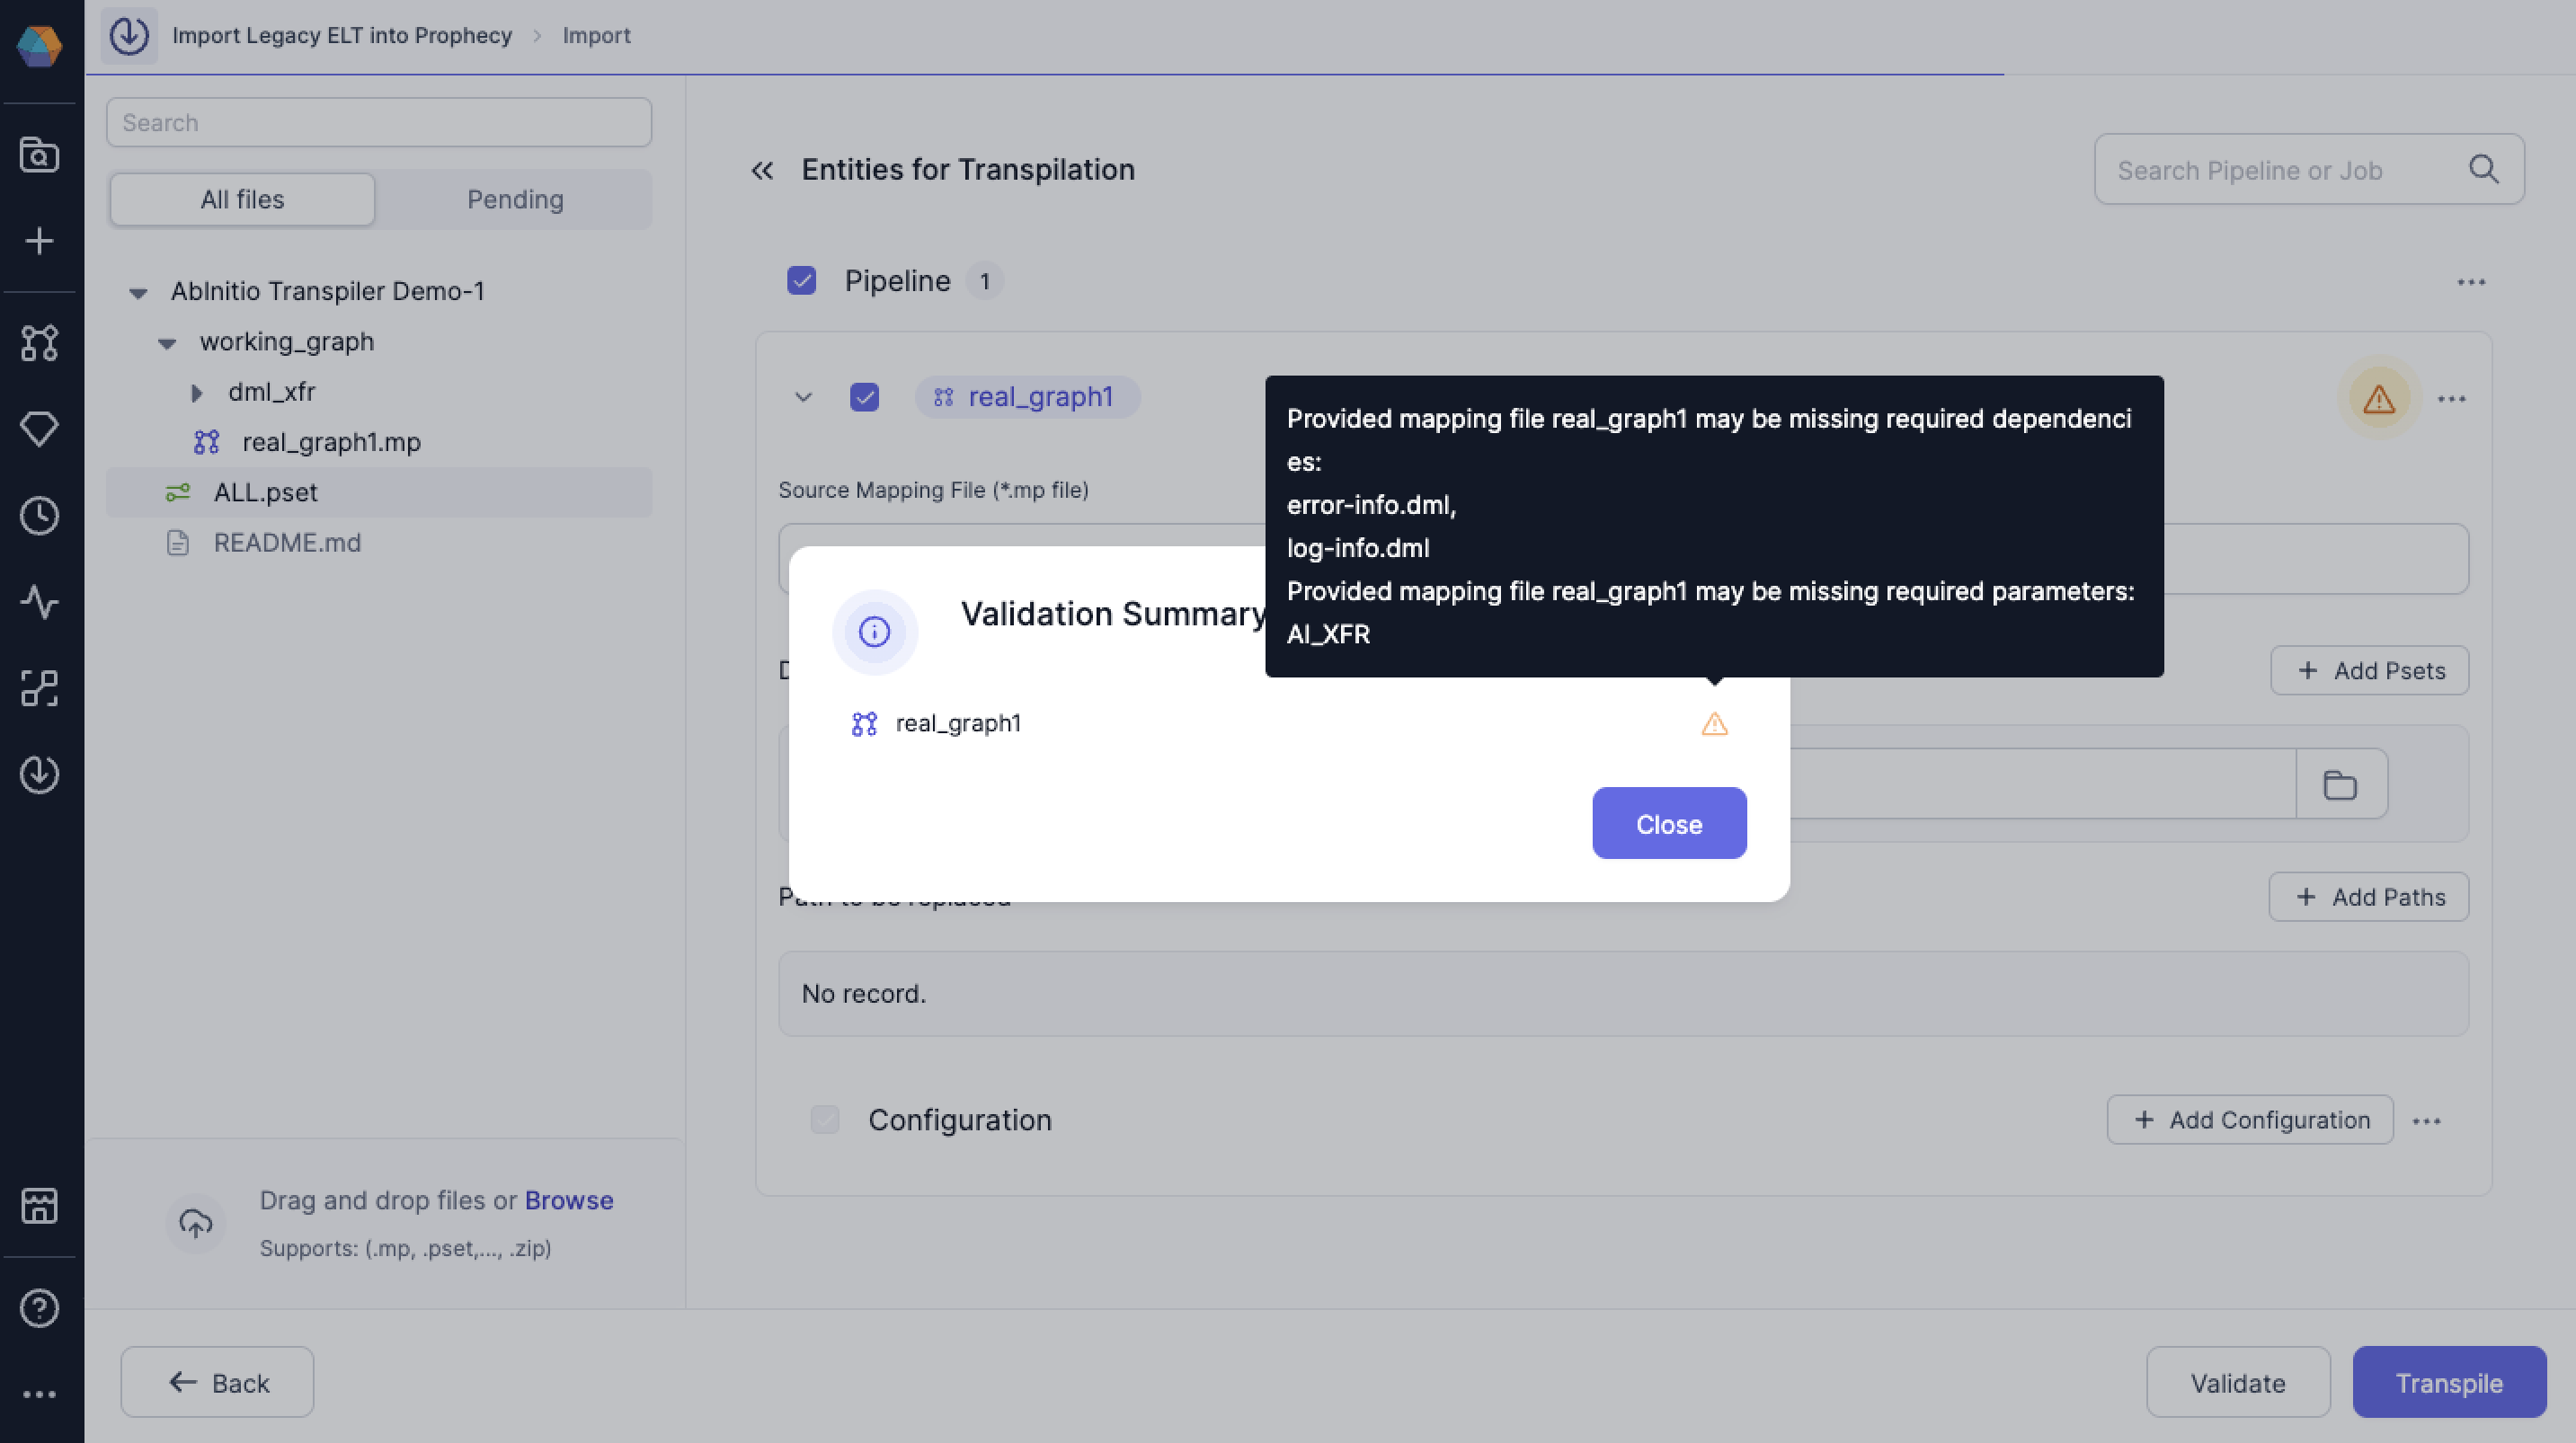
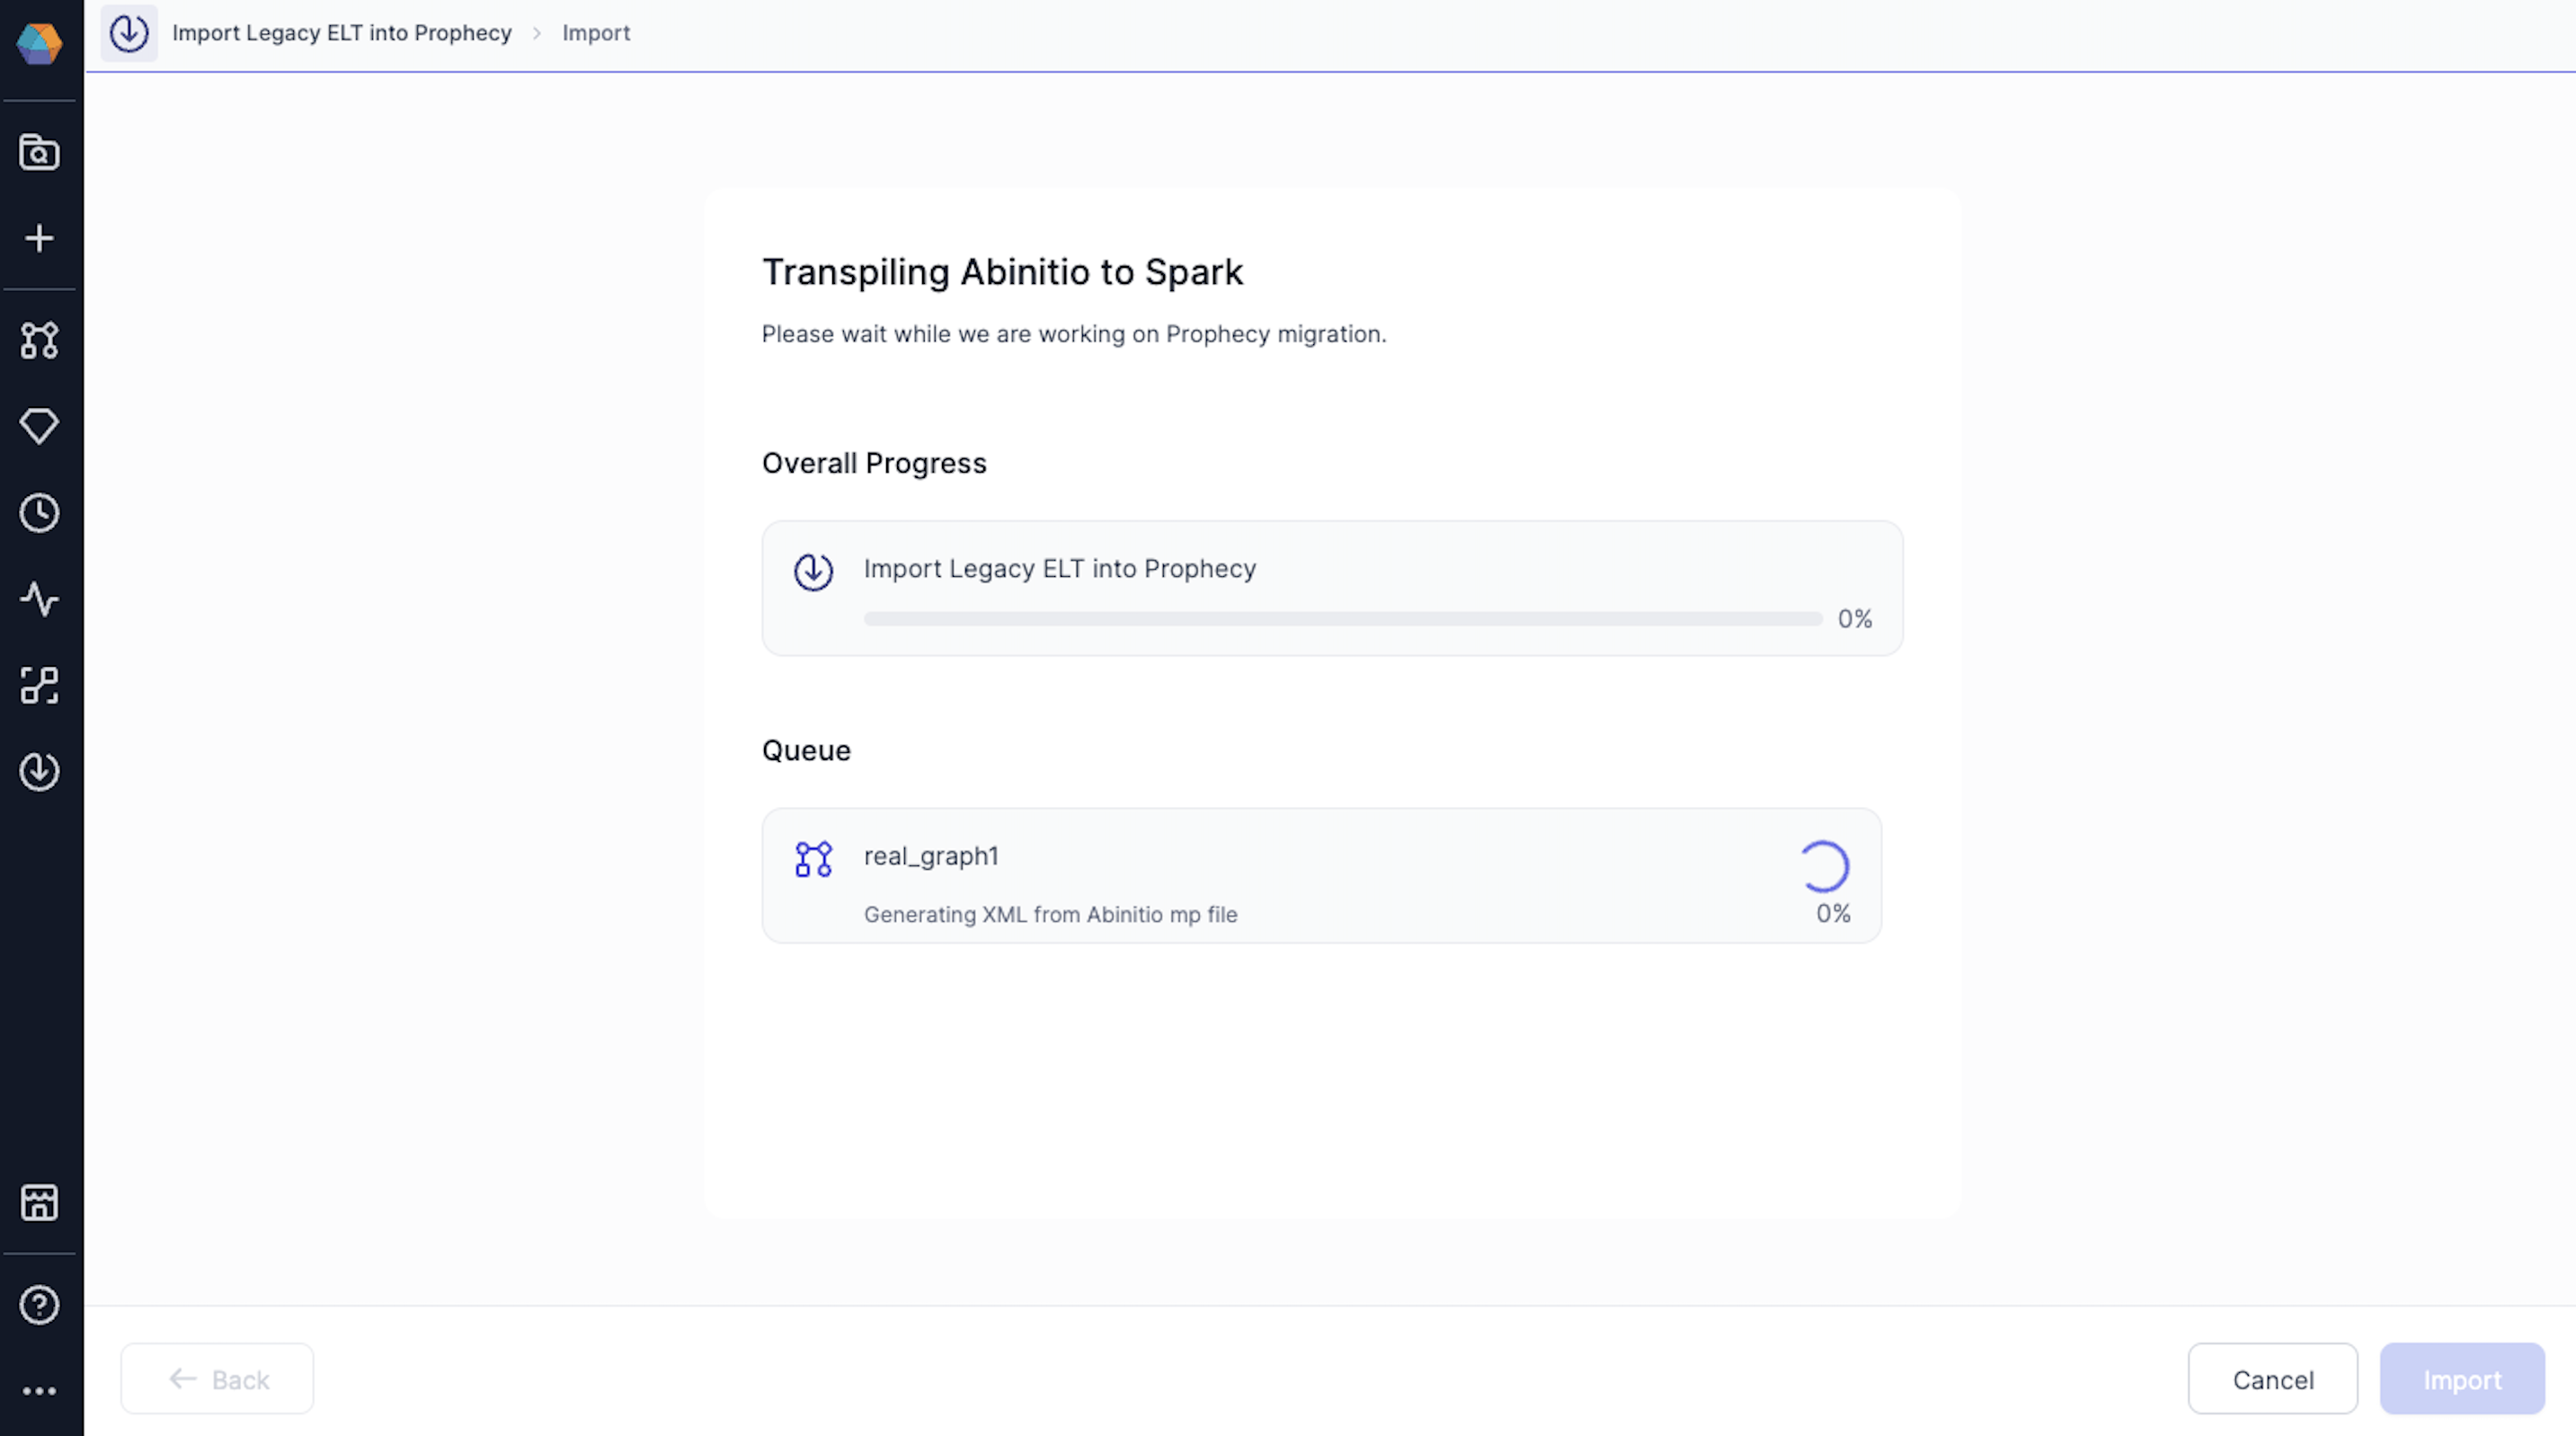
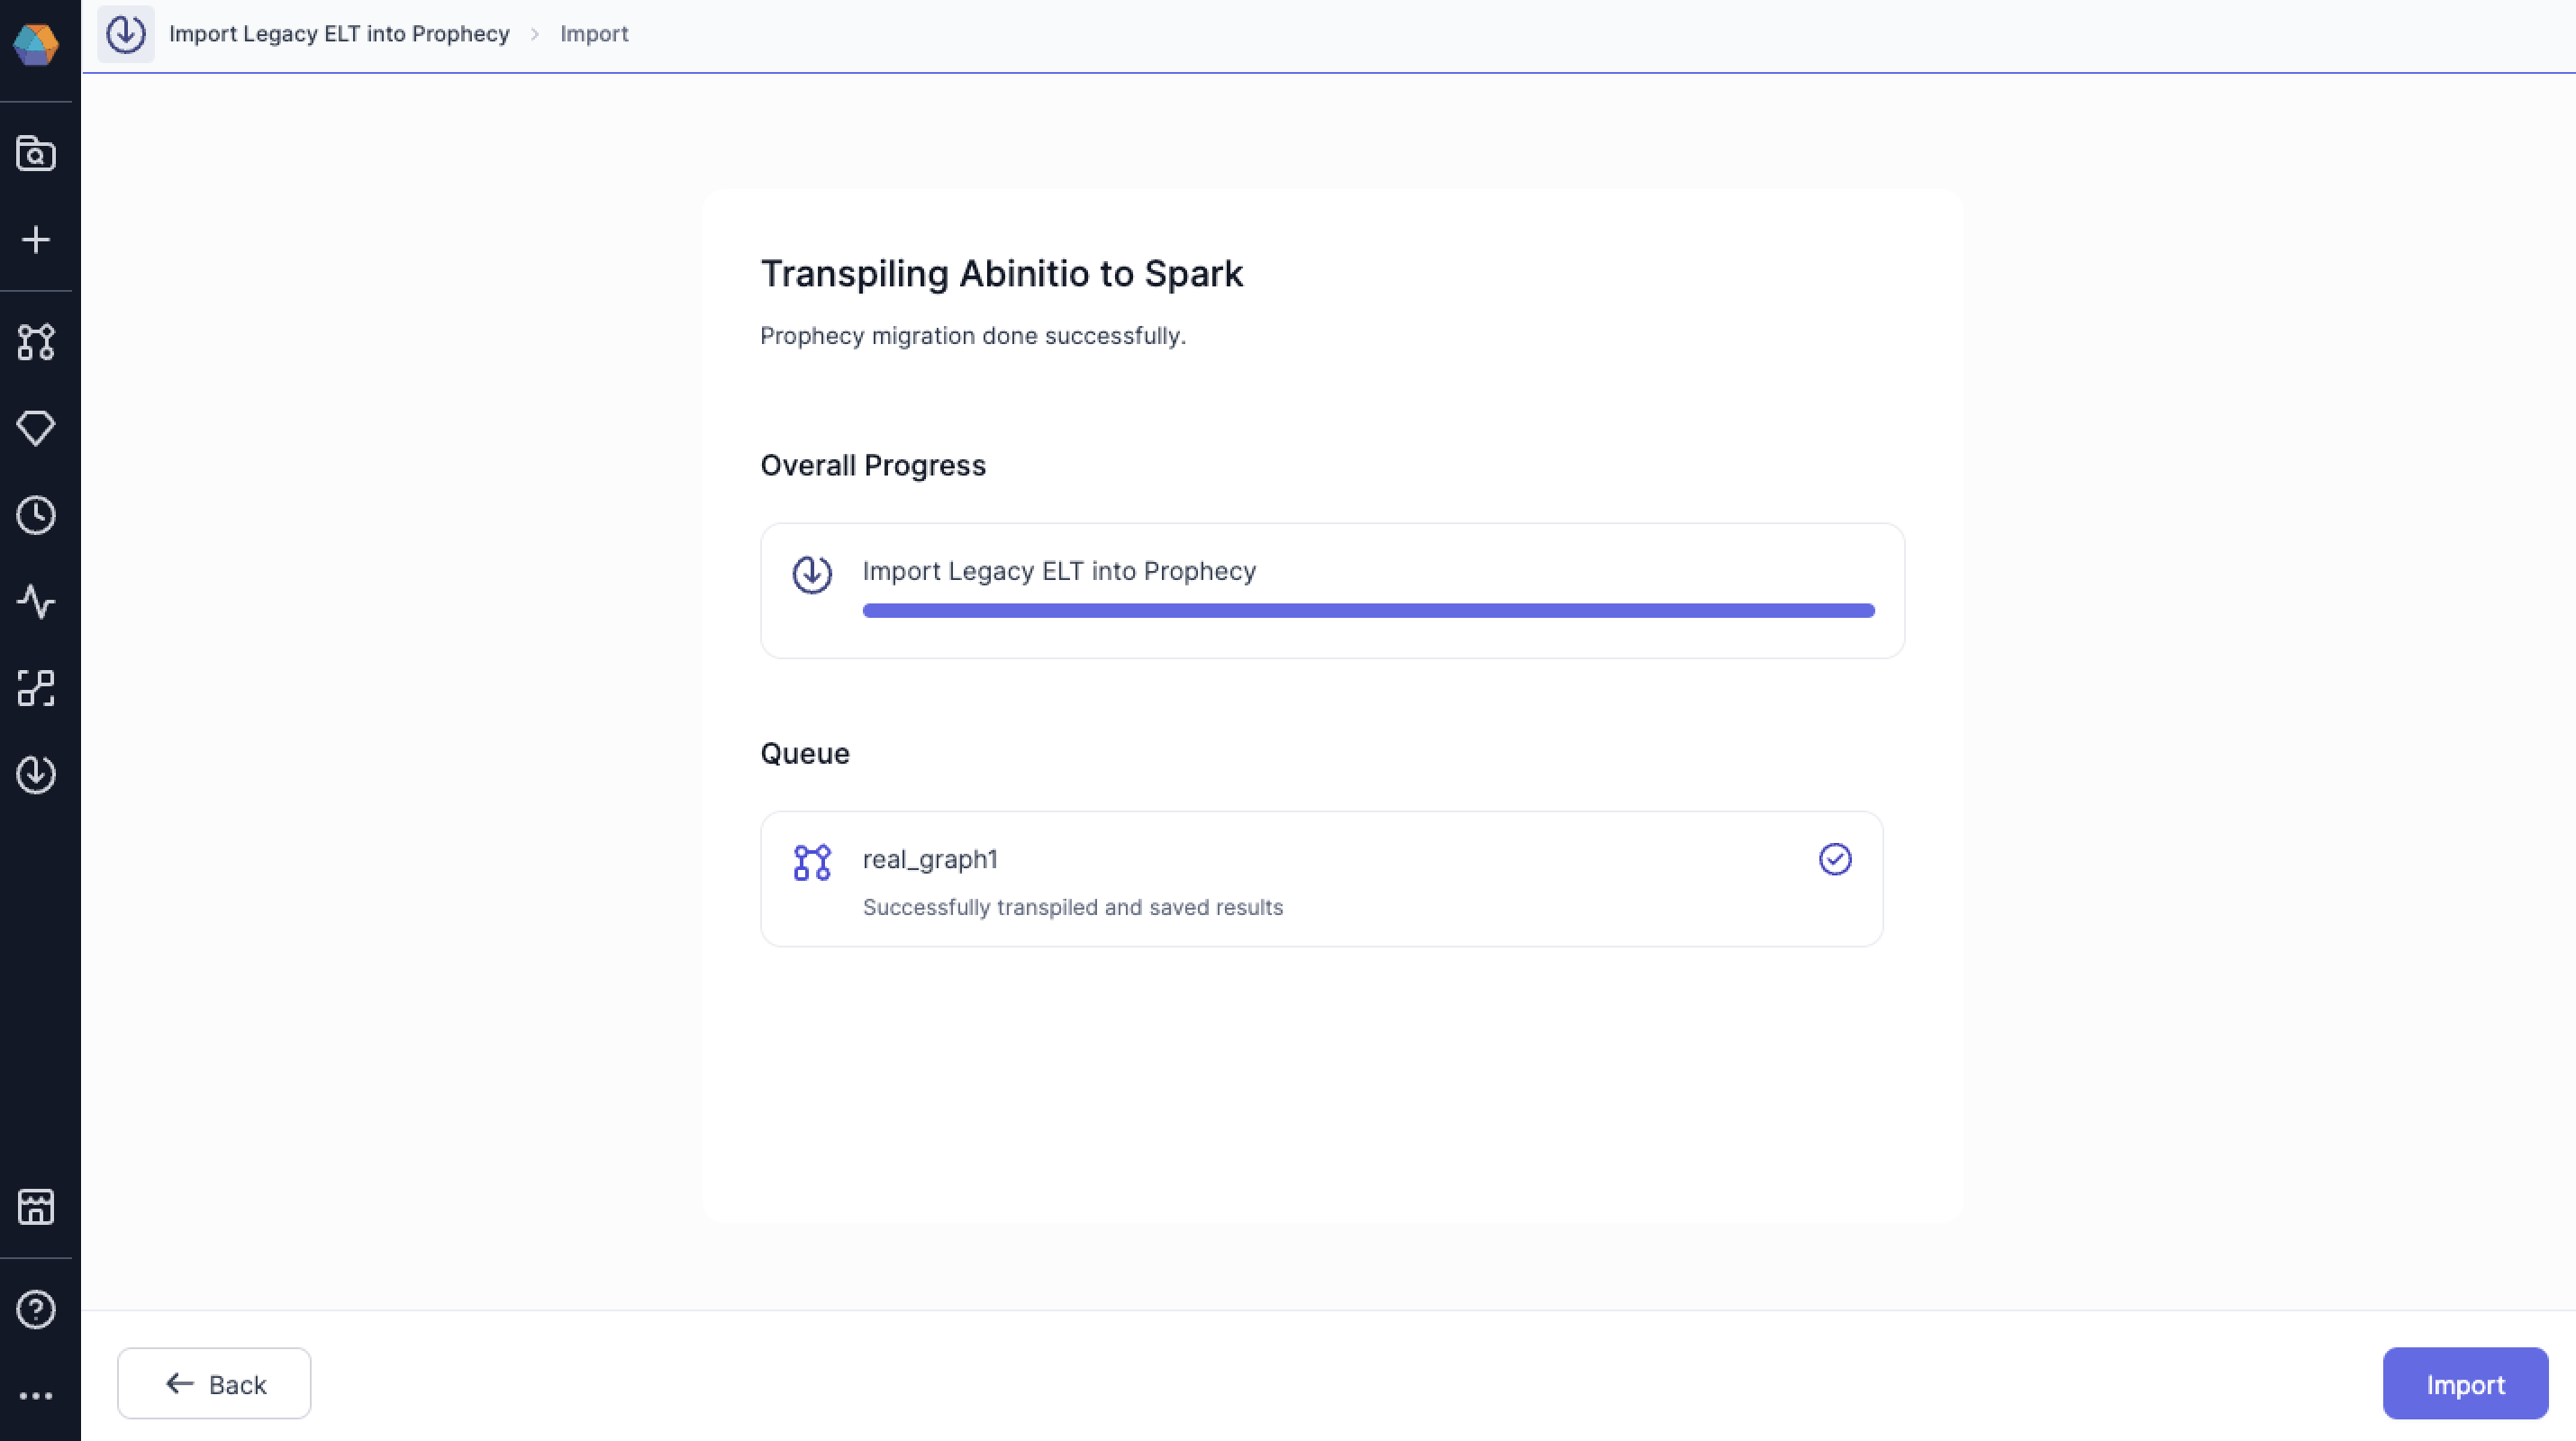
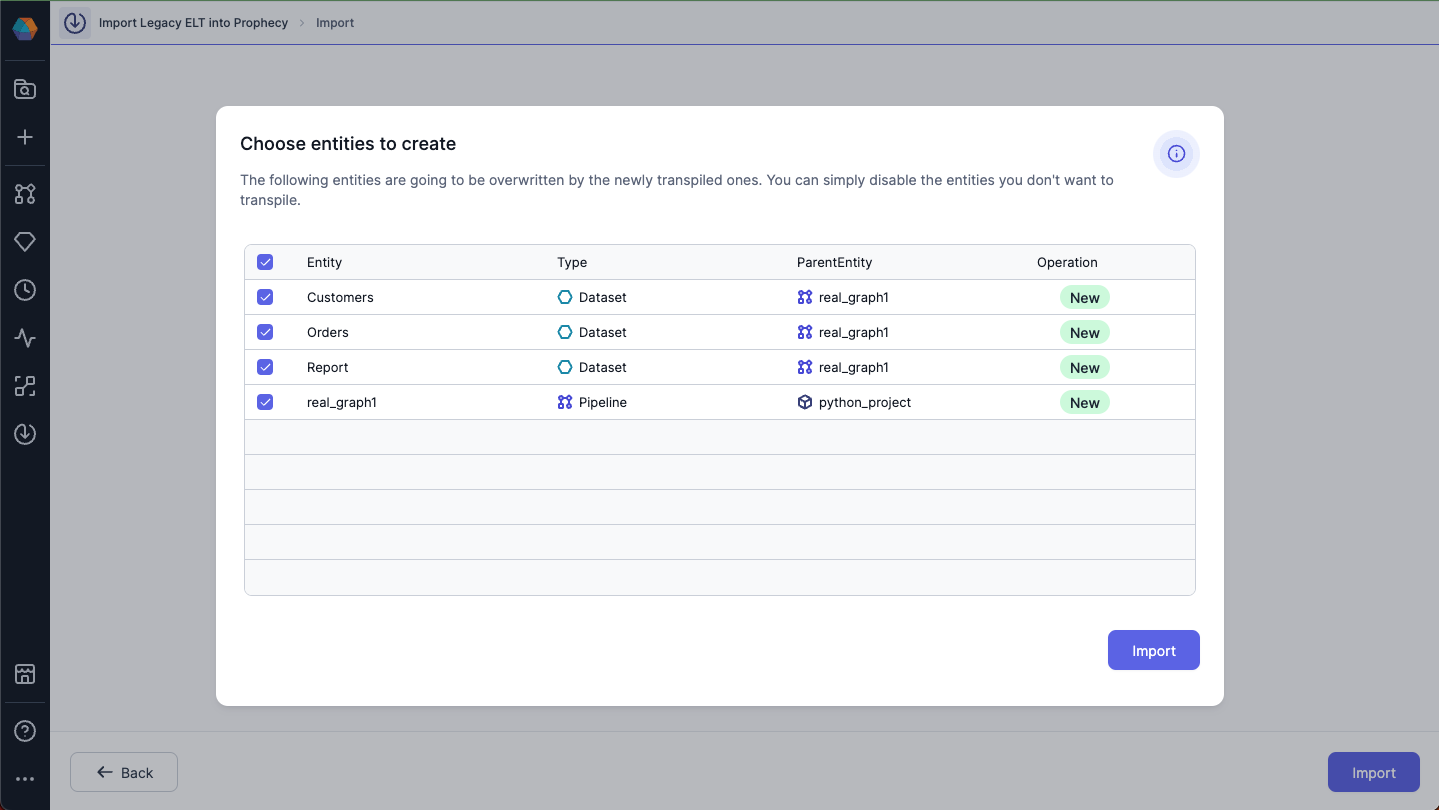
3. Validate and Transpile
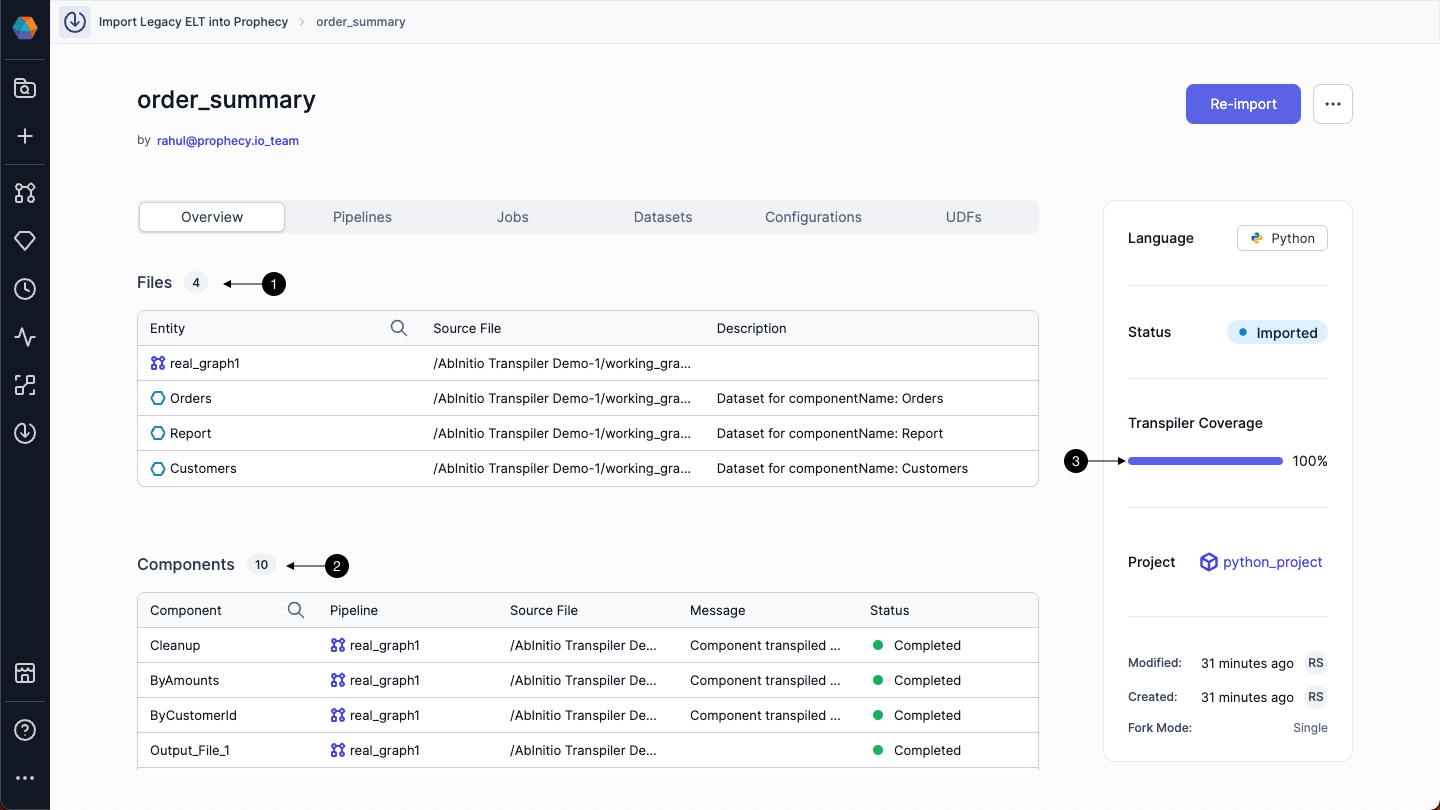
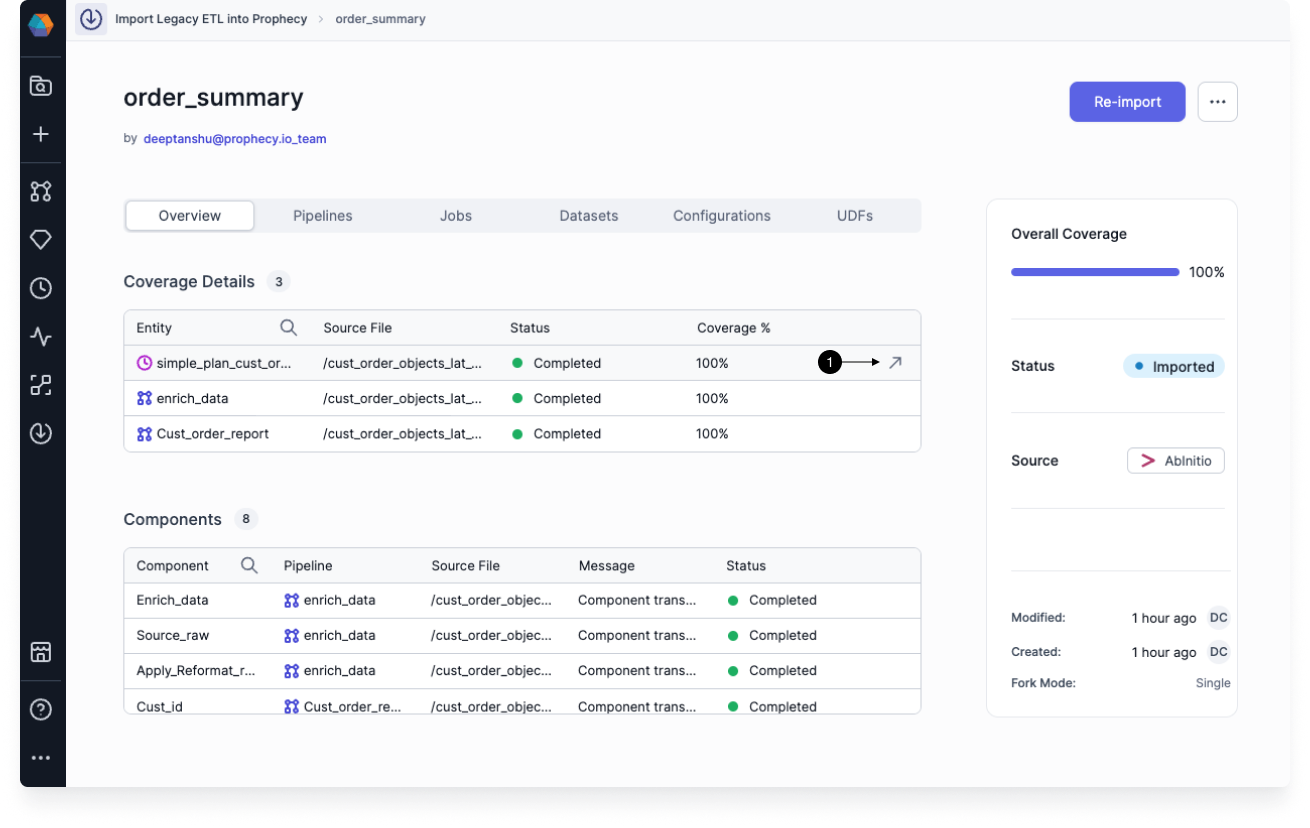
4. Bundle Overview
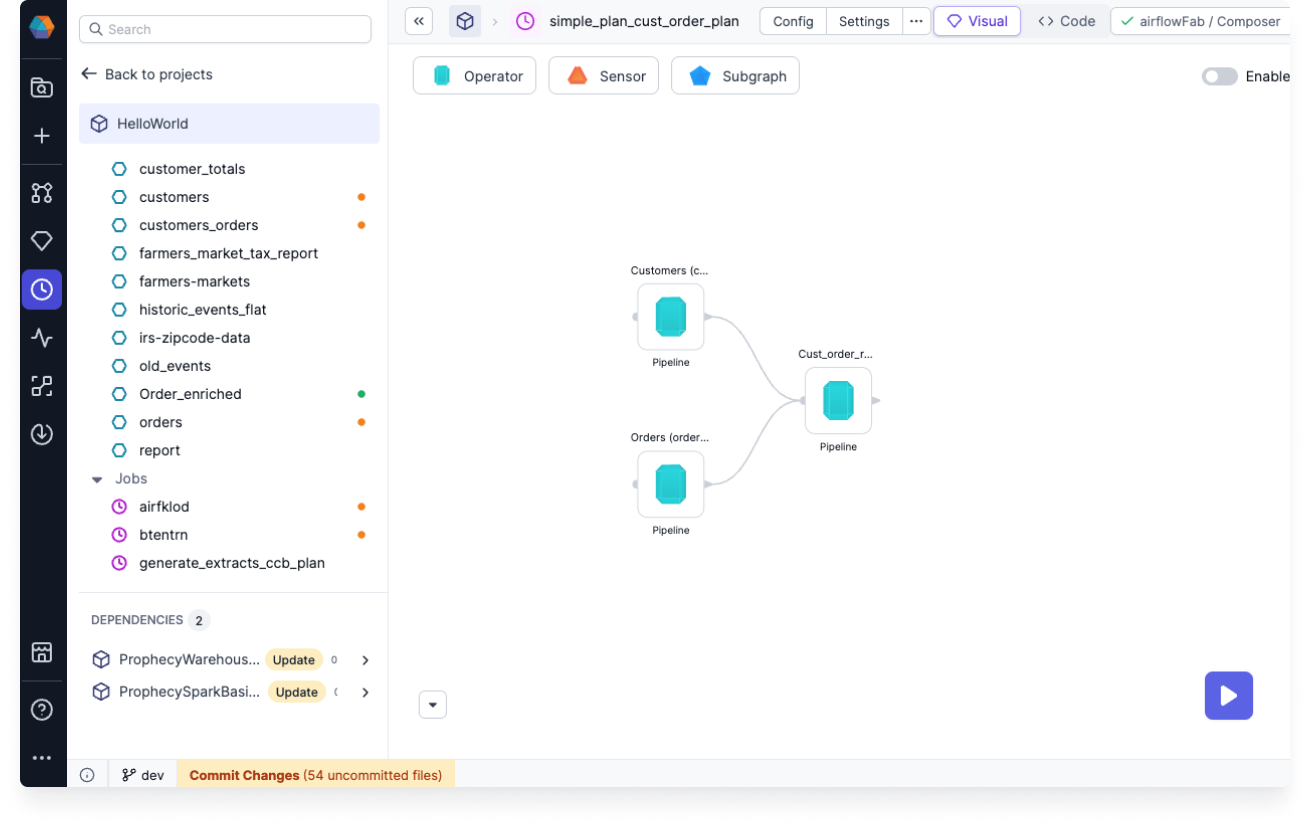
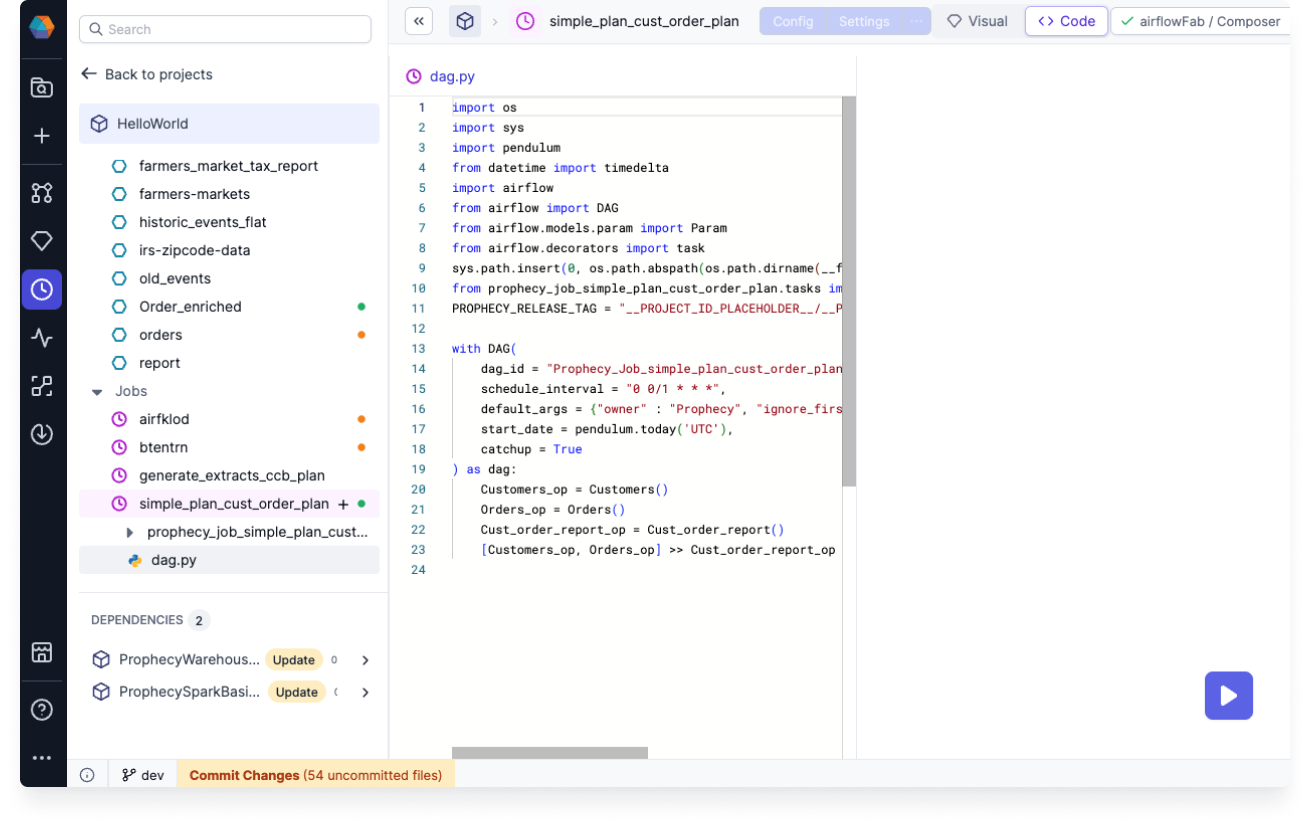
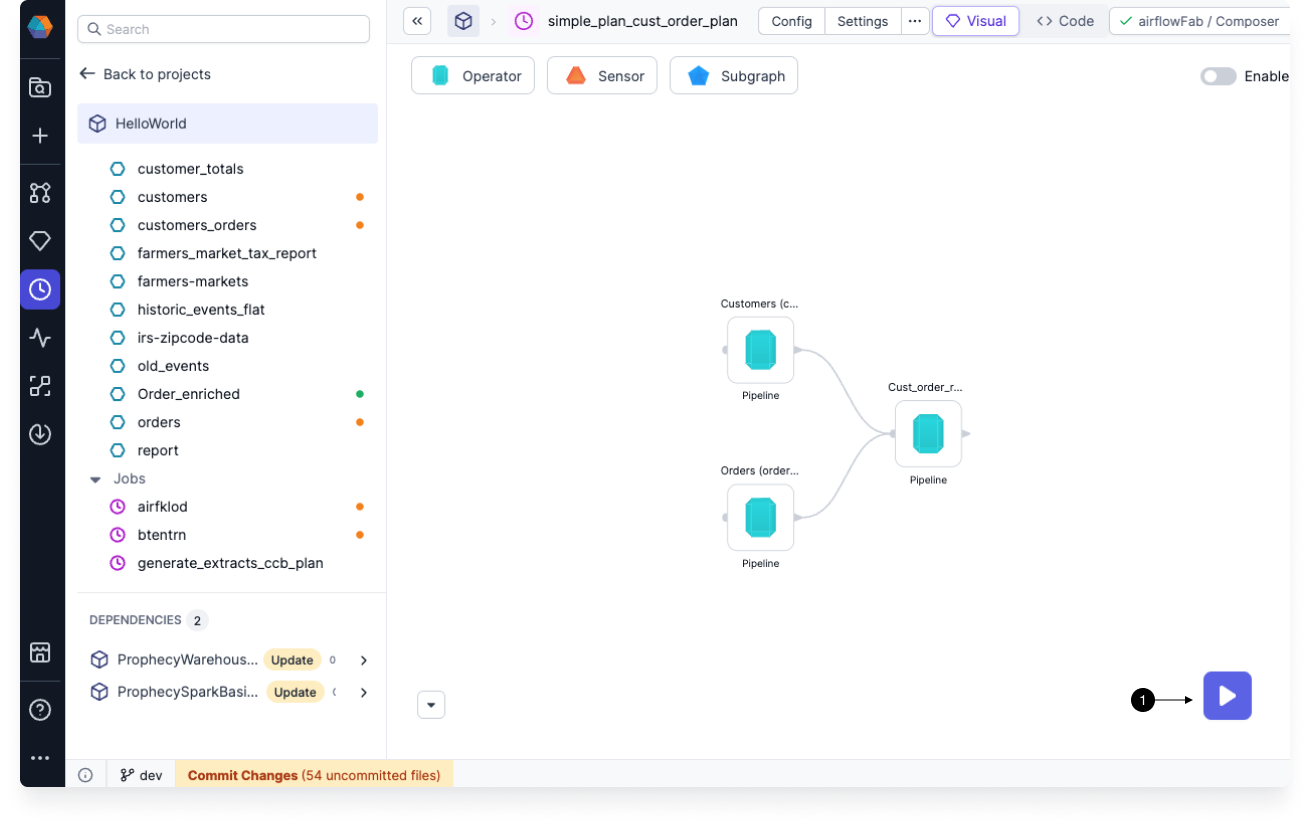
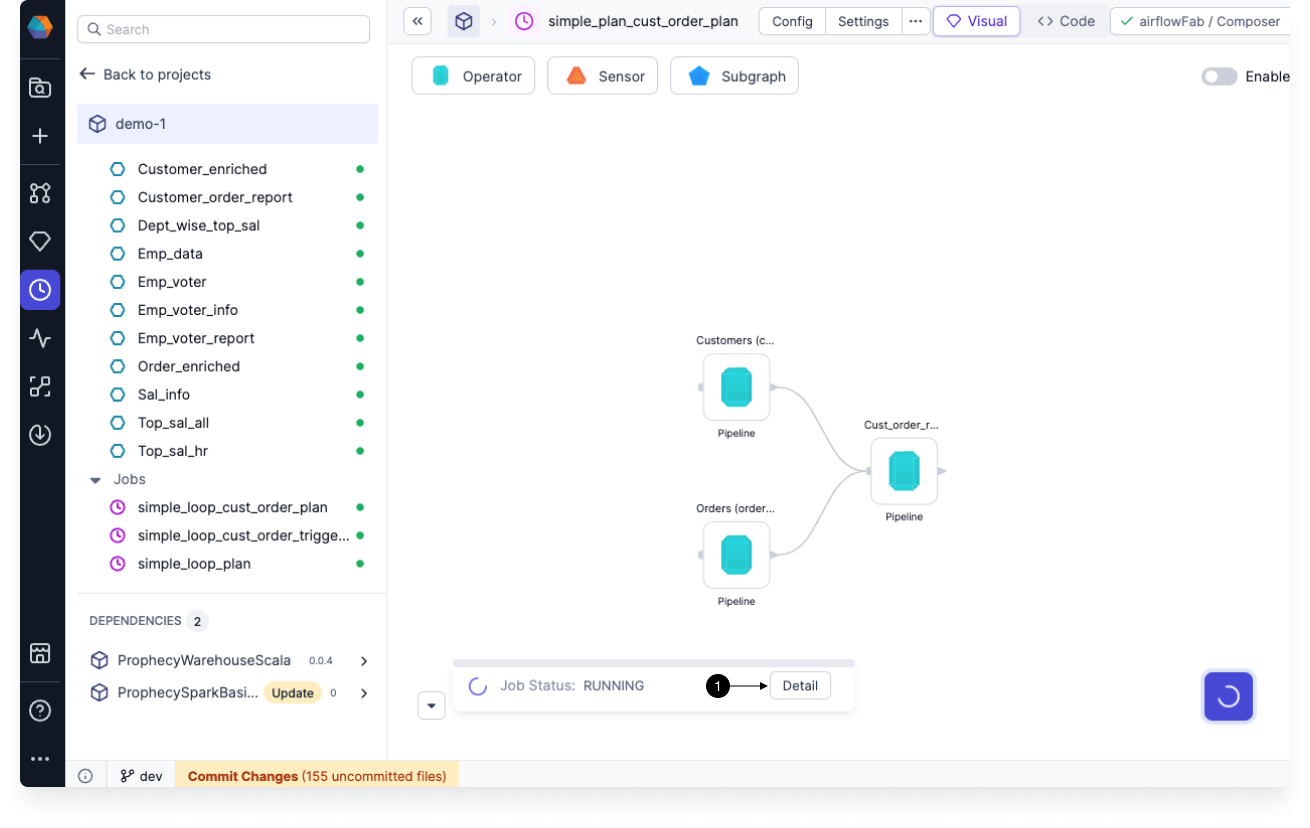
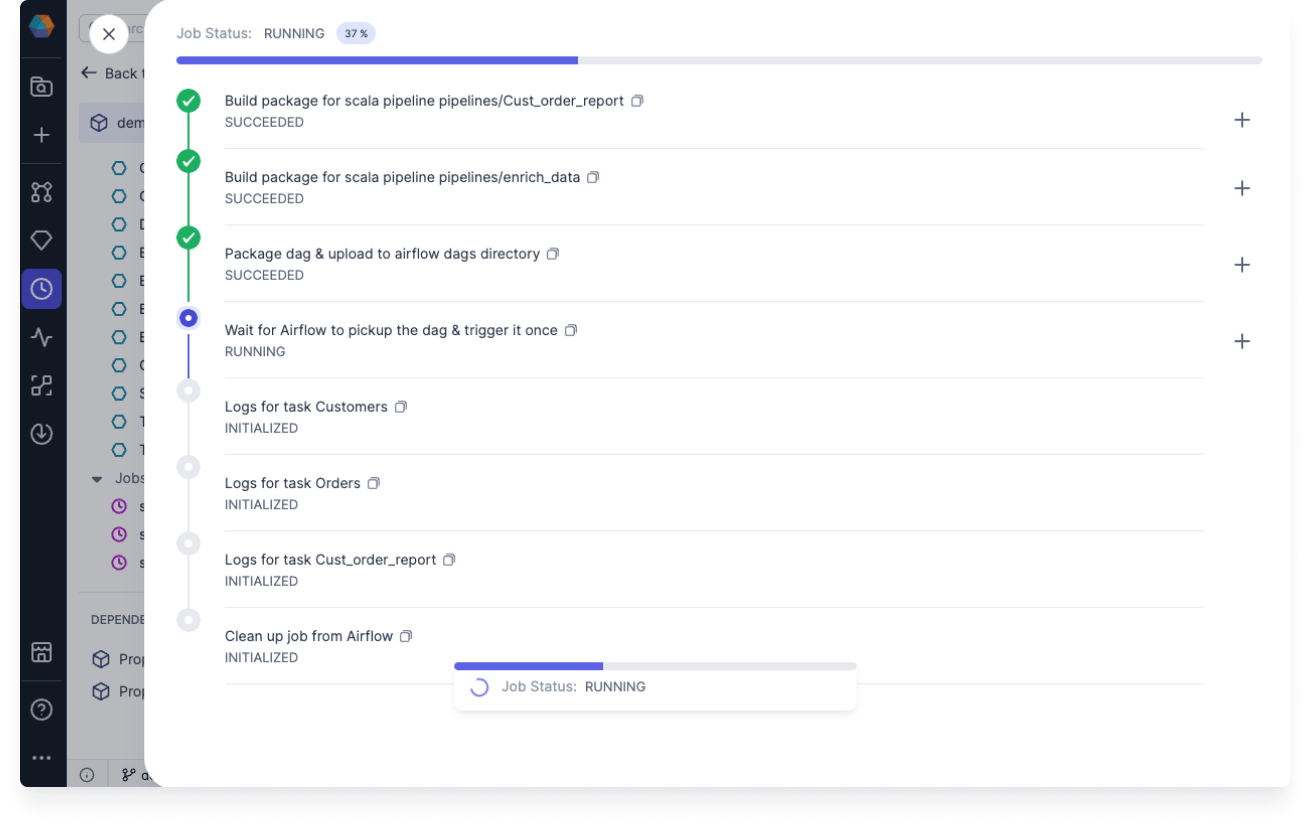
5. Run Job