Dependencies & cluster requirements
Dependencies & cluster requirements
Dependencies:
- ProphecySparkBasicPython 0.1.4+
- ProphecyLibsPython 1.8.4+
- ProphecyLibsScala 7.1.66+
- UC dedicated clusters 14.3+ supported
- UC standard clusters 14.3+ supported
- Livy clusters 3.0.1+ supported
Creating a TableIterator gem
First add the Input gem on which you want to Iterate over. For this, simply use an existing dataset or create a new Source gem pointing to your Metadata table. You can run this Source gem to see the data your loop would be running for. Now, Drag and Drop the (1) TableIterator gem from the Subgraph menu, and connect it to the above created Source gem.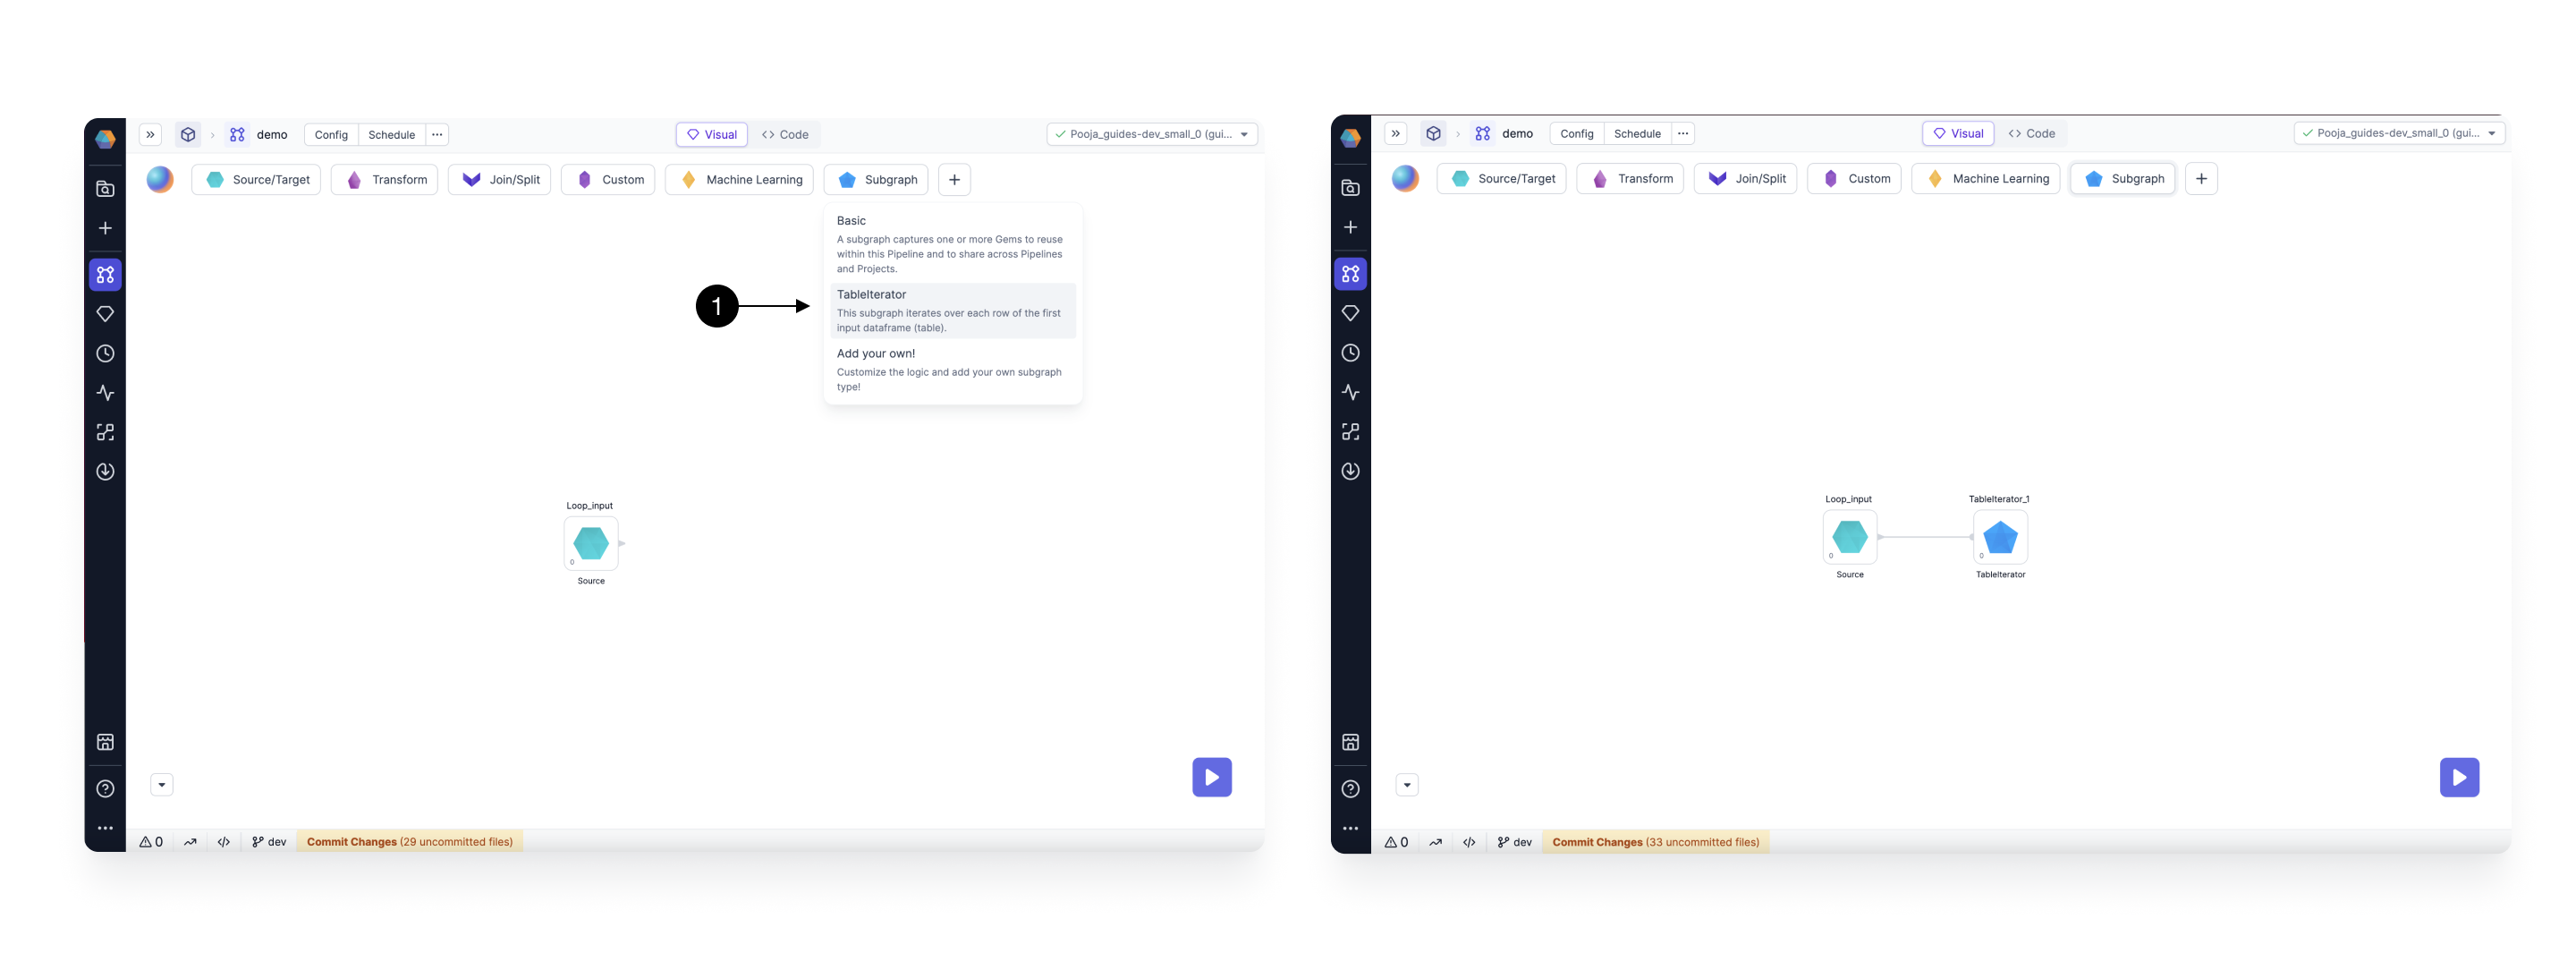
Configure the TableIterator
Open the TableIterator gem, and click on (1) Configure to open the Settings dialog. Here, on the left side panel you can edit the **(2) Name ** of your gem, check the (3) Input Schema for your DataFrame on which the loop will iterate. On the right side, you can define your Iterator Settings, and any other Subgraph Configs you want to use in the Subgraph. In the (4) Max Iterations field, you can control the maximum number of Iterations this loop can have. This is to safeguard that nobody runs the loop on a very large DataFrame by mistake. The default value is set to 1000. You can also (5) Enable Parallel Execution.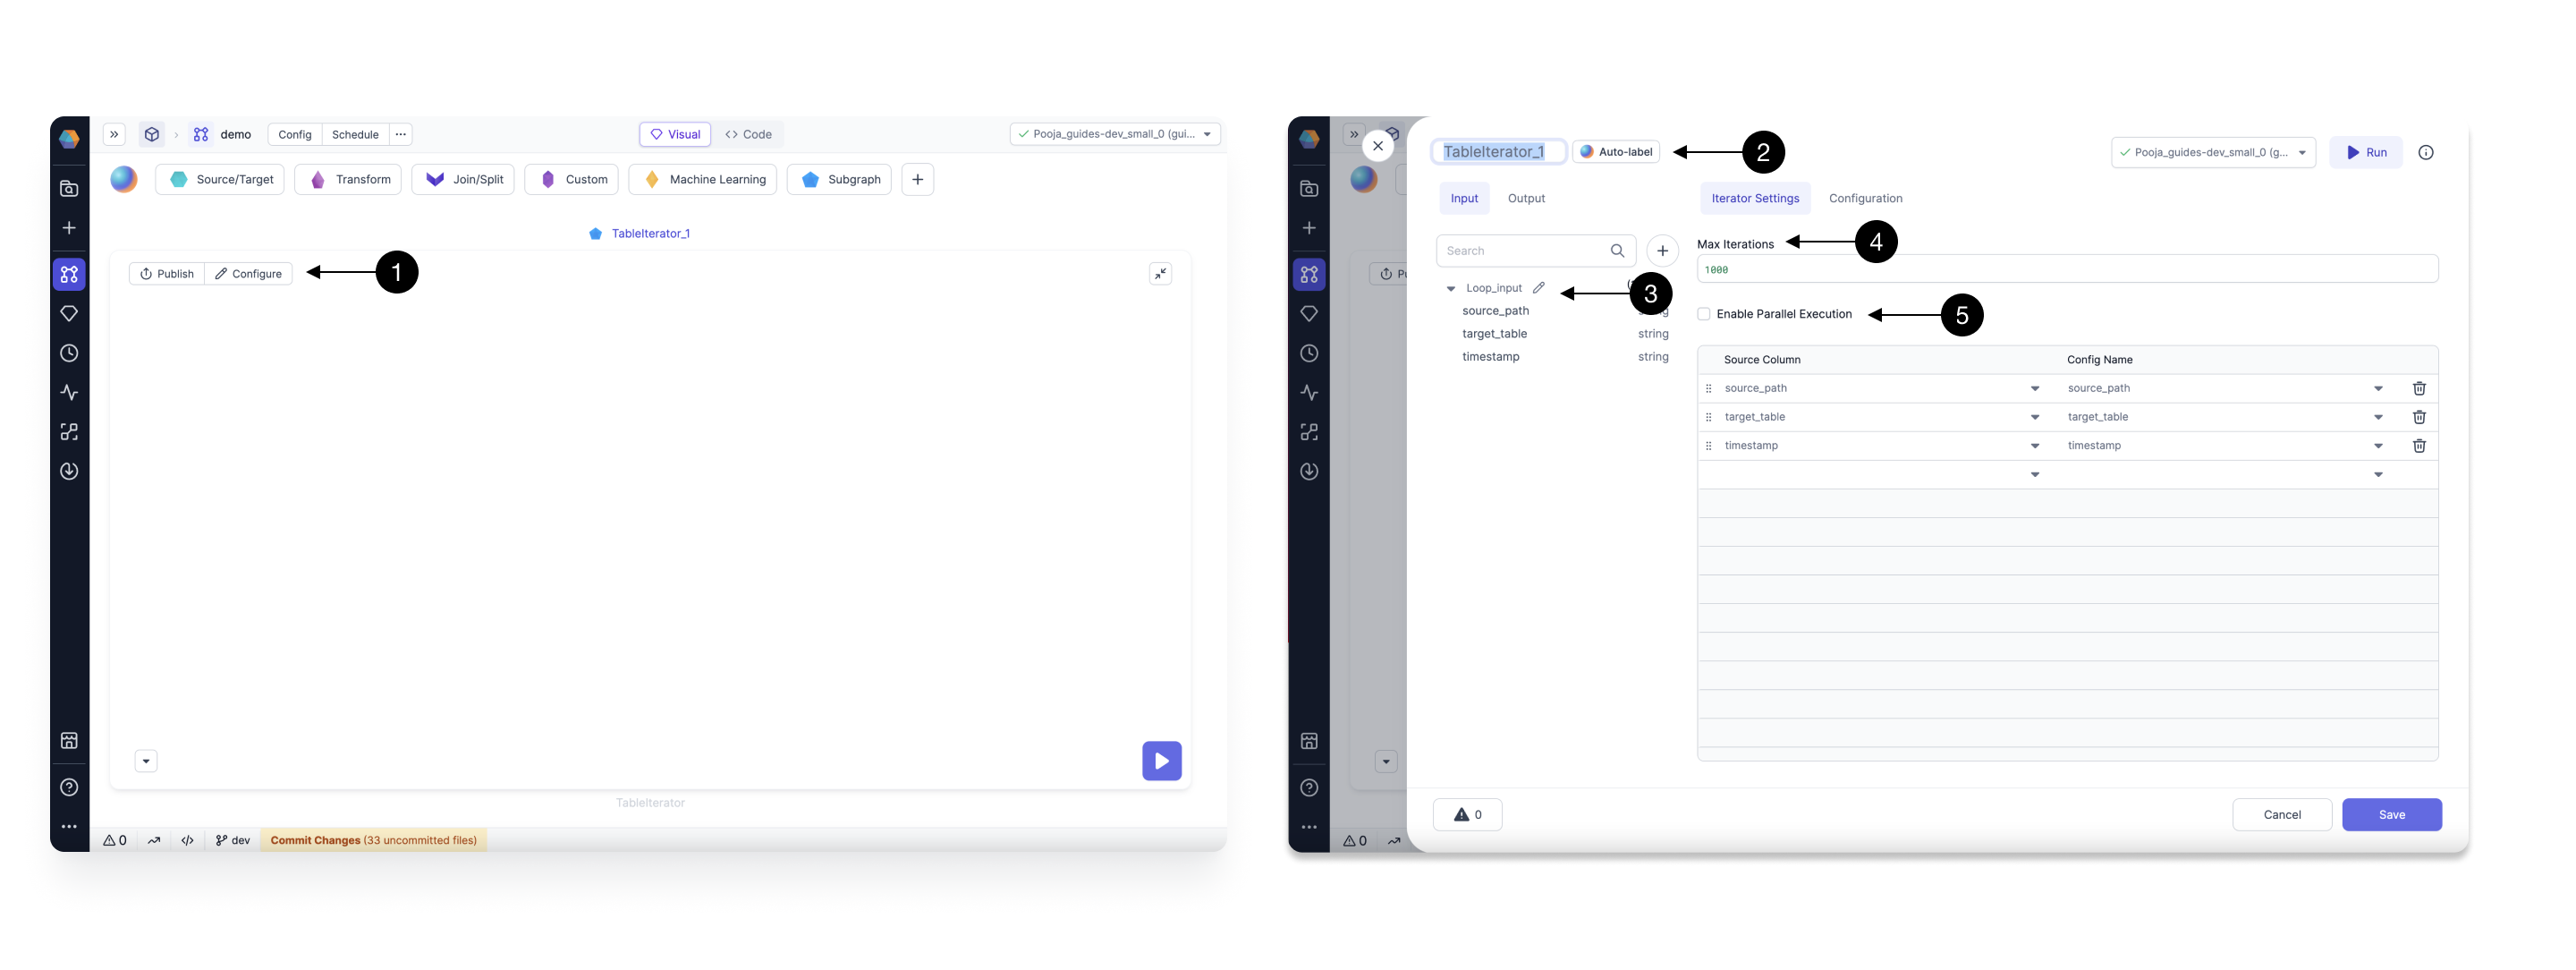

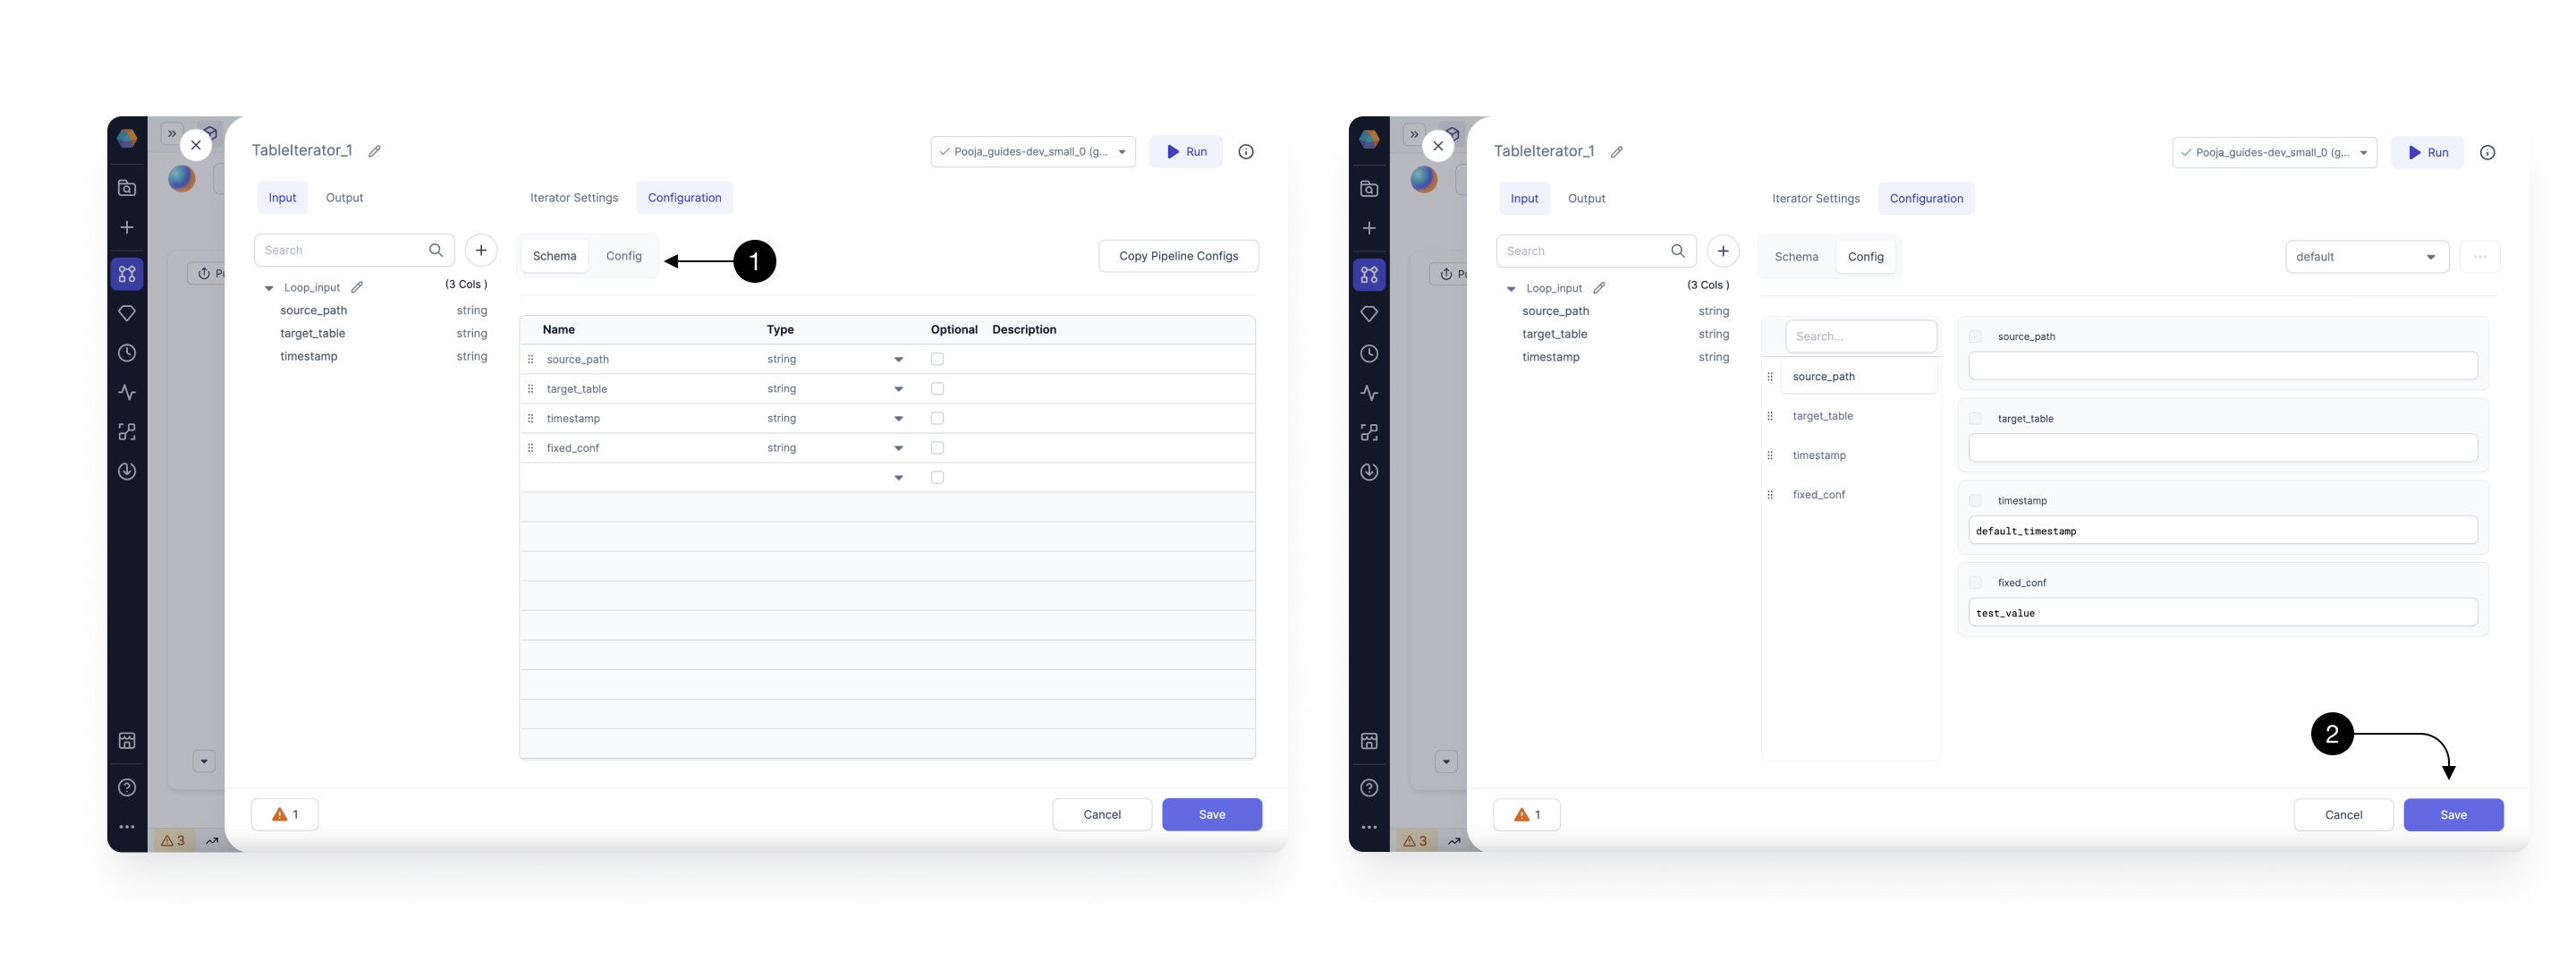
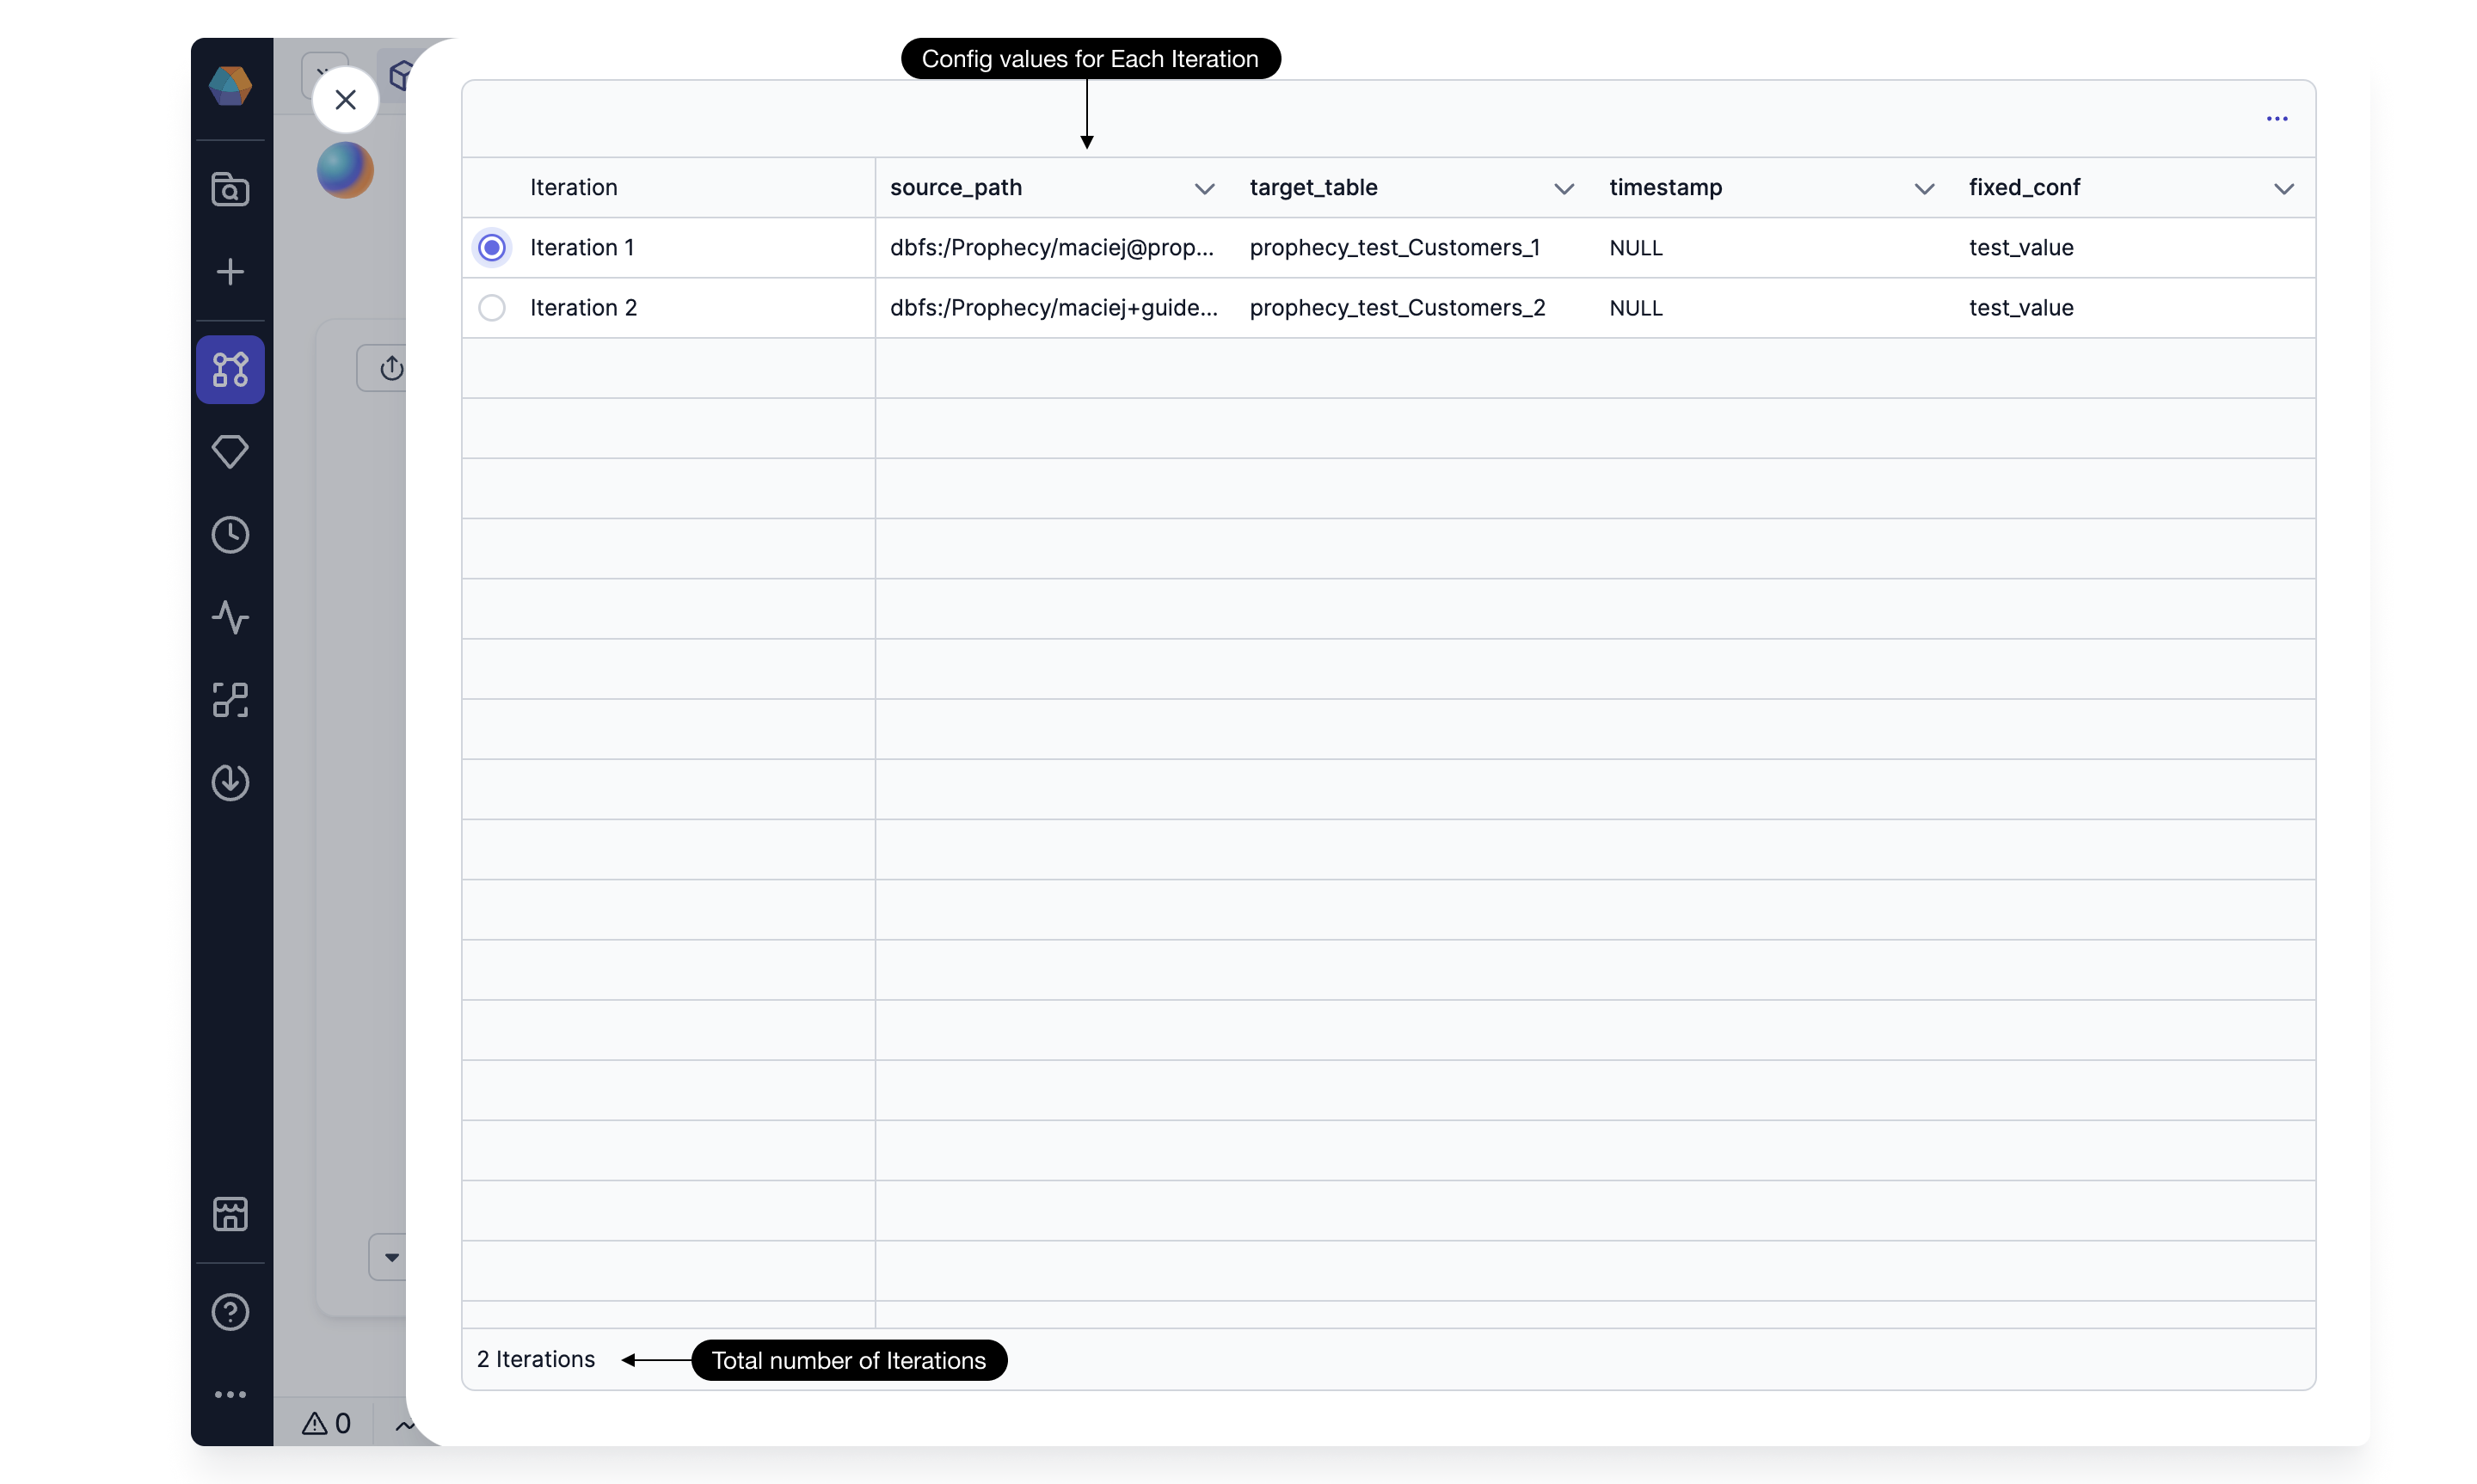
Note, the configurations associated with a source column will have different values for each
iteration based on the input data’s current row value for that column. The configs which are not
mapped to a source column, will have a fixed value for each Iteration provided in the Config tab.
Running the Loop
Once you have added the gems to your Subgraph, Click on the (1) Run button to start execution. As the execution starts, you will see a new (2) Iteration button. This will show for which Iteration you are seeing the current interims. You can click on the (3) Interim to check values for that Iteration.
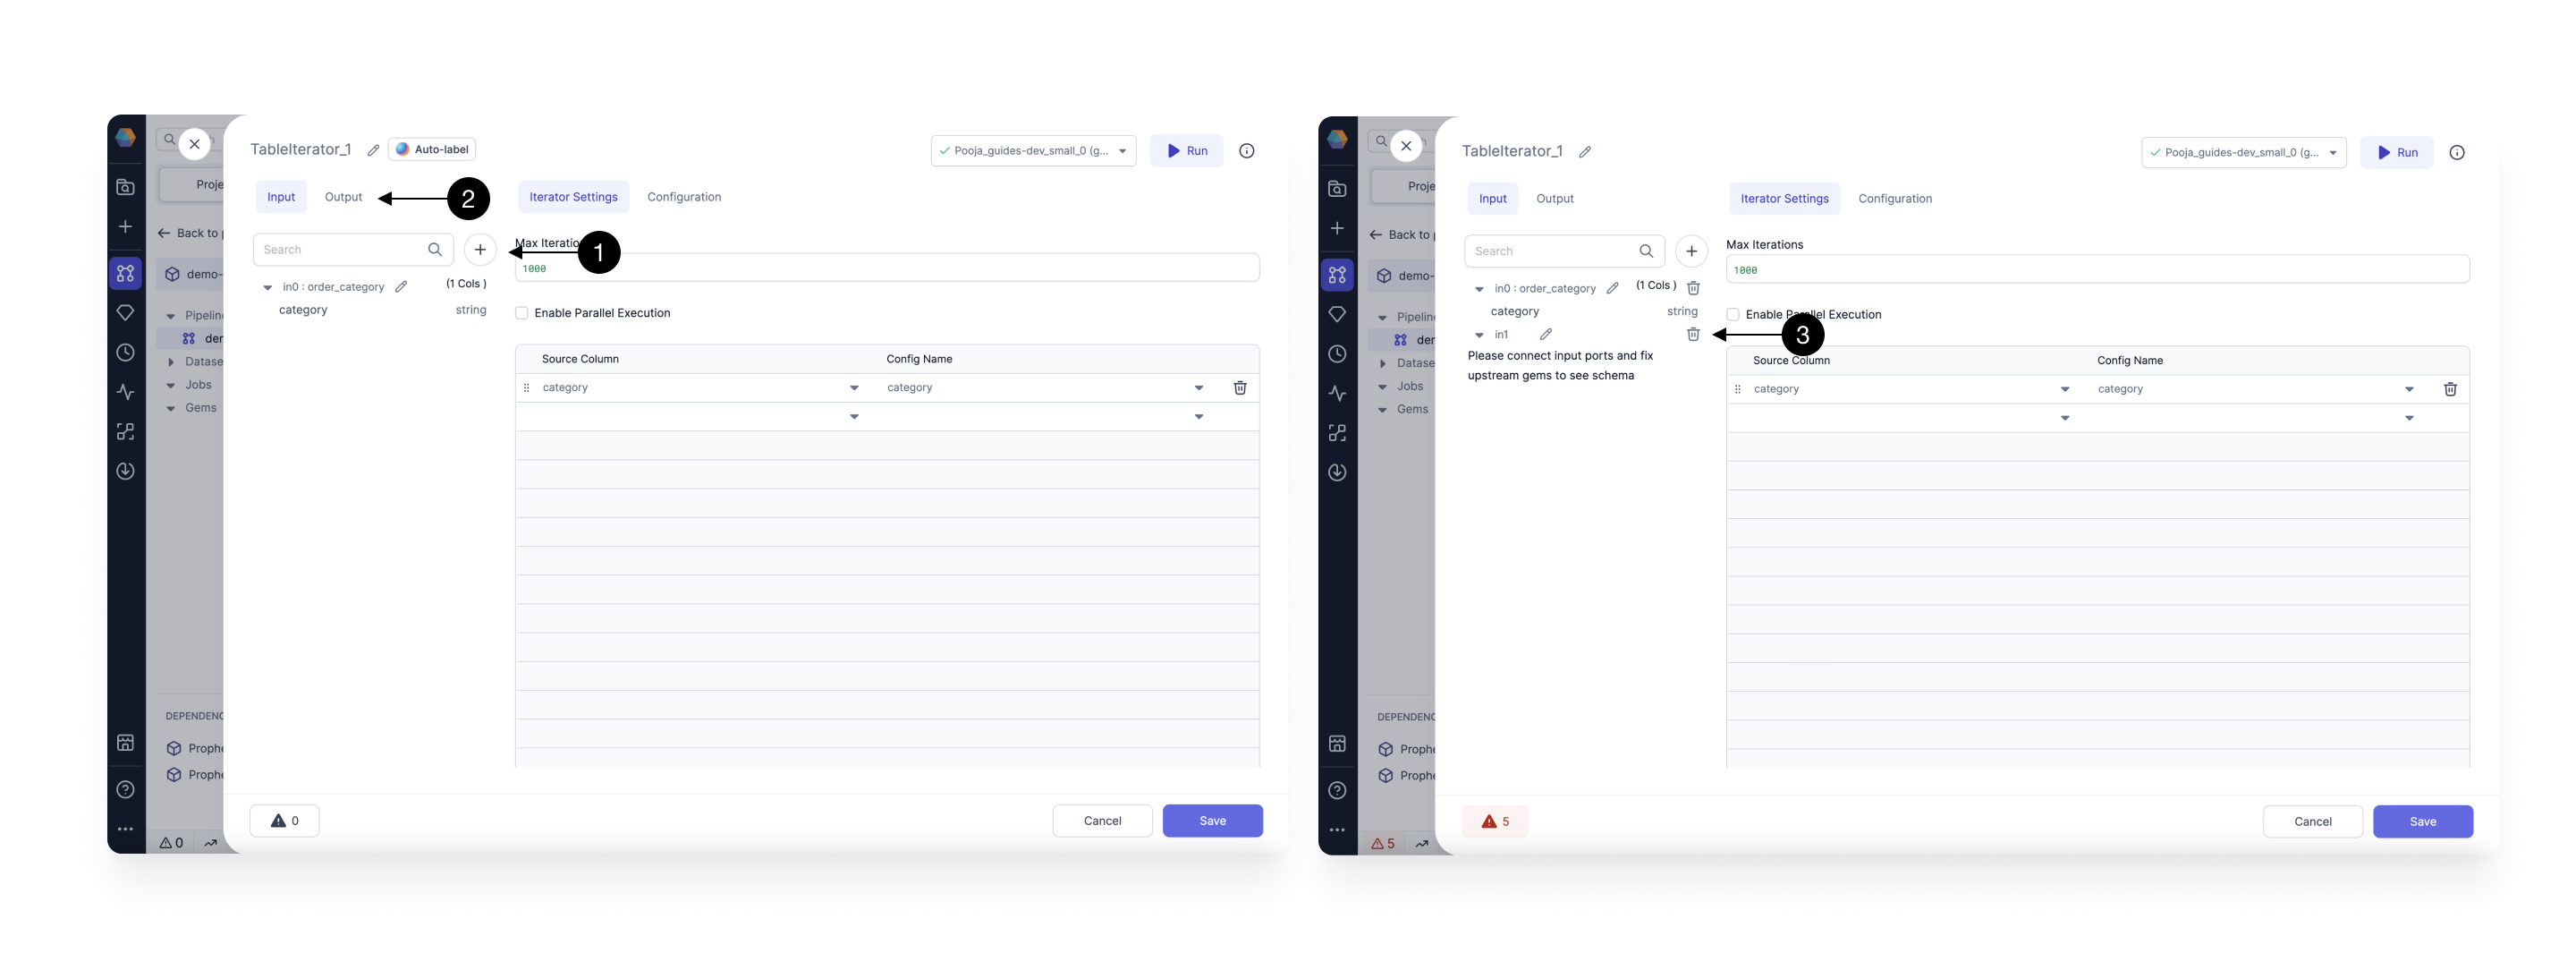
Adding Inputs and Outputs to TableIterator
For a TableIterator gem, the first input port is for your DataFrame on which you want to Iterate Over. You can (1)Add more Inputs or Switch to (2) Output tab to add more Outputs as needed. These extra inputs would not change for every iteration. Also, the output will be a Union of output of all Iterations. You can (3) Delete any port by hovering over it.