
OrigBal in one system and Original_Balance_Amt in another, with different date formats and rounding conventions layered on top. To merge this data into a single dataset, you need to harmonize it.
The Harmonization Agent does this for you by transforming source columns into their expected target columns while validating data quality. You start by selecting a source dataset, reviewing its schema, choosing a target CDM, and letting the Agent generate an initial mapping.
After the initial mapping is complete, you can review mapped and unmapped columns, resolve data quality issues, preview the output, and export the harmonized data. Behind the scenes, Prophecy creates a pipeline that performs the harmonization process.
How does the Harmonization Agent work?
The Harmonization Agent uses AI to infer mappings between source schemas and a target Common Data Model that you define.Common Data Model
A Common Data Model (CDM) defines a target schema for source data. It specifies standardized column names, data types, and data tests used across downstream pipelines. The CDM is typically created once and reused across multiple harmonization workflows.Access harmonization
The harmonization feature is currently available only through the Structured Finance Edition. To access Structured Finance, go tohttps://app.prophecy.ai/finance/.
If you are already signed up for Professional Edition, you will need to create a separate sign-in for Structured Finance.
Create a new data mapping
To create a data mapping:- Open Structured Finance.
- Click Tape Cracking.
- Select a source dataset. Either:
- Click Table to upload an Excel, CSV, Parquet, or similar file or
- Click Select Existing to choose an existing table.
- Click Continue.
Review the source data
The source data review opens with the schema for your chosen source (that is, a page that displays column names, data types, and any available metadata). To view sample data by column, click Data in the upper-right corner of the page. After reviewing the schema or sample data, continue to the target data model selection.Select a target data model
Available data models appear in the left-hand column.- Select a target data model.
- Review the target model schema.
- Click Map Data.
Create new Common Data Model
Create new Common Data Model
Each Structured Finance project can contain one Common Data Model (CDM). To create a new CDM, either create a new project or ask the Agent to create one for you.To create a CDM manually:
- Create a new project by clicking the Projects folder icon and selecting Create New.
- Select Tape Cracking.
- At the top of the page, click + > New > CDMs.
- In the New Common Data Model dialog, enter a name for the CDM and click Create.
- Define the schema for the CDM using one of the following methods:
- Click Add Table to manually define tables and columns.
- Click Upload Schema to import a schema from a CSV or other supported file.
Generate mappings
Initially, Prophecy runs a deterministic, rule-based mapping pass. The deterministic pass considers:- Exact-name matches with compatible data types
- Historical, approved mappings stored in a per-CDM memory store — mappings previously approved for this CDM’s other pipelines can be suggested again, with a distinct historical-match attribution
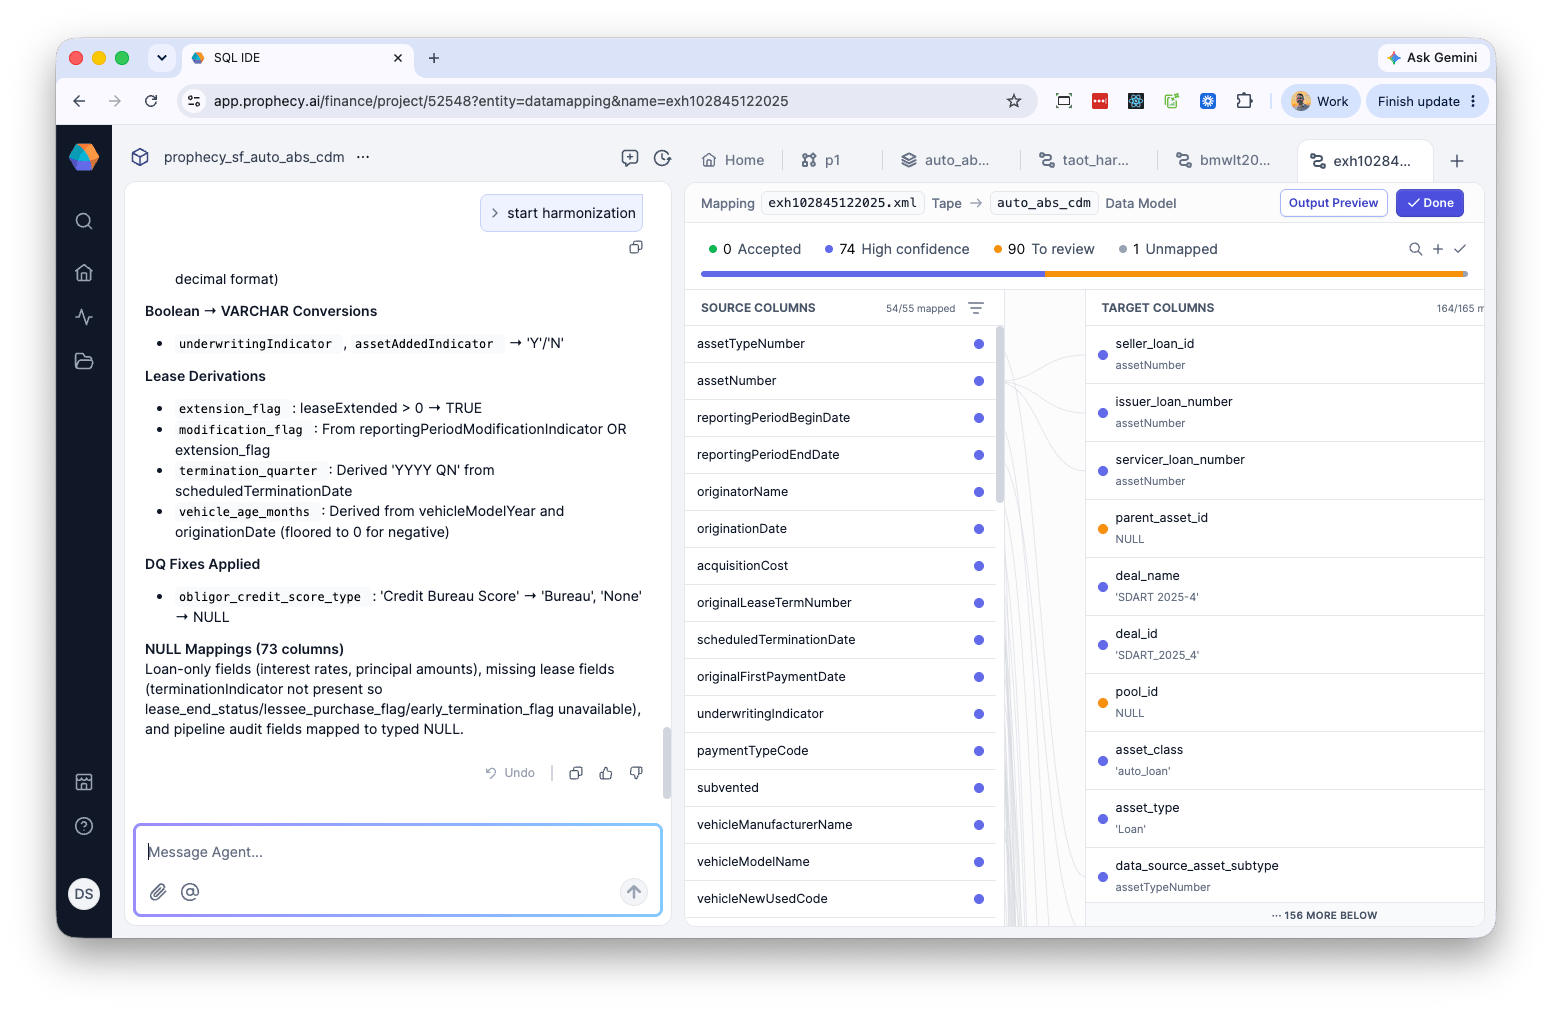
Review mapping details
- Open the new data mapping.
- Select View Details.
- Select a column from a mapping category.
- Review the line that displays the source-to-target mapping.
- Select the target column to view its details.
- Click Next to continue.
Review data quality results
Open the Data Quality tab to review the mapping checks. The summary displays table-level and column-level checks, including how many checks passed and failed. When a check fails, click Go to Mapping to review the related mapping.Human-in-the-loop validation
While the agent handles routine mappings efficiently, human oversight catches edge cases and ensures that transformations align with business rules. Before harmonization processes, you can validate agent-generated mappings and transformations. During review, Prophecy shows you how each source column is mapped to the target schema, any transformations applied, a confidence score for each mapping, and any data quality tests applied.Apply a suggested fix
The Agent does not directly modify the live mapping when resolving a data quality failure. Instead, it creates a separate suggested fix that includes:- A proposed transformation
- A plain-language description of the proposed change
- Ask the Agent for suggestions to resolve the mapping issue.
- Review the suggested fix and its description.
- Select the proposed option you want to use.
- Explicitly apply the suggested fix to update the mapping.
0, a fallback to another field, or a fallback to an expected value.
Preview and export the output
- Click Output Preview to review the harmonized results.
- Return to the mapping when additional changes are required.
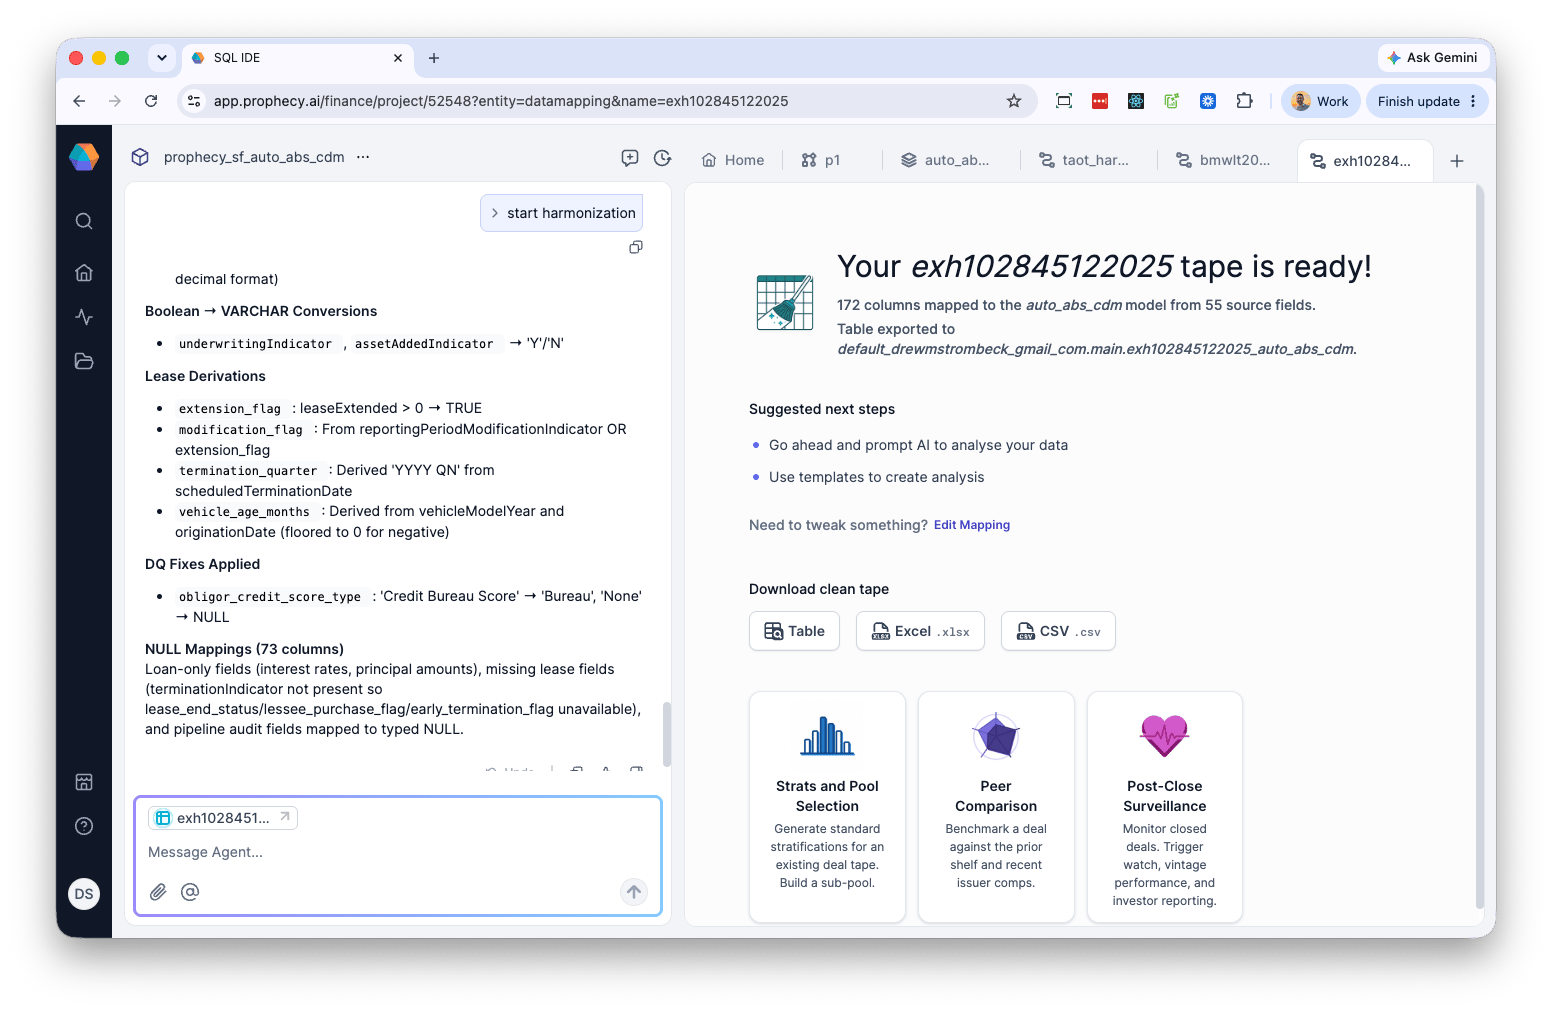
- After the mapping completes successfully, review the success message indicating that the dataset is ready.
- Export the harmonized data.