

Start harmonization
Attach the loan tape (CSV or XML) and tell the Agent to begin. For a new tape, you can enterlet's crack this tape. Click Get Started.
Prophecy creates a new project and identifies the schema of the source file.
Review the source data
Before mapping, you should review row profiles and distributions to understand the tape’s data. Click Data Profile to see detailed column-level information, including value distributions (such as the percentage breakdown across vehicle types). Click Continue once you’ve reviewed the profile.Select a CDM
Choose a Common Data Model (CDM), such asauto_ABS_CDM. You can click a CDM to view its full definition.
The CDM you select is part of a domain pack. A domain pack bundles the CDM together with the domain-specific knowledge needed to interpret it correctly. auto_ABS_CDM is bundled with US auto loan structures, which is why fields like obligorEmploymentVerificationCode or vehicleModelYear map correctly out of the box.
Click Map Data to continue.
At this point the file is uploaded to a fabric. A fabric is a Prophecy entity that contains the connection information needed to connect to external compute and data storage. You don’t need to configure one here; it’s used automatically as part of this step.
Agent-driven mapping
Prophecy begins harmonization, starting with deterministic mapping. The agent narrates its reasoning as it works through the tape: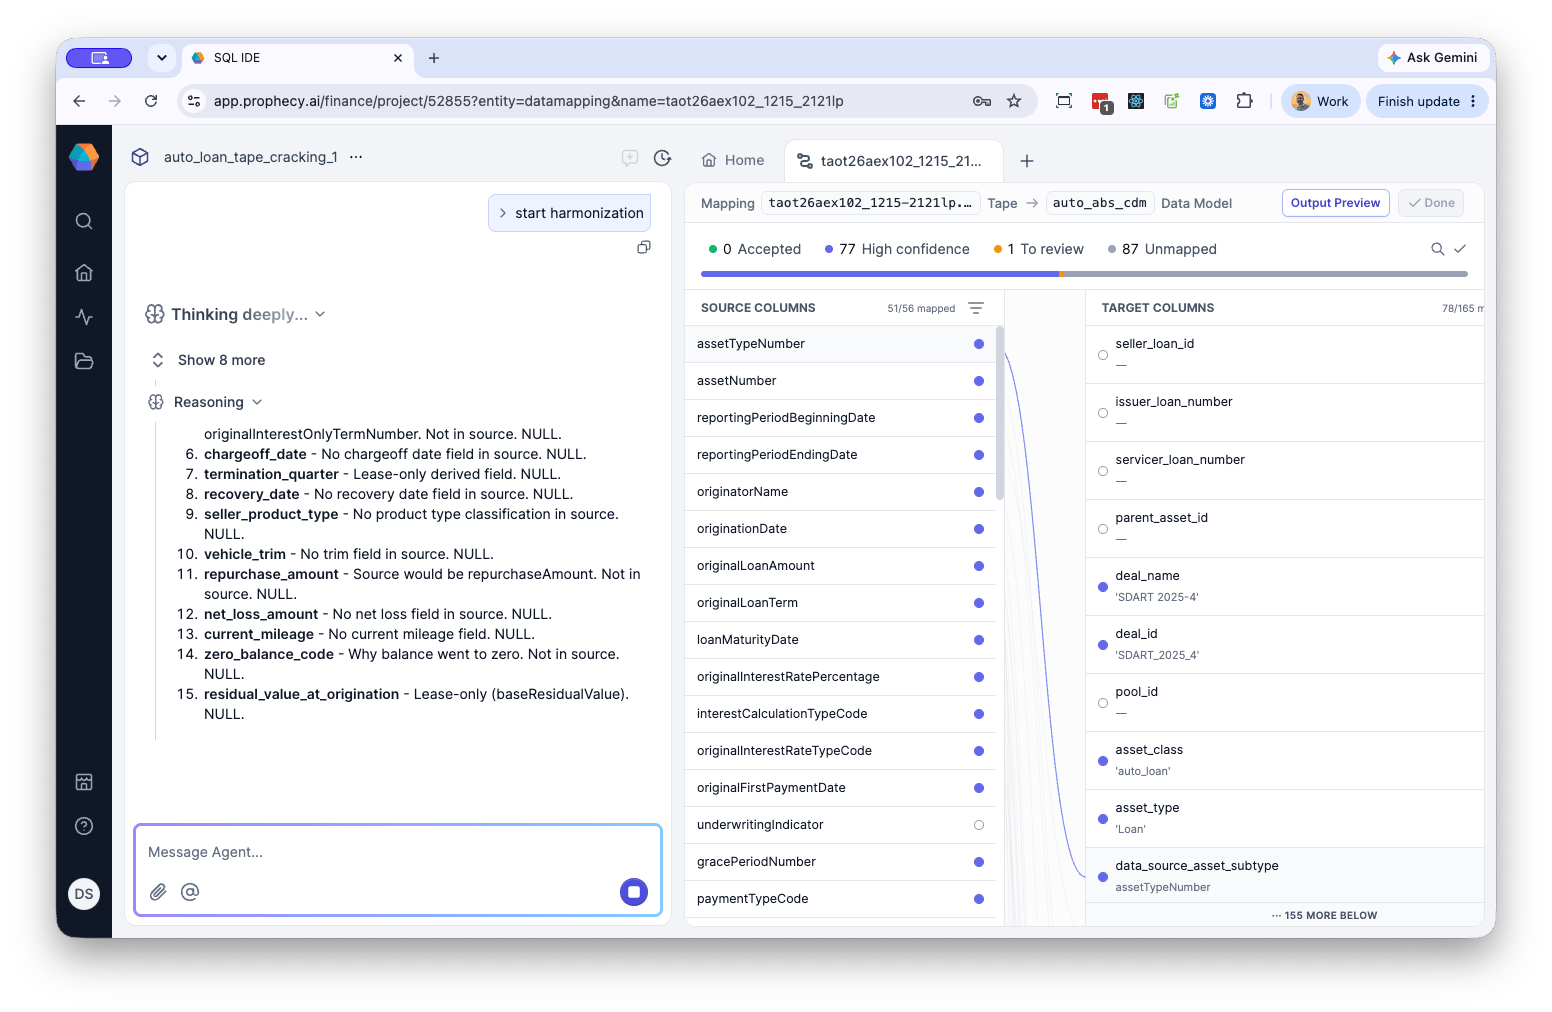
View summary of harmonization
When the Agent finishes, it returns a summary of how columns were mapped:
Deterministic — historical mappings match a pattern the system has mapped before.
Deterministic — direct passthrough mappings are unambiguous one-to-one field matches.
AI-mapped mappings required inference. NULL mappings are target fields with no corresponding source data.
The agent also returns DQ check results, such as:
- 37 checks passed (including 1 fixed)
- 0 checks failing
- 0 SQL errors
obligor_credit_score_type from 'FICO Score 8 Auto' to 'FICO Auto'.
Finally, the Agent summarizes key mappings applied: how source fields were mapped to the standardized target schema, grouped by category (Identifiers, Dates, etc.).
- Source — the original field name from the input data
- Target — the corresponding field name in the harmonized schema
View review panel
The right panel shows mapping review status. Click any mapping to see:- The transformation applied.
- An AI explanation of the confidence level.
- Any DQ tests passed.
- AI Memory — previously approved mappings inform future mapping accuracy. The more mappings you approve, the more deterministic future mappings on similar tapes become
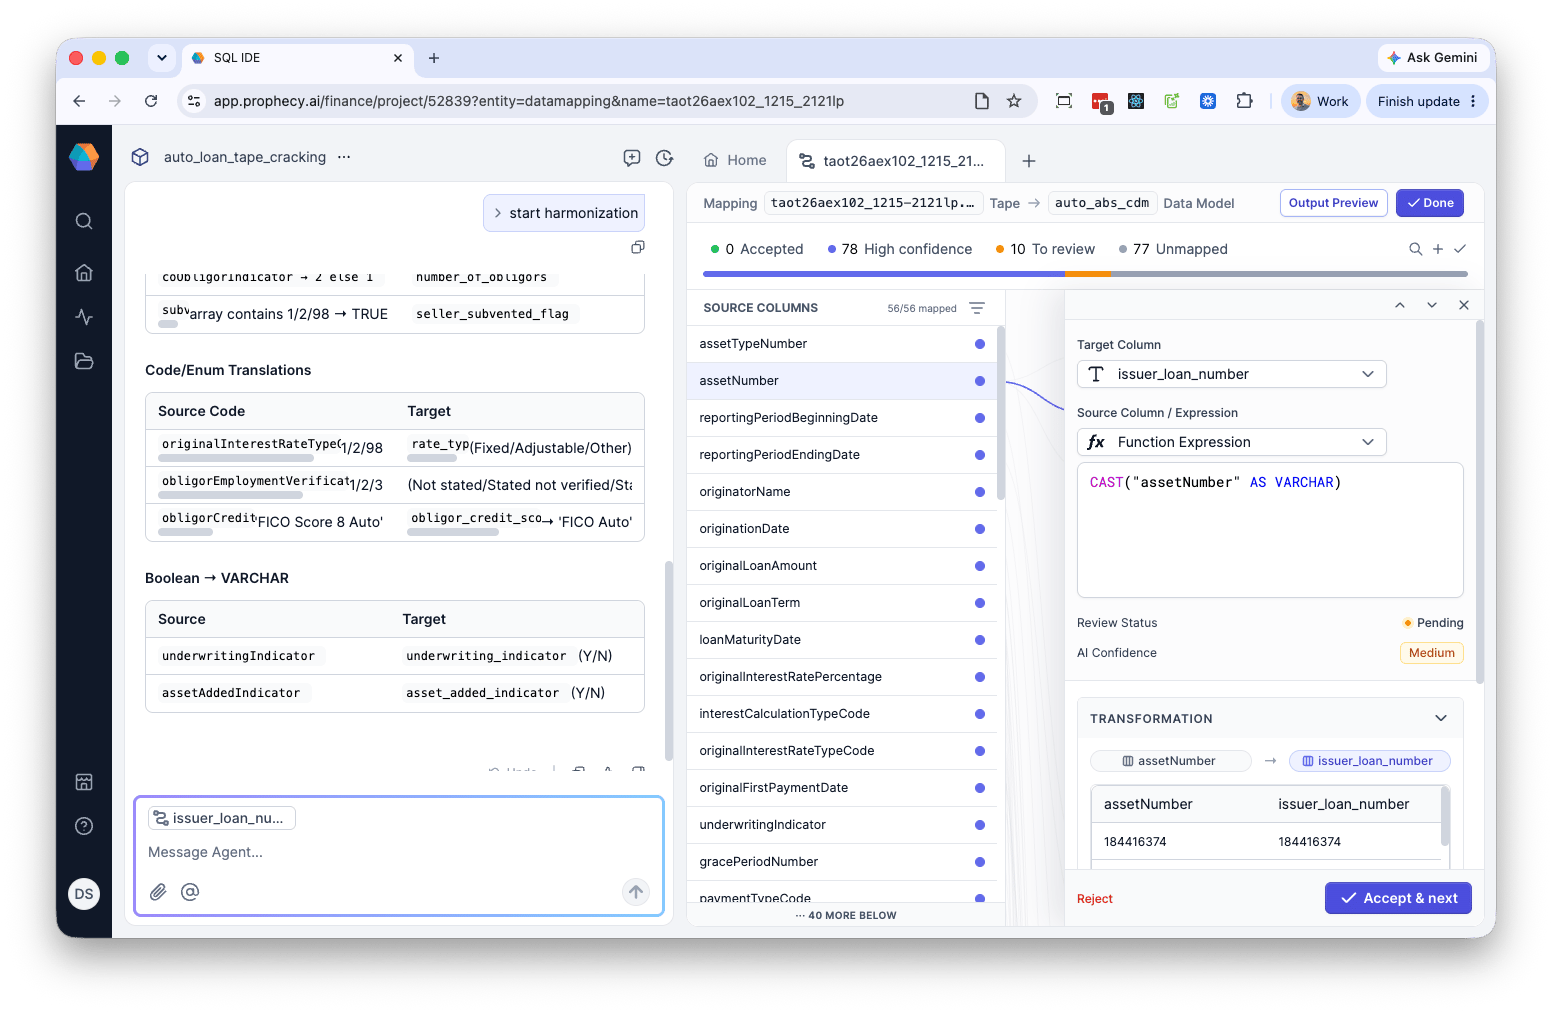
- No value (null) — leave the target column unmapped.
- Function Expression — write a custom expression manually
- Use AI to generate expression — have AI generate a transformation instead of a direct field mapping
- Columns — map directly from an available source field
Review mapping results
Review the overall breakdown, for example:- 62 deterministic (historical)
- 15 deterministic (direct pass-through)
- 17 AI-mapped
- 78 null
- 72 high-confidence
Filter and sort mappings
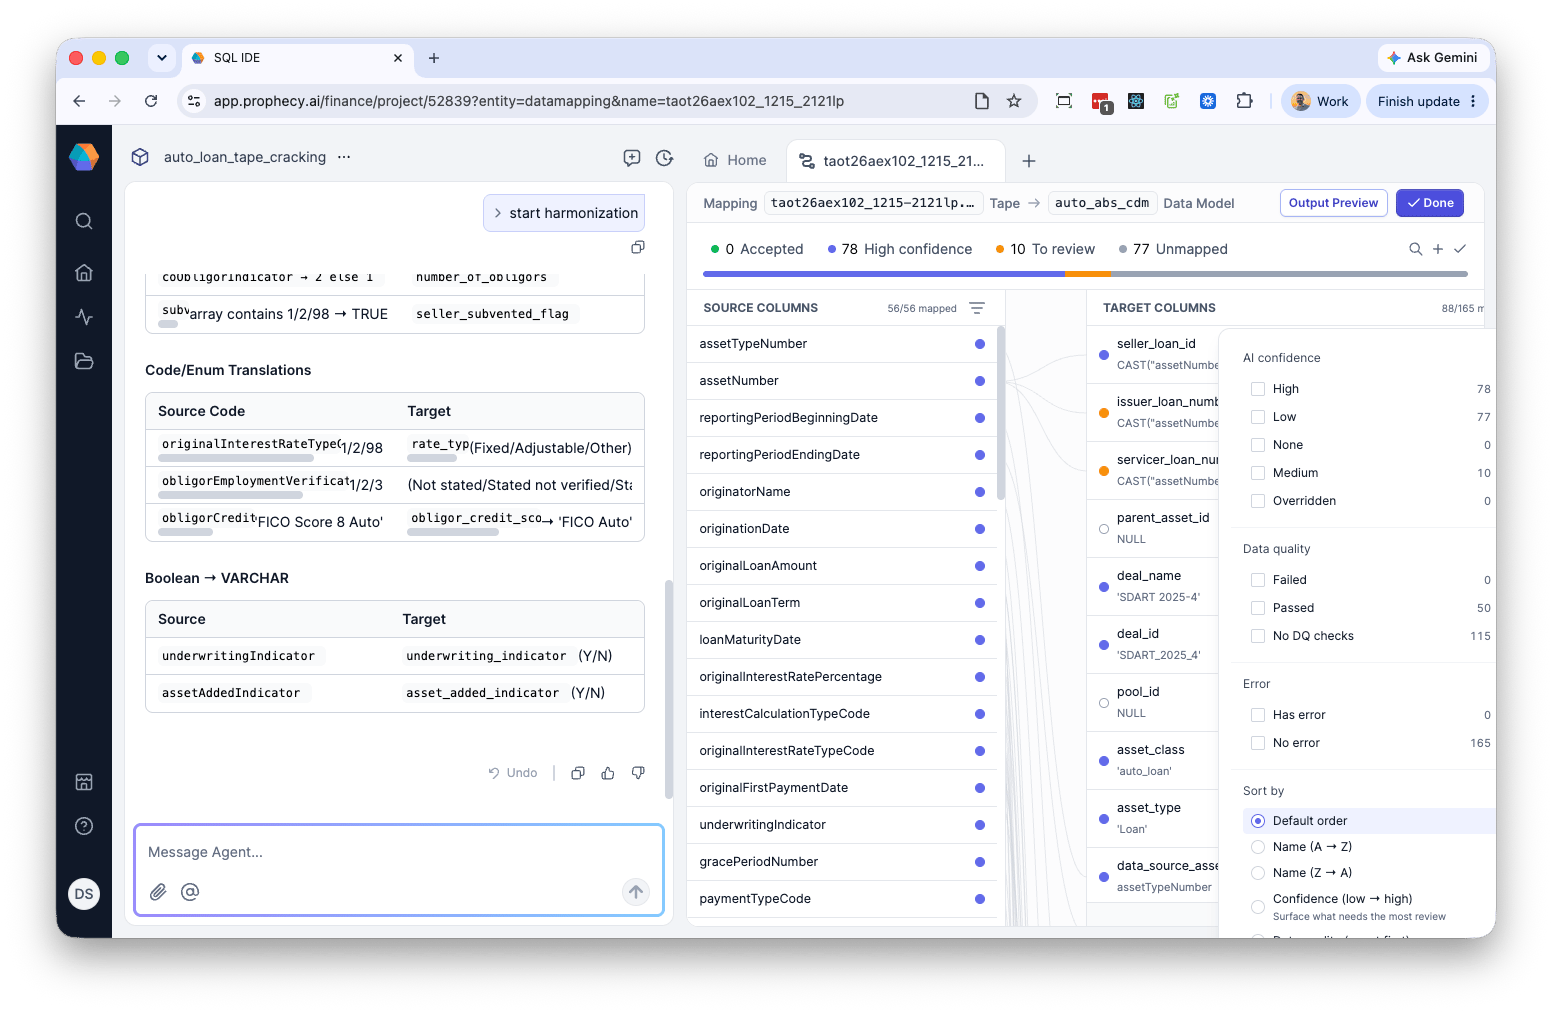
Use the Filter icon (top right) to isolate mappings that need review. You can filter by:- AI confidence — High, Medium, Low, None, Overridden
- Data quality — Passed, Failed, No DQ checks
- Error status — Has error, No error
- Default order
- Name (A → Z)
- Name (Z → A)
- Confidence (low → high) — surface what needs the most review
- Data quality (worst first)
- Status (unmapped → accepted)
Correct a mapping via chat
To fix an incorrect mapping, describe the issue and the correct value directly in chat — for example, correcting adeal_id mapping.
Meta-questions during review
You can ask the Agent questions about the review state at any point — for example, “how many source columns were there in total and how many were mapped?”Add DQ tests
The agent can suggest data quality tests to add. Adding these improves the Agent’s mapping performance on future tapes, not just the current one.Add a new CDM
To add a new CDM:- Click the + at the top of the review panel, then select CDMs.
- In the dialog, enter a name for the common data model and click Create.
- In the new CDM, choose Add Table or Upload Schema.
- If you choose Add Table, enter names, types, descriptions, and DQ checks for each column.
Complete the tape
- Continue reviewing remaining confidence tiers (medium, low, etc.). If you’re certain of a mapping, you can specify it directly and check sample values in the window.
- Once every mapping is accepted, click Output Preview to preview the harmonized result.
- Once satisfied, click Done.
- The tape is marked ready. Download it as Excel or CSV, or add it as a table to your SQL Warehouse.